Should you take pictures vertical or horizontal in general?
It is largely a matter of personal preference and depends on a myriad of factors, including subject, intended composition and output format among others. In general, landscapes, group portraits are horizontal; people portraits are vertical. But these are highly simplified guides and are rarely definitive as to which a photographer prefers.
Once you get the hang of it and develop your own style of shooting, the orientation of the photo becomes intuition - it rarely takes a conscious effort.
But as a starter here are some factors that you should consider - the shape of your subject, how you want your photo to look like aka preferred composition, and what you need the output format to be.
Subject
This is where generalisations come into play. Some types of subjects just tend to come in a certain shape and orientation, like humans tend to show up as an upright cylinder, assuming that you are trying to show most of the body in a picture.
So your photo orientation would be a natural, instinctive reaction to the shape of your subject.
When the subject is not a lone item but a group of items arranged in a certain pattern, in that case you are reacting to the overall form of the arrangement.
For instance, dancers spread out horizontally on a stage would give you a horizontal subject; a still life of a vase of flowers would give you a vertical subject.
Intended composition
The (smartphone) camera is a frame, but the world is not.
It then follows that every photo taken is a compromise made. On many levels this is true, but here I refer specifically to the consideration of what to emphasise in a photo.
When you shoot horizontally, you emphasise width and vastness; shoot vertically, you bring something into greater focus.
This is just one person’s opinion, but I say this because the human vision is slightly wider horizontally than vertically. The portrait orientation is therefore not the default way in which we see.
Hot take, again, but I think the horizontal frame feels larger than the vertical frame, as a matter of human perception.
The compromise to be made here is therefore, whether you want to engender a sense of space across a wider canvas, or a reduction into a compartment with a tighter canvas.
Output format
Much of what photographers do are dictated by the required dimensions of the final usage of the photo.
A good example of this is when a photograph needs to be used as a design element.
For instance, where you are looking to shoot a photo that serves as a background of a horizontal banner, on which you will also add text, you will have to shoot horizontally and allow negative space, even if the actual subject in the shot is largely vertical and upright.
For social media content creators, the dimensions of the platform for which they are creating content for becomes critical.
For example, Tiktok and Instagram reels have to be 9:16 vertical; Youtube thumbnails have to be 9:16 horizontal. So for the former it makes sense to default to shooting vertical, the latter horizontal.
Should you take pictures vertical or horizontal on cellphones?
Pay attention to what you are using the pictures for. Many social media apps today favour content in vertical dimensions, such as Instagram stories, reels, Tiktoks, Snapchats; while other platforms provide a horizontal medium, such as normal Youtube videos. Generally, phone users hold their phone upright, which explains why most content should be vertical.
The case with cellphones can be slightly different from the general picture because here the image quality may not be the primary concern. Rather, it has more to do with the final usage, with a heavy emphasis on instant publication.
Generally speaking, the point of shooting on a phone is to be able to repurpose it into social media content, which imho means you will find yourself shooting vertically most of the time.
Note that you can still shoot horizontal on your phone of course, and that it has no effect on the image quality in the technical sense.
I sometimes shoot footage on my phone for my Youtube videos, and photos also for the thumbnails.
Why do photographers shoot vertical?
Photographers shoot vertical usually for composition considerations, sometimes out of spatial constraints, and also to work with requirements in final usage of the photos, the last being the most defining factor of all.
Similar to what we went through above, there are a myriad of considerations that go through a photographer’s head that could lead him to decide on shooting vertical.
In this section I will provide more examples for your reference.
Output format required is vertical

Photo by Yüksel Göz on Unsplash
Imo the most critical consideration would be the required output format because a great photo is useless if it does not properly fit into the intended context.
Billboard ads are a good example - they are mostly vertical. For a photo to be used as a background for a billboard ad, they will therefore also have to be vertical.
Magazine covers are another type of work that require the final output to be vertical. The inner pages does allow horizontal images, either in form of a full-spread or a collage, but the front page has to be portrait, 99% of the time.
The first example below is from an editorial I shot. There are obviously endless ways a cover can be designed but this should sufficiently illustrate my point.
There are exceptions but designs as such are few and far between - it results in a lot of wasted print real estate, as in the second example below.

Typical cover photo orientation.

Exceptions to the rule.
Stand up banners also often require a vertical image. Depending on how tall the banner extends, a varying amount of design element could be employed to help the photo fit.

Resulting stand-up banner.
But it would be a huge stretch to use a horizontal photo to fill such an elongated vertical space.
Here is a photo of me with a banner that was created using my photo.
Below it is the original photo, to give you an idea of how much you can normally stretch a photo to elongate it further.
Composition
Original photo.
This post is not mainly about composition, which in itself is an art, and therefore I will not go into it at length here.
But as I mentioned above, vertical and horizontal compositions tend to impart very different feelings and tend to be perceived differently by the human eye.
Here are some articles I have written to give you a good introduction into the topic of composition:
[Pho.Talk] Great Photographers: Light and Shadow Photography
[Pho.Talk] Saul Leiter Street Photography Analysis: Techniques, Influences, Philosophy
Correct way to hold the camera vertically
The correct way to hold a camera vertically is the posture that is the most stable for you. The textbook answer is to flip the camera clockwise on your right hand, with your right elbow landing on your chest. But many have expressed the difficulty of operating the shutter from this position, which is a legitimate complaint as everyone have different hands. Do what works best for you.
Let’s first walk you through how you are ‘supposed’ to do it, assuming that you don’t have a vertical grip, which should be the case for most cameras - there is only one grip for the right hand.
No vertical grip
It is generally recommended that the camera be tilted clockwise, so that the right hand grip is at the bottom, shutter also at the bottom.
I have attached photos in the following sections of how I do it.
This should allow your elbow to comfortably rest on your chest, which provides better support.
You press the shutter with your right hand, and operate the lens on the left.
Both elbows should ideally borrow support from your torso.
With vertical grip
Some photographers choose to get a vertical grip that goes into the bottom of the camera (when placed horizontally), which enables them to shoot vertically as if the camera was horizontal.
In that case, the posture would be the same, whether shooting horizontally or vertically.
The only downsides to doing so is 1) cost; these handles can cost a fortune and 2) weight; if the type of photography you shoot require you to carry the camera around over long hours, this is probably not for you.
Potential issues & alternatives
While I personally hold the camera from the bottom with my right hand holding the grip, I don’t do it exactly the textbook way either.
The conventional wisdom was always to hold your camera how you normally would when shooting landscape, and simply tilt the camera downwards clockwise so that your right elbow rests squarely on your body to borrow support.
The biggest issue people have had with this is that it can be hard to use the buttons and press the shutter with your right wrist twisted to a side.
The right palm basically takes all the weight and the fingers cram together, making it really hard to quickly adjust the buttons.
So some people have decided to tilt the camera anticlockwise instead, which means their left hand is supporting the weight where they operate the lens, leaving their right hand on top, unattached to the body.
Try this yourself, as many swear by it, but I personally find it not the most stable arrangement for me. I still sometimes do it for the sake of switching poses, to relax the muscles a bit.
Though I find that being able to borrow support from my body a massive benefit so I keep my right elbow down.
To work around the problems related to having to twist my wrist, my solution is to let go part of the grip, illustrated below.
The one on the left shows what I do when the focal length needs adjusting; the one on the right when the lens needs to adjustment.


I free up space between my right palm and the grip so that I could comfortably press the buttons, while also lending support from the body.
There is strictly speaking no one standard way of going about it so, at the risk of sounding obvious, do what works best for you.
How do I take vertical pictures on a tripod?
The best way is to do it on a tripod that is designed to support vertical shooting, which enables you to tilt the camera sideways and arrive at a level position. It is done either with the ball head or the pan-and-tilt head. You loosen the knobs, tilt your camera until it is vertical, and tighten the knob, followed by other angle adjustments that may be available on the tripod head.
This is something you should consider at the time of buying a tripod, because not all tripods are built for vertical shooting.
If your tripod doesn’t come with the adjustments that you need for vertical shooting, there is no quick fix; you will literally need to buy another one.
Here let me walk you through how to do it on the most popular, beginner-friendly types of tripod heads, namely ball heads, and pan-and-tilt heads.
Whichever kind of tripod you have, it is advisable to rotate the legs so that one of the legs is directly below the camera.
This offers better support for the vertical camera, which would otherwise be protruding from above with no support below. The setup could easily topple this way.
Ball heads

The name should be self-explanatory - the camera is supported by a ball shape pivot that stays locked by a knob.
An example would be my Manfrotto Befree GT XPRO Carbon Fibre Travel Tripod with Ball Head.
With this structure, you will have to make two adjustments, at the minimum.

The first is to lower the camera to a vertical position. To do this, look for a dent in the bracket the holds the ball, which allows you to lower the camera to a vertical position.
Screw the knob tight after you’ve reached where you want the camera to be.
Then, rotate the position of the entire ball head clockwise or anticlockwise (seen from above) to fix the camera where you need it to be.
Pan-and-tilt heads
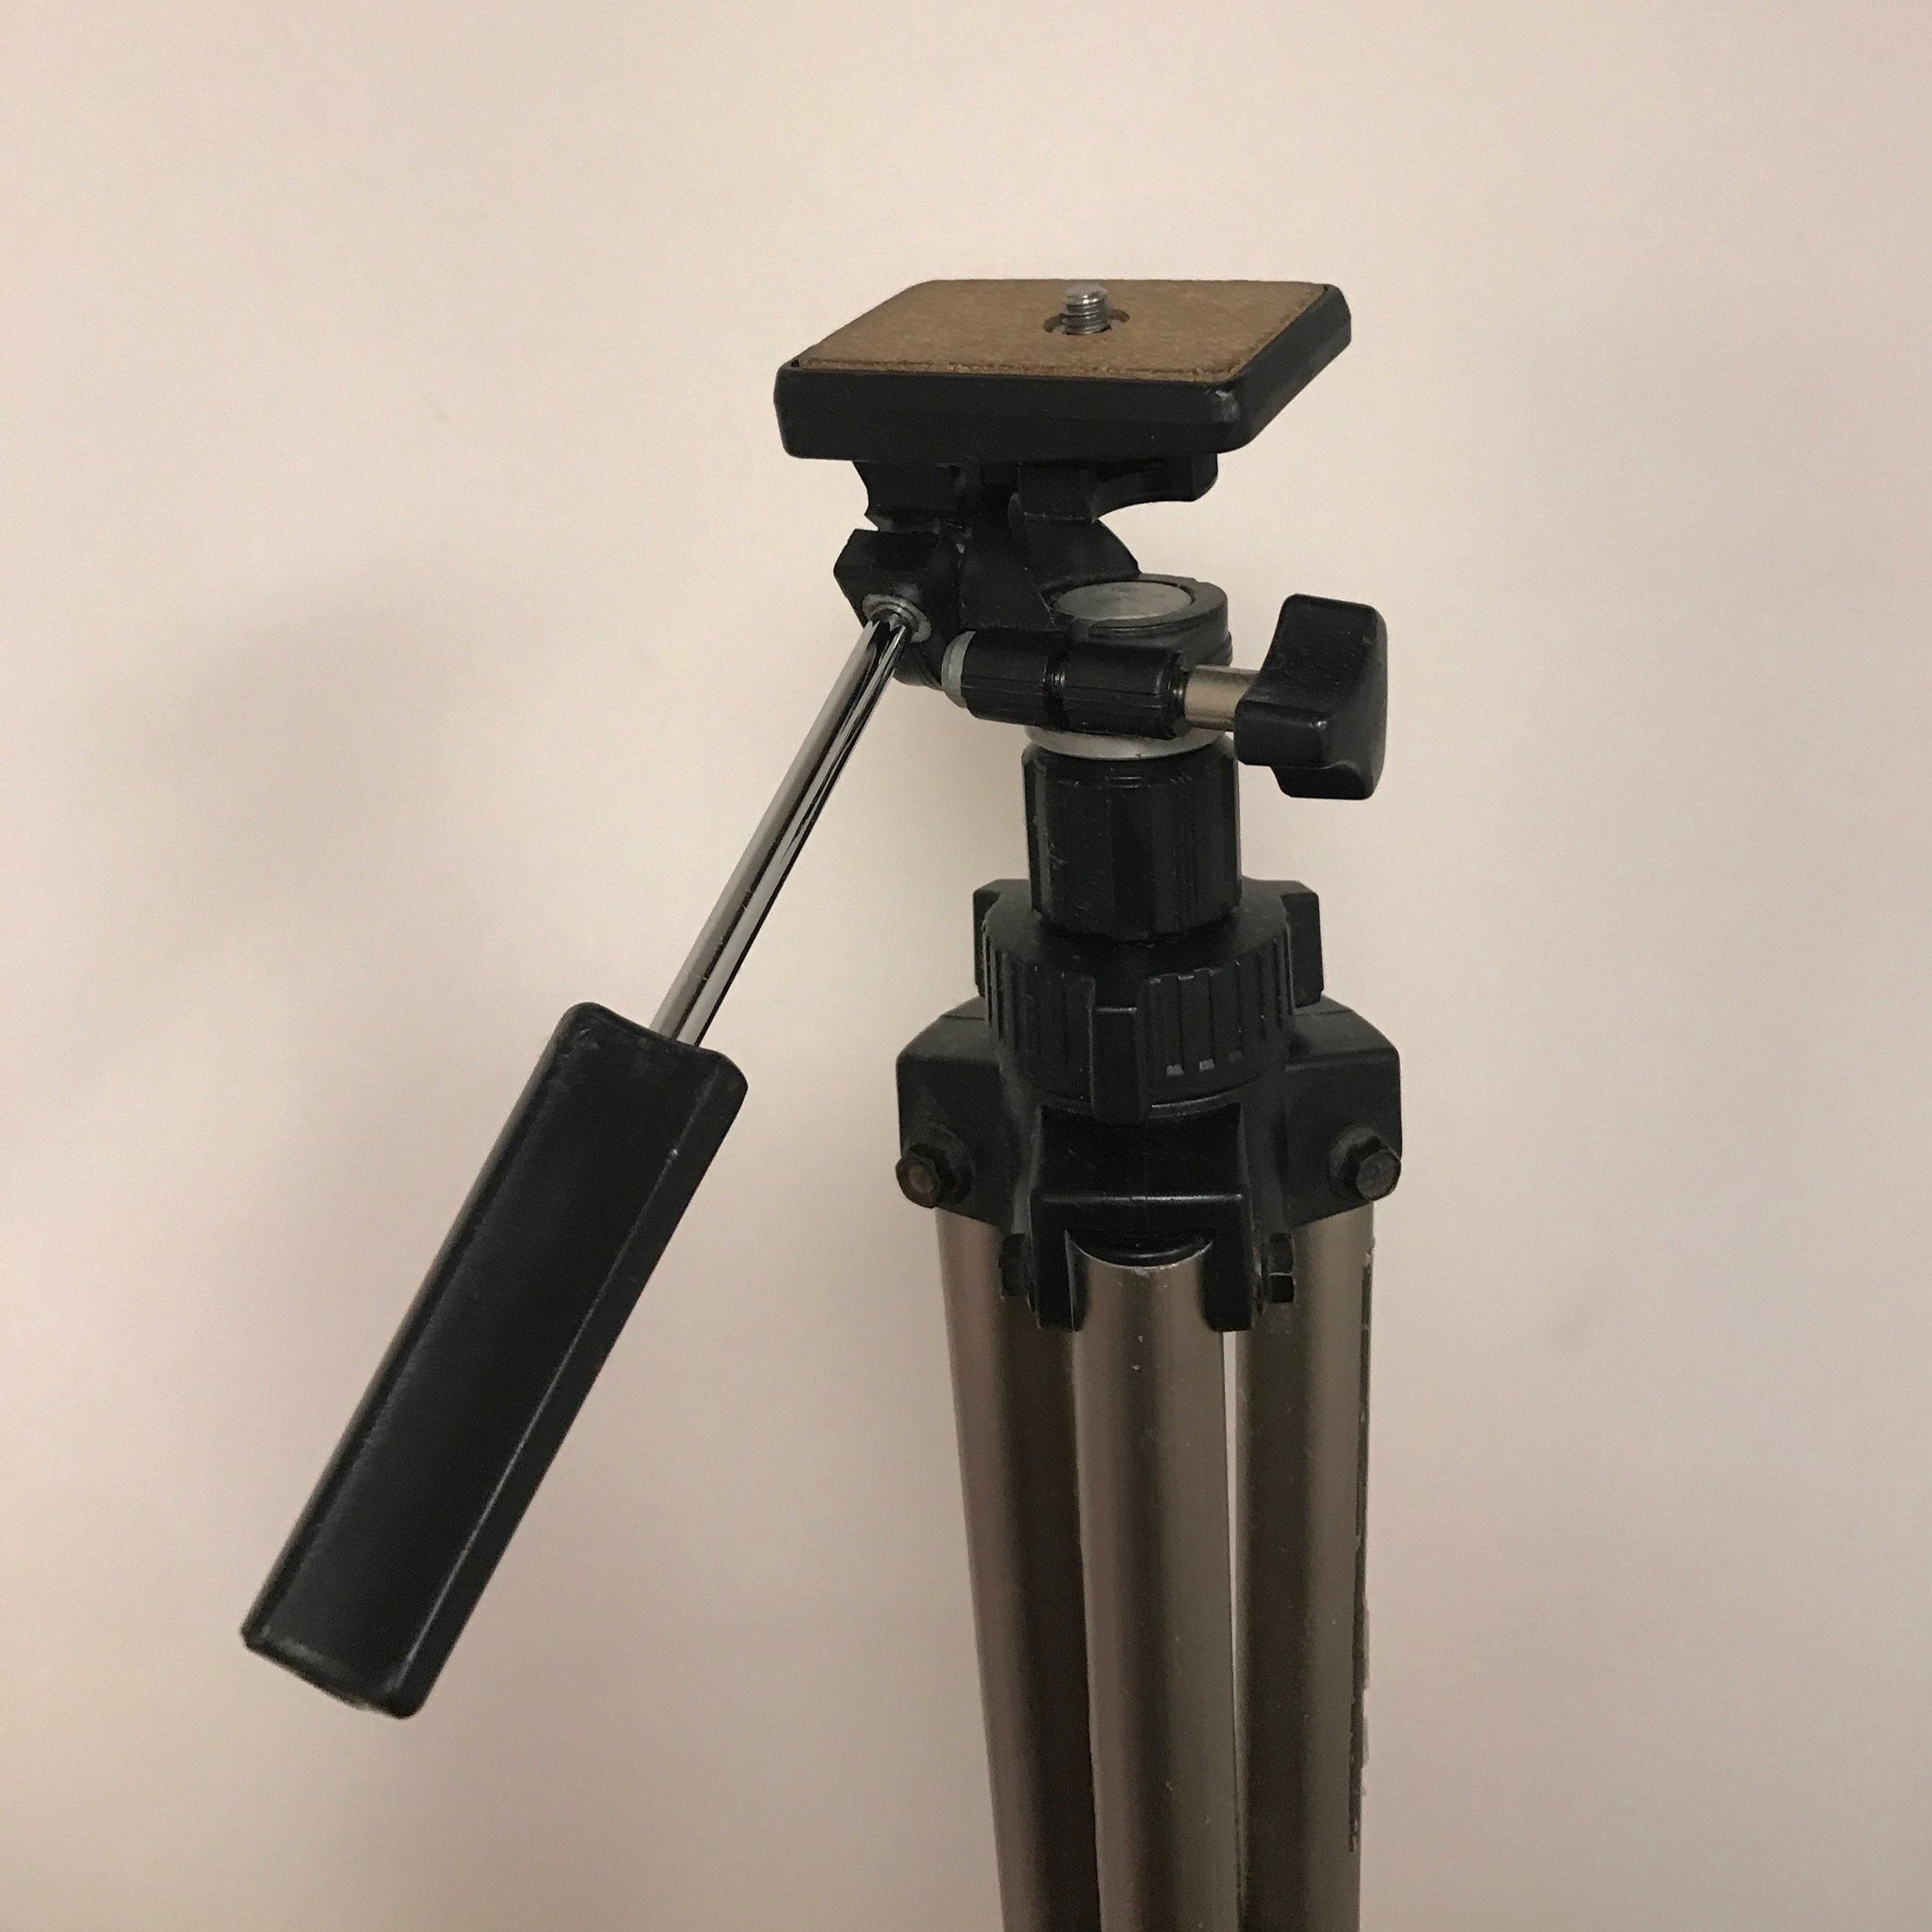
Another common type of head that tripods come in is the pan-and-tilt head, which looks something like this.
With this kind of structure, you will have to make three adjustments also. You can think of it as being three dimensions that need adjusting.
The specific operations really depend on how your tripod is structured, but you basically will have to perform three steps:

A lateral pan
A vertical pan
Tilt your camera 90 degrees
There you have it.
How to shoot vertical video with DSLR
Ideally, you will have fixed your camera vertically on a tripod, and start filming in that orientation by pressing the record button. If you don’t own a tripod that would allow you to position your camera vertically, another option would be to shoot horizontally and crop in post-production. If shooting hands-free, there are gimbals that are optimised for vertical filming.
There are quite a few different scenarios under this section and I’d rather not lump them all into one.
Stills camera on photo tripod
The best option as described above is to get a tripod that is built for vertical shooting. That should be the most straightforward way to do it.
Alternatively, it could be a sensible move to get a L-bracket if you need to shoot vertical videos for a prolonged period of time, that basically being your main output format.
Having a camera tilted all the way to one side is not the most stable setup; it could easily topple.
With a L-bracket, you will be able to mount the camera vertically but also place all the weight right at the centre, which is a much better permanent solution.
Another situation photographers might find themselves in, is where they have to switch between horizontal and vertical shooting rapidly.
A great solution that allows such flexibility are collar tripod mount rings. This is a ring that attaches the lens burrow to the tripod without touching the camera body.
So the photographer will be able to tilt the camera body horizontally or vertically as he sees fit while the lens is held in position by the mount.
Video camera on video tripod
If you are shooting with a video camera, and presumably with a video tripod, though, you will have to get a bit more creative. Video tripods, based on how I’ve seen videographers use them, are not optimised for vertical shooting.
Video cameras weigh much more than stills cameras and therefore will require additional pieces of gadgets if you need to secure them on a tripod.

The usual way of going about it is to rig your camera on a 90 degree bracket, or vertical plate; essentially different names for the same piece of gadget.
You screw your camera onto the vertical plane on the rig, which is attached to the tripod head on the horizontal plane.
This is a rather permanent set up and will not allow easy transition between the two orientations.
Vertical gimbals
This is the solution if you need to shoot vertical videos hands-free.
Unfortunately, there are not a lot of choices on the market that fully supports vertical shooting.
The best you can do is to mount the camera horizontally on the gimbal, like how you normally do, and hold the gimbal sideways.
Vertical grips
This is perhaps the most affordable solution, which is to handhold the camera without a gimbal, by simply adding a vertical grip to the camera.
This works where you would like to incorporate a level of hand-held rawness to the footage - in this case a gimbal will not give you the right look.
To make it easier to hand-hold a camera vertically over a decently long period of time, the vertical grip would be a handy addition to your bag, so that you are not constantly twisting your wrist to keep the camera in position.
How do I fix my phone vertically on my tripod?
To do this, you will need a tripod head that is able to rotate to a vertical position, which fortunately is now a common feature most phone tripod heads have. Insert the phone into the bracket, rotate the phone to the vertical position, and mount the bracket either on a phone stand, a tripod, a gorilla pod, or wherever you see fit.
What really matters is the bracket. You need a bracket that can rotate.
Once you have that, you enjoy the flexibility of using the bracket with whatever stand you fancy really.
It just needs to have a thread so that you can mount the bracket on.
Continue reading for recommendations on vertical tripods for phones.
Vertical tripods for phones
There are two main things to look for when getting a tripod for phones, especially if you need to hold your phone vertically. Firstly, the phone bracket needs to adjustable, ideally be able to rotate 360 degrees. Secondly, the consider the height of the stand. The general principle is to buy a stand that gives you as many options as possible, at the best price possible.
The recommendations are linked to Amazon, where you can find their latest prices.
Manfrotto Stand for Universal Cell Phone, with A Bonus ZAYKiR Adapter, Rotates Vertical and Horizontal - Manfrotto stands don’t go wrong; they are of high build quality across the board, and this should be able to hold a little more than a phone, for example an external mic. The reason why this recommended set comes with an extra mount is because, the native bracket it comes with does not have the best features. It will work fine if you are only going to shoot horizontally and aren’t too fussed with the angles, but if you could get a much more functional bracket with a few more quid, why not?
Joby GripTight 360 phone mount - this is just the phone mount so you will have to buy the stand separately, which should not be an issue. The reason why this mount is recommended is because it rotates 360 degrees. It will enable you to shoot horizontal, vertical, and any angle there is in between. Not all mounts are able to do this.
Joby GripTight Mount PRO for Smartphone - this is also just the mount, but will work on almost any stand. The advantage of this mount is that it is going to be more secure and be able to hold more weight, as it locks the phone in with tightening screws. The grip itself is also made of metal. It would be good if you need to attach external components to the phone, say an action camera.
Lume Cube Desktop Tripod Stand - this is just a stand. But with the standard thread size you can just use it with a bracket of your choice. This stand comes with a fuller range of capabilities. To begin with, it is taller and comes with 4 possible heights ranging from 12.5-30 inches, which has you covered for more potential usages. Secondly, it comes with a ball head. This drastically opens up the angles that are possible on the stand.
Summary
In this article, we talked about:
Whether you should take pictures vertical or horizontal in general;
Whether you should take pictures vertical or horizontal on cellphones;
Why photographers shoot vertical;
The correct way to hold the camera vertically;
How to take vertical pictures on a tripod;
How to shoot vertical video;
How to fix cellphones vertically on a tripod; and
The best phone tripods for vertical shooting.
SUBSCRIBE via the box on the left for more PRO tips, and follow me on Instagram (@_bjiao__) and let me know what you think in the comments!
Share this article on Pinterest too!
Keep shooting, keep creating!