How to get Sharp Film Photos?
The most common reasons that lead to unsharp film photos are motion blur, caused by using too slow a shutter speed; missed focus, caused by not having enough depth of field to work with; and underexposure, caused by not exposing for the shadows. To get sharper film photos, the photographer should gain a good understanding of film speeds and choose the right film stock for a particular job. Knowing the mechanical limitations of certain film cameras is also crucial.
In the below sections, we will look at each cause of blurry film photos in greater detail, followed by some suggestions based on my experience of working with film on how to mitigate the undesirable blurriness in your film photos.
If you find this helpful, SUBSCRIBE to my channel via the box on the left to make the most out of my blog! Also, do share it with people who might be interested. Shoot me an email/ DM to share your thoughts too.
Also, Pin this article to your Film Photography boards in Pinterest if you find it helpful!
Why are your Film Photos Blurry?
The typical causes of blurry film photos include motion blur, missed focus, and underexposure. These issues are relevant when shooting digital but are especially prominent when working with film, due to the lower ISOs for which most film stocks are rated at, mechanical shutter delays of old film camera models, and a lack of understanding of manual exposure.
There are substantial differences between the various causes of unsharp film photos, and we will look at them one by one so that you can judge which one(s) is causing the blur in your case and adjust accordingly.
Motion Blur
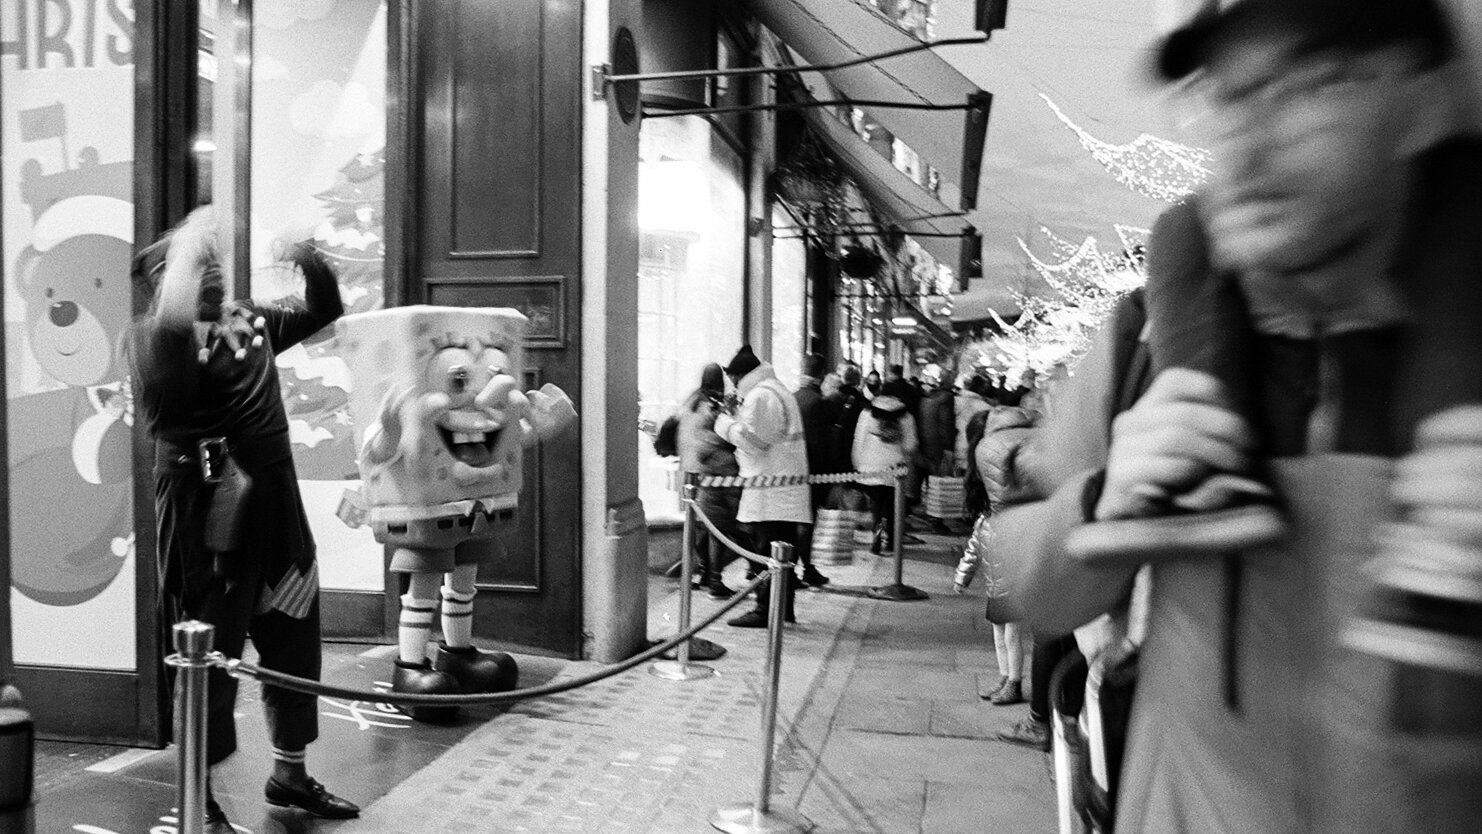
Motion blur typically shows strands of light trailing in the frame moving in parallel. Because it was caused by a shake, the points in the frame are moving towards the same direction, to the same extent.
Here is an example of a film scan with motion blur. Although done intentionally, it works as a demonstration.
The blur mainly happened while the man on the right walked towards the right, as indicated by the trails created by his glasses; and also looking at the hands of the performers, you can clearly tell that they have left a few ‘ghosts’ along their line of movement.
Where the blur is done unintentionally, everything should be shifting towards the same direction.
If you think that the photo you are concerned with shows signs that it has been affected by motion blur, this is why it happens: your shutter speed is not fast enough to freeze the motion. Your camera has recorded visibly different positions the subject has travelled across.
Film is especially susceptible to this because most film stocks are made in the ISO 100-400 range. While there are faster film stocks going up to ISO 800 or even 3200, they are relatively rare.
For starters, you might be shooting on automation with your camera, which leaves the camera to choose the settings for you. Under dim lighting situations, older film camera models with less refined auto modes simply selects a shutter speed that’s too slow on your behalf, which results in motion blur.
It can be hard to notice too because shutter speeds are so quick that it is really hard to tell, even if they can be a few stops of light apart. For instance, shooting at 1/80s does not feel strikingly different than shooting at 1/200s.
The solution in relation to Motion Blur
The solution to blurry film photos caused from motion blur is to learn to shoot on manual exposure if your camera allows you the controls. In that case, you should be able to fix the shutter speed faster than what your handheld abilities permit.
But if unfortunately your camera does not let you control the exposure settings, the solution would be to pick the right film stock and shoot it under the right type of lighting situations.
It would be beneficial to get a feel of what level of light can each ASA rating handle, relative to what the shutter speed is limited to (either by the camera or by your handheld abilities).
For instance in London, where I am based, I only shoot ISO 200 films under intense sunlight, and ISO 400 where the sun is still up. As for ISO 800, I am comfortable in shooting it up till blue hour.
The reverse of this is that if I already have a roll of film loaded in my camera that I have shot halfway, I don’t shoot on that camera until the lighting conditions have been met on a particular day.
Missed Focus
An out of focus photo features an absence of distinct lines. Colours on the two sides of where a solid line should be appear to be merging together, and in extreme cases the entire area becomes lacking in detail.
Here is an example of an out of focus film photo for your reference.
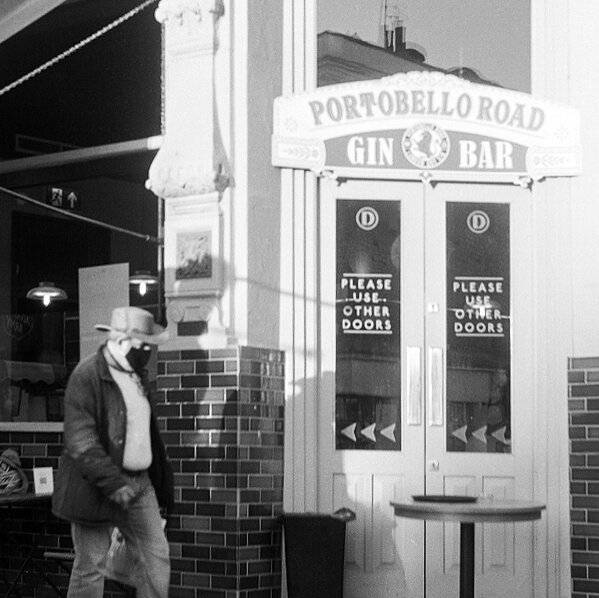
In this image, the focus was neither on the man nor the door in the background. It is unclear where the focus was placed. Looking at the man, we see that he has no definite outline but we know in real life he does; as for the door, judging from the writings on the sign, the edge of the words appear to be fading into the walls.
This is a common difficulty in operating a manual focus lens. In making a compromise between achieving a sufficient exposure on a slower film, and a steady shutter speed for the hand, film photographers may often have to resort to larger apertures (or smaller aperture values), which results in a relatively narrow depth of field to work with. It can be a challenge to manual nail the focus in settings like capturing street life, especially that film cameras do not have advanced mechanisms for photographers to check their focus.
This can sometimes also be an issue shooting on film cameras with an autofocus capability, because the focusing mechanism can be rather slow. This delay in a split second can lead to incorrect focus, because the delay is more than enough for the subject to move to another focal plane.
The solution in relation to a Missed Focus
In the case of using autofocus on film cameras, it is crucial that you develop your understanding of your intended subject matter so that you can anticipate their direction of movement.
For instance, if you are shooting mainly people, train your ability to read people. Based on what someone is looking at, can you tell where he wants to go? Based on his direction of movement, will he fall into your zone of focus? If not, where do you need to position yourself so that your subjects will be in focus and be where you want them to be?
This is key to help you manual focus faster and more accurately, but also applies to film cameras with a slower autofocus ability.
Another tip specifically for manual focusing on film cameras is to be realistic with what the depth of field you are working with. In this video, I mentioned how using a slow speed expired film restricted me to dialling my aperture wide open to f/3.5 shifted my subject matter from mostly moving objects to still objects on streets.
Underexposure
Underexposure is a common issue, especially when working with film, mainly because film’s latitude in handling shadows is more limited than its ability with regards to highlights. In other words, it handles overexposure better than underexposure. So if a shot was underexposed, the negative has difficulty in recording the details in the shadow, which leads to a lack of definition in the shadow areas in the resulting scan.
Various measures can be performed to mitigate the underexposed negative, such as adjusting the brightness of the light pad during the scanning process, and also adjust the brightness levels in editing the scan. But lost detail cannot be invented after the math which inevitably ends up in a muddy looking image.
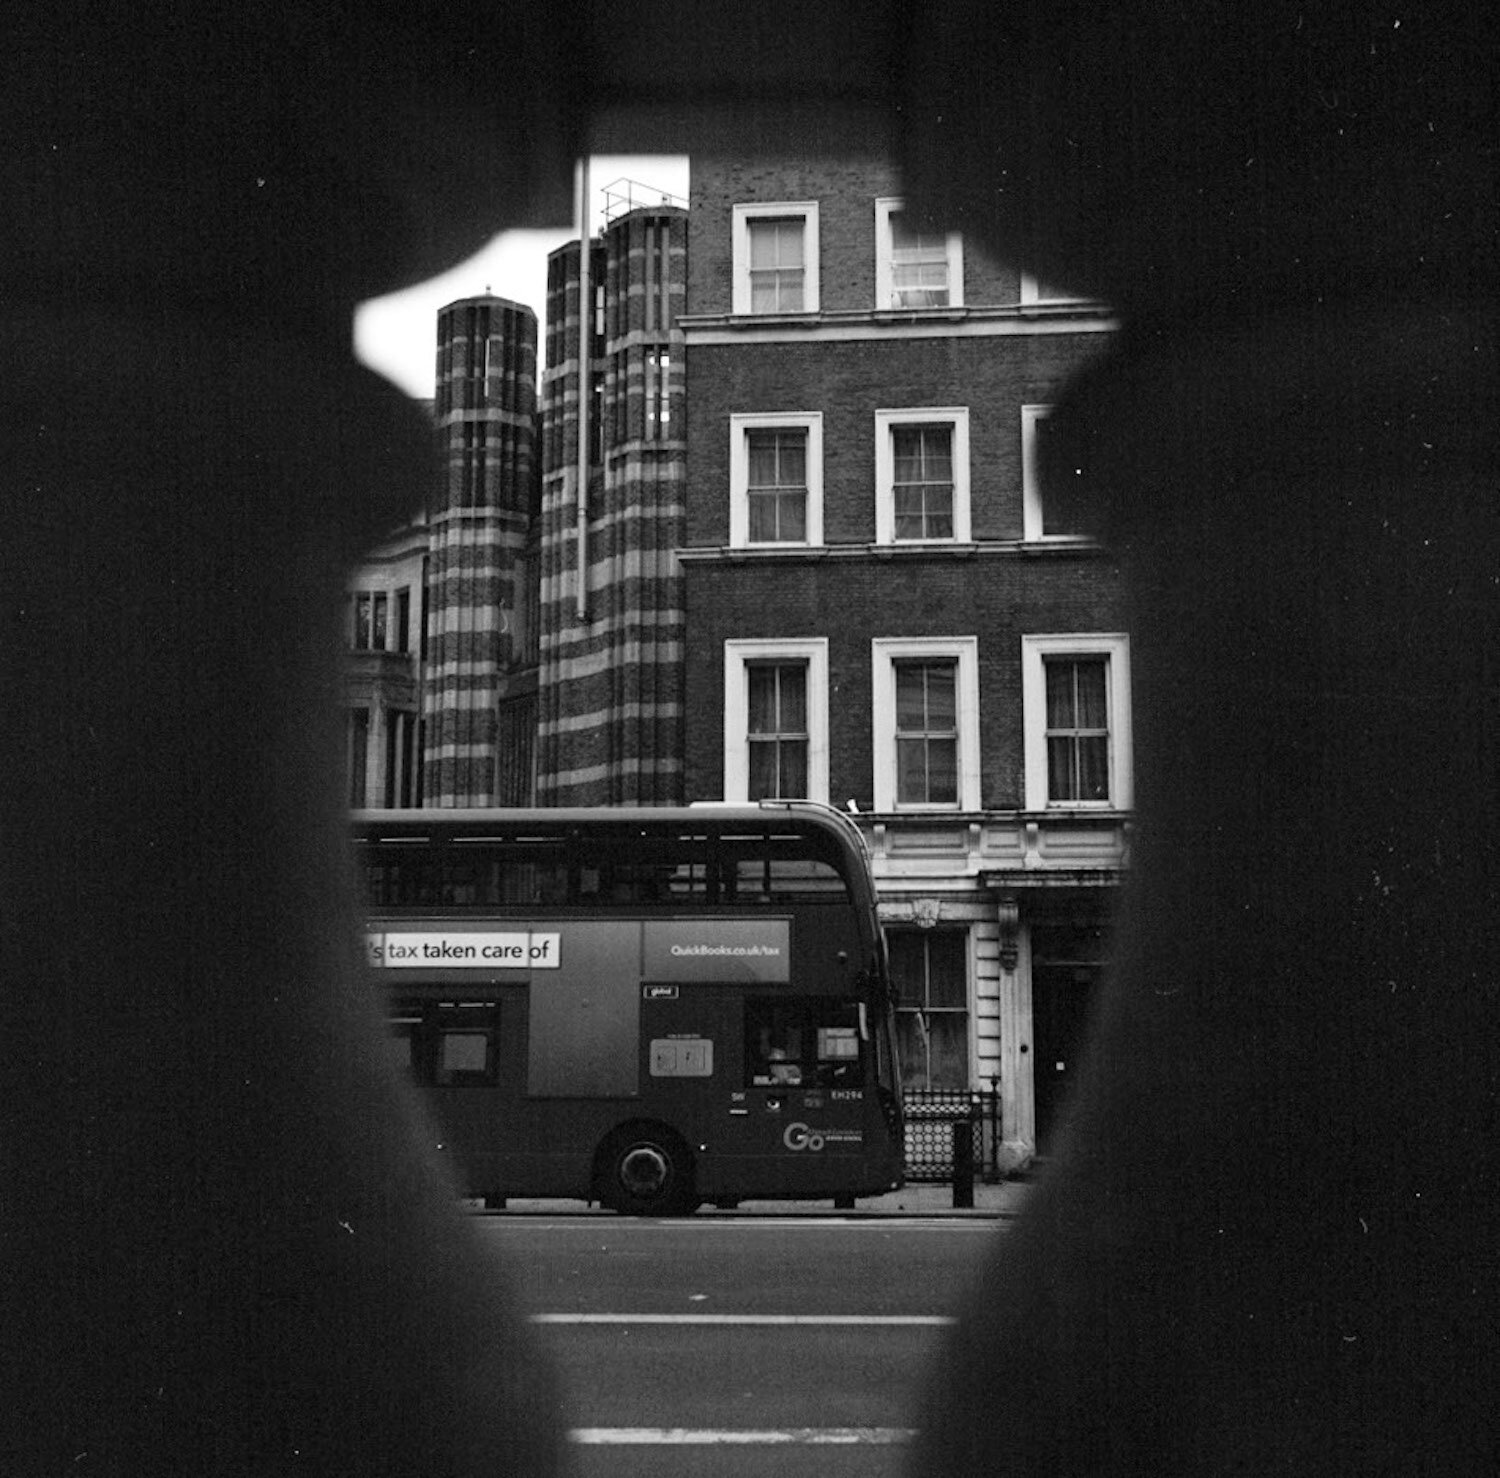
Here is an example of an attempt to lift the shadows of an underexposed negative.
You can tell from looking at the window frames that the image was in focus. You do see a fair amount of details in the highlights in the image.
However, the image overall just appears to be not sharp. And the reason for this, in my opinion, is because the shadow are lacking detail, coupled with the fact that the shadows took up a large portion of the frame (indeed, it was underexposed).
Therefore, the respective shades of grey failed to render in the scan, which gave the impression of a lifeless, muddled image.
The solution in relation to Underexposure
Underexposure mostly has to do with manual film cameras, because assuming that the built-in light meter is functional, the autoexposure should be able to deliver correct exposures.
In the case of manually exposing film, if you do not already have a good feel of what one stop of light looks like, getting a light meter is a reliable way of getting the hang of it.
A light meter will be able to give you a recommended exposure setting in the particular situation you are shooting in, and you can learn the concept of light by metering at difference spots in the frame. For example, when shooting a portrait under natural light, metering on the face, which is usually brighter, would give you a different reading when metering at the neck, which is usually buried in a shadow created by the chin.
Light meter readings are an effective guide to creating the exposure you desire, especially in high contrast lighting situations where you really need to expose for the shadows specifically.
A major limitation with light meters though, is the fact that the process takes time and therefore would be of little help in genres like street photography where the capture needs to happen instantaneously. In genres like these, there will mostly not be enough time to meter the light for every frame before the shot is gone.
When manually shooting street photography on film, your best bet is to make sure your starting point for the day is correct. Unless the lighting situation changes dramatically, the exposure on the shots can be guaranteed to some extent.
Should any adjustments be required, the Sunny 16 rule will come in handy, if no light meter is available. Here is a video of how the Sunny 16 rule is applied in practice.
Summary
In this article, we talked about:
How to get sharper film photos; and
Why your film photos are not sharp
SUBSCRIBE via the box on the left for more PRO tips, and follow me on Instagram (@_bjiao__) and let me know what you think in the comments!
Share this article on Pinterest too!
Keep shooting, keep creating!
The mission of this blog is to provide the best insider information in the photography industry, as openly as possible. You have direct access to my
first-person experience as an aspiring photographer who talks, but also works.
Honest opinion are rarely available as public resources because this is a competitive industry. Huge sums are made when such information is delivered in the form of mentorship and workshops.
This blog is a great way in which I cover my daily expenses, but also provide real value.
If you have learnt something that would be worth at least $10, please consider donating to the page. This enables me to keep creating content and helping more people sustainably.
Your continued support for the blog is appreciated!