This guide covers all basics about pushing and pulling black and white and colour negative film. A downloadable pdf is included that contains the time charts for pushing and pulling common black and white film stocks. Detailed but easy to follow explanations are provided regarding the effects of pushing and pulling film.
If you find this helpful, SUBSCRIBE to my channel via the box on the left to make the most out of my blog! Also, do share it with people who might be interested. Shoot me an email/ DM to share your thoughts too.
Also, Pin this article to your Film Photography boards in Pinterest if you find it helpful!
What is the purpose of pushing and pulling film?
From a technical standpoint, you increase the contrast of the film by pushing, and reduce it by pulling. Depending on the content of the exposure, pushing usually raises overall brightness, while pulling reduces it. Pushing allows the use of a slow film at handheld shutter speeds, while pulling is mainly to maintain highlight detail in contrasty scenes. Some creative visions call for pushing to increase graininess.
There are two types of purposes for pushing and pulling film: technical and creative. Most of the time it will be a combination of the two.
The most apparent difference that pushing and pulling makes is the contrast level of the resulting negative. Pushing increases the contrast, and pulling decreases it.
Why pushing film increases contrast
Let’s refer to this graph below.
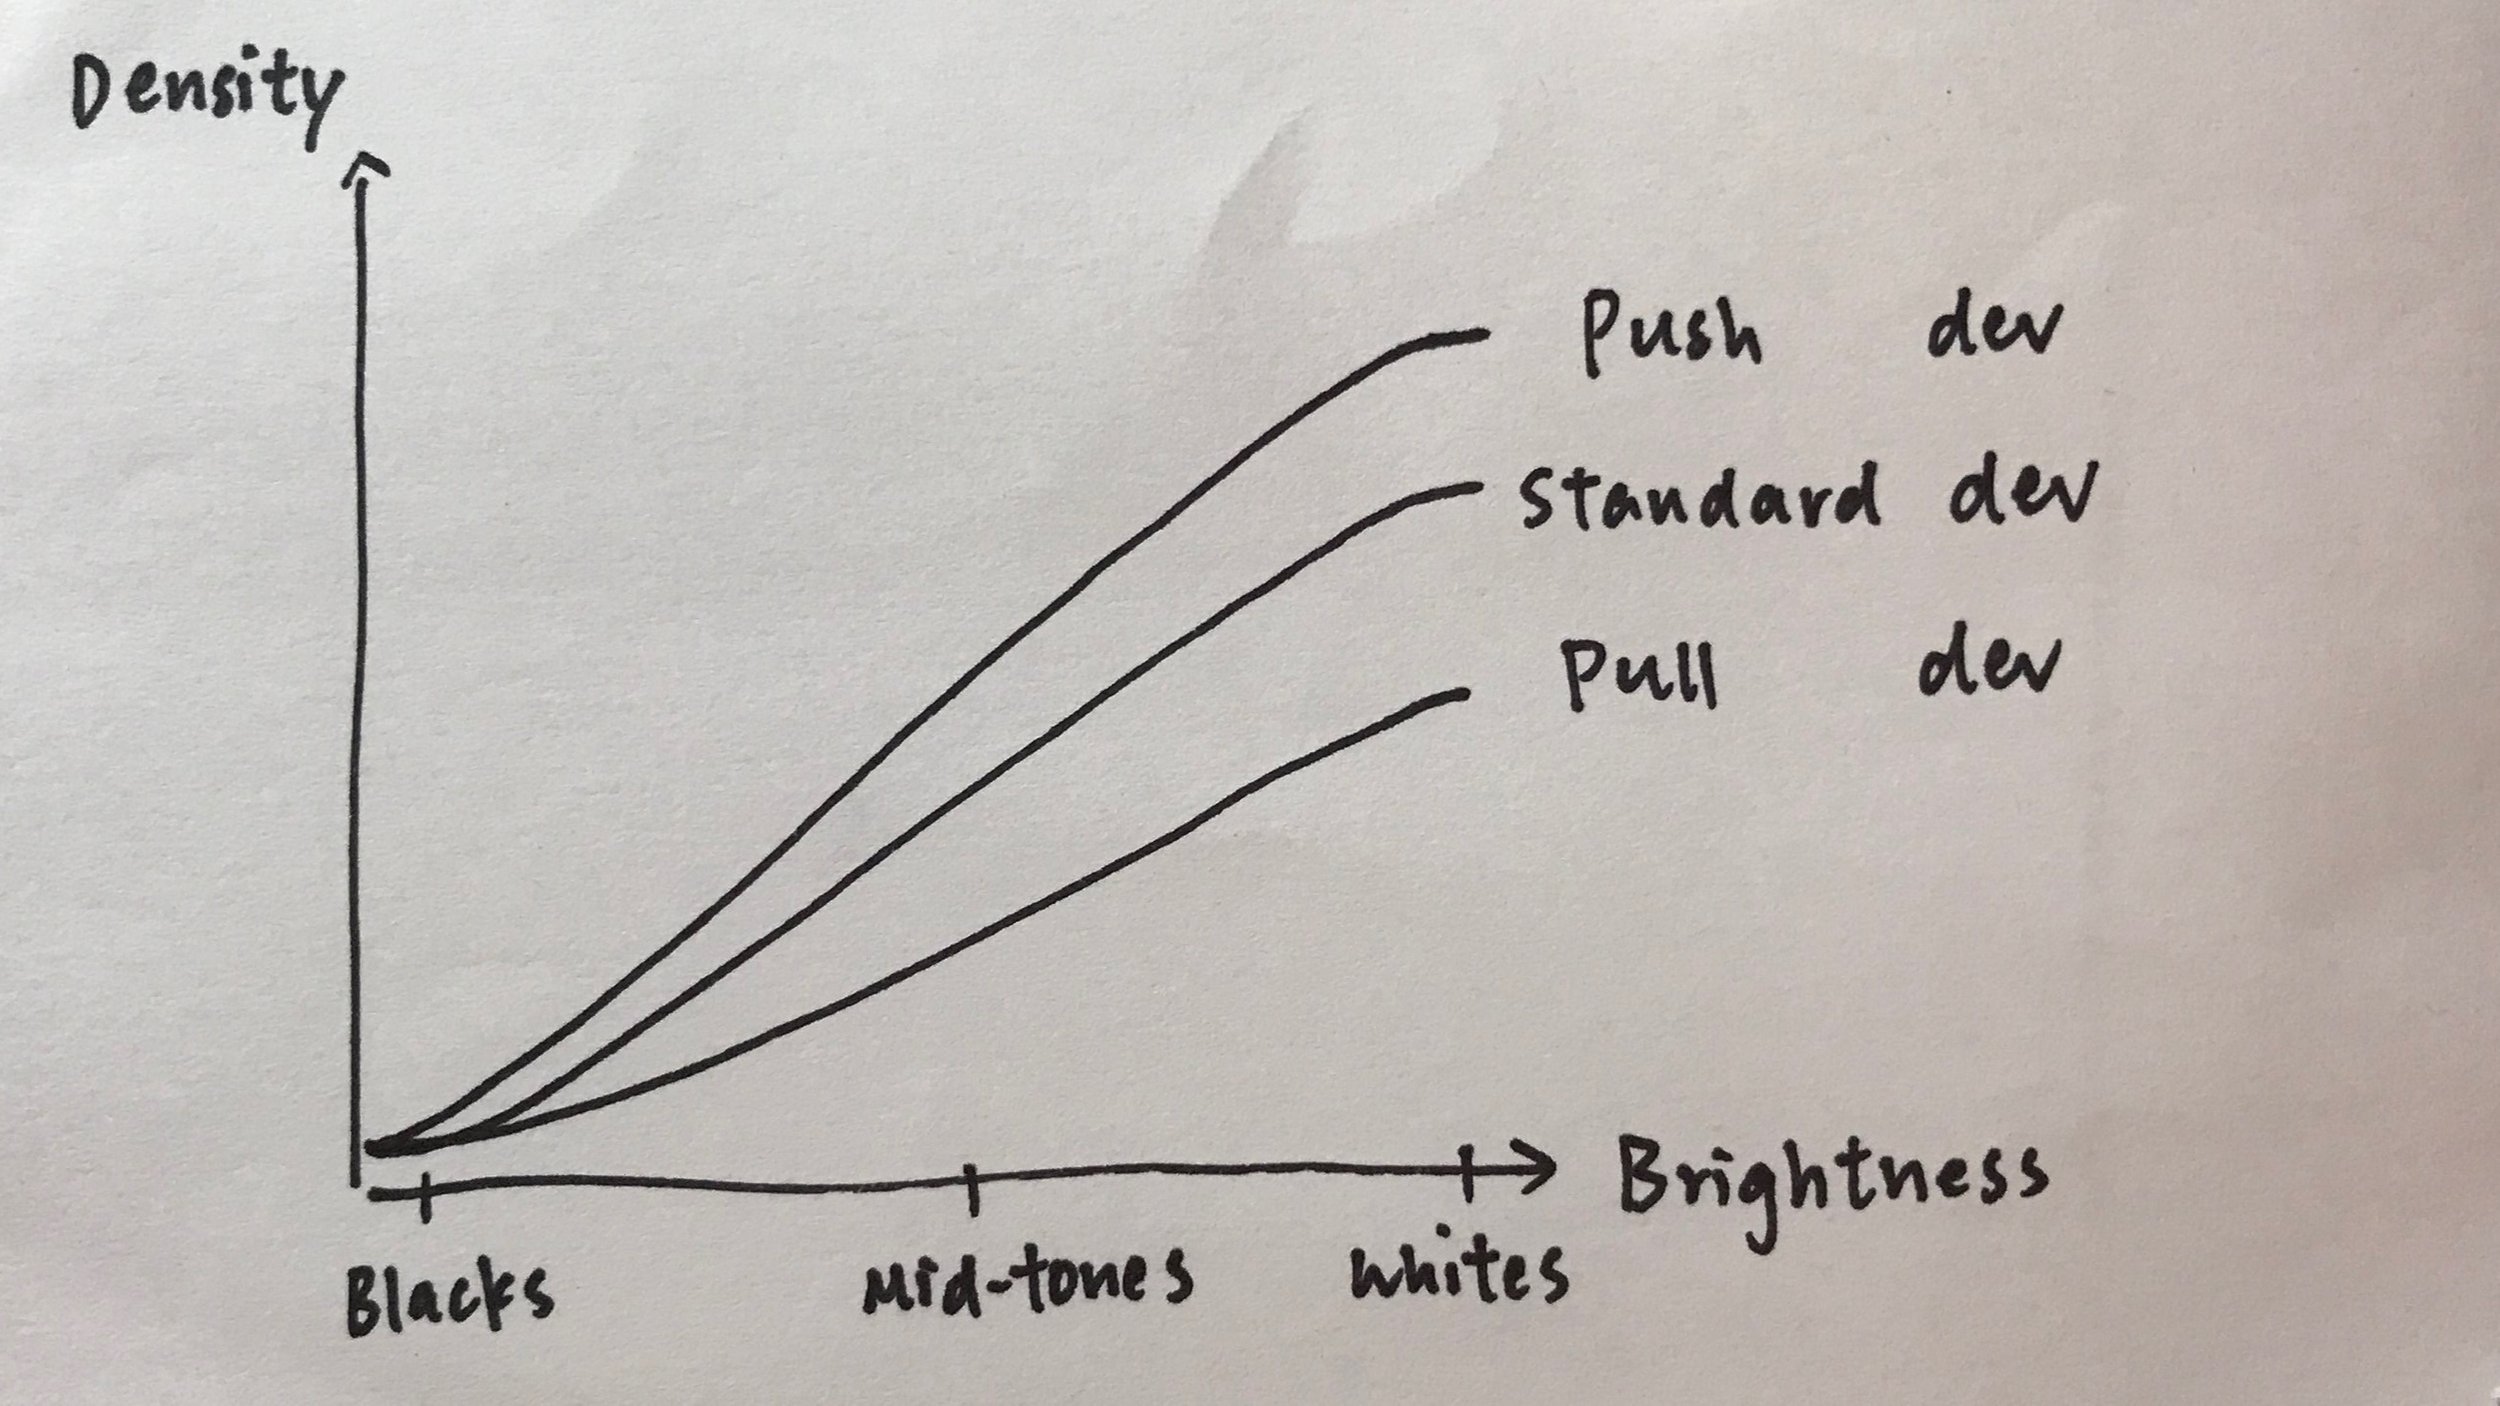
Graph showing the relationship between negative density and relative brightness.
Every image can be roughly said to contain values ranging from blacks, mid-tones to whites. The development time affects the brighter parts more than the darker parts, thus altering the contrast level.
Density refers to the amount of silver that remains on the negative. The denser an area, the brighter it renders on the final scan/ print.
Referring to the graph above, the curves represent the relationship between the building up of density on a negative with the brightness zones.
This curve, aka this relationship, shifts with development time. A steeper incline in the curve represents greater contrast in the negative.
Observing the densities of the blacks, we can see that the densities are affected to a minimal extent regardless of development time. This practically means that your blacks will look pretty much equally dark however long you develop your film for.
But further up the brightness levels, most notably the highlights, they proliferate to a larger extent as development times lengthen. This practically means that your highlights (and most likely mid-tones) will become much brighter if you develop your film for longer.
Why pulling film decreases contrast
The reverse is true for pulling. The entire curve shifts downwards when you reduce development time, which does not create that much of a change at the blacks but lowers the brightness of the frame from mid-tone upwards.
In the development process, the shadows require the least time to develop, while it takes a longer time for density to build up in the highlight areas.
Pull development is essentially stopping the development after the shadows have finished developing, while the highlights have not. Shadows are usually fully developed 5 minutes into the development.
As a result of pulling, the shadows will render properly, coming out as bright as it was exposed; the highlights and mid-tones will be toned down.
This results in a lower contrast overall.
Practical restraints
Photographers often find themselves in situations where the lighting is not ideal, but the shooting must nevertheless still go on, and are also restricted to shooting at handheld shutter speeds.
In other words, the frame will almost certainly be underexposed, but it can be mitigated by extended development to obtain a still usable image.
Cost-saving is also why many photographers sometimes push film. For regular film shooters, buying film in bulk is more economical. Of course photographers would choose a film that has them covered for the type of situations they mostly shoot in, but sometimes exceptions happen.
And so where one finds himself in a shoot where the film in the camera isn’t fast enough, the shutter can’t be slower, and the aperture can’t be further opened up, pushing is an attractive option.
Conversely, pulling is a common solution where the ND filter is missing in making long exposure shots. For genres in photography like landscape, long exposures often need to be made in broad daylight.
Depending on the specific circumstances, using a ND filter may cause unwanted disturbances to the relative brightness values of the subjects in the frame. Other times, the ND filter is simply not around. In these situations, pulling is a convenient solution.
Increase graininess by pushing
Pushing film increases the appearance of grain in a frame, which is a look that some photographers prefer.
The technical explanation as to why pushing increases grain are explained in greater detail in my other article ‘What you Need to Know About Film Grain’. In that article, you will see in depth the effects of prolonged development on the process of silver depositing on a negative.
In short, letting your film stay longer in the developer favours the clumping of grain particles, and also increases local contrast.
These combined result in a negative that gives a greater sense of grain.
Increase colour saturation by pushing
Professional colour negative films are designed with the flexibility to push well. These are typically in the ISO 400 range, such as Kodak’s Portra 400. They are able to be pushed 1-2 stops without colour shifts.
The colours become more saturated as you develop the film for longer. To achieve this effect, some photographers expose the film at normal EI, and develop longer than standard.
The situation becomes less straightforward though, if the film was underexposed in camera. The loss in shadow detail may result in a drab appearance - no amount of development can make up detail; it is the detail that contains the colour in the first place.
ISO vs Exposure Index (EI)
ISO in film photography refers to the light sensitivity of a film as determined by the manufacturer under lab conditions. In digital, it refers to the sensitivity of the sensor as assigned by the camera manufacturer. Exposure Index is the sensitivity level the photographer intends to use the film as. ISO and EI are entirely independent; the ISO is fixed by manufacturers, while the EI depends on the photographer.
In other words, depending on the photographer’s intention, the EI can be identical with the ISO. But usually, EI only becomes a material decision when the photographer decides to depart from the ISO of a film.
It is also worth noting that EI is more relevant to film photography than digital. In digital, you simply change the ISO value to change the sensor’s sensitivity to light without needing to be involved with the concept of EI at all.
On film, however, the ISO of the roll is fixed as it was manufactured. EI is therefore a helpful concept that helps film shooters maintain a degree of flexibility of what they can do on the film.
To illustrate my point, let’s refer to the below scenarios.
In-camera exposure
For example, let’s say you are about to shoot a film that was rated at ISO 400 on the box. The light meter reading tells you that the exposure will be about right at 1/250s f/8.
EI is the ISO value that you pretend the film to be. If you intend to shoot at box speed, you shoot the film at EI 400. Straightforward.
If you shoot it at EI 200, you are treating the film as if it is an ISO 200 film. You will meter the film as if it was rated at ISO 200, which should give you the readings of 1/125s f/8, or 1/250s f/4, or any other combination that results in one stop of overexposure.
By rating the film at an EI one stop lower than the box speed, you are basically letting in one stop more of light. You are shooting the film as if it were slower, thus resulting in denser negatives.
Let’s walk you through the opposite - say you are to shoot the ISO 400 film at EI 800.
By metering the film as if it was an ISO 800 film, your meter would give you readings of 1/500s f/8, 1/250s f/16, or any combination that results in one stop underexposure.
By shooting the film at an EI one stop higher than the box speed, you are underexposing the film by one stop than the film manufacturer would recommend.
Development
Let’s use Ilford Hp5+ 400 as the example film here. See the table below for Ilford’s official recommendations for the development times for various developers and designated EIs.

So let’s assume that we are developing the film with Ilfosol 3, at 1+9 dilution.
If you are to develop it at EI 400, which is the same as the film’s rated speed, you would develop it for 6.5 minutes.
If you are to develop it at EI 200, you develop it for 5 minutes only. You are effectively developing the film as if it were shot at EI 200, which would have already been overexposed by one stop in camera than the manufacturer’s recommended ISO of 400. You effectively counter the overexposure by developing the film for a shorter amount of time to obtain the manufacturer’s recommended density on the negative.
Of course, I must stress at this point that there is no relation between the EI in-camera and the EI in development. The EI you shot your film at does not necessarily dictate the EI you develop it at.
I will expand on this but let’s walk you through one more scenario before moving on.
Suppose that you are to develop it at EI 800; you develop it for 13.5 minutes. You are developing the film as if it were shot at EI 800, which meant one stop of underexposure in-camera. By developing it at EI 800, you compensate for that underexposure to obtain a negative with a density within the range recommended by the film manufacturer.
Flexibility across the stages
Now that we’ve seen the role EI plays in-camera and during development, it is time to address how these two stages relate to each other.
They don’t.
You can certainly keep the EI constant throughout. For instance, shoot at box speed and develop at box speed.
Or perform a standard one-stop push. Using our EI 800 example, that would be exposure as if the film speed was 800, and developing at EI 800. A standard one-stop pull would look like shooting at EI 200, and developing at EI 200, for instance.
But these are just a few combinations you can choose to go with. I personally tend to overexpose by one stop in-camera and overdevelop for one stop. So if I were shooting an ISO 400 film, I would shoot it at EI 200 and develop at EI 800.
At this point you should be able to see that EI is purely a matter of your intention as the photographer, and it is a representation of how much your intended treatment of the film departs from that recommended by the manufacturer.
The EI at the two stages can be the same, but they don’t have to.
Should you push or pull your film?
Whether or not to push or pull film is a decision that photographers arrive at after numerous rounds of trials. Typical considerations include the nature of the film stock, the desired grain structure and contrast level, and the developer-film combination if developing in-house. Pushing is a handy tool for increasing contrast and grain; pulling, for decreasing highlight density.
Listed below are the main factors that photographers attempting to push/ pull should consider.
Film stock - Colour vs Black and White
Generally, black and white films are believed to be more suitable for pushing and pulling than colour film. Various colour layers react differently to extended development, which can cause colour casts in pushing or pulling colour films.
Some black and white films are designed to be pushed. A great example of this would be high speed films like Kodak T-MAX P3200 and Ilford Delta 3200.
These are marketed as ‘multi-speed’ films, made to perform well across a range of ISO ratings. Referring to the data sheets published by Kodak and Ilford for these films, you will see the range in which they are able to produce decent results. Data sheets reveal that the true speeds of these films are somewhere around ISO 1000-1250.
Another class of black and white films known to push and pull well is those around the ISO 400 speed, most commonly Kodak’s Tri-X 400 and Ilford’s Hp5+ 400. These films push and pull really well, at least within the range of ±2 stops.
With colour film, more caution is to be given when deciding whether or not to push/ pull film. The colour negative technology today has become so advanced that C-41 films generally have a wide exposure latitude to accommodate for slight variance in exposure.
Some films like Kodak’s Portra 160 are known to push well, but the more relevant question is whether pushing is necessary at all. If the underexposure is within 1-2 stops, the film will turn out alright even with straight development.
It becomes a matter of weighing between the risk of colour shits, increased graininess with the boost in brightness.
Film stock - film grain structure
As mentioned above, pushing film gives an image a more grainy look. It is generally agreed that slower films are more suitable for pushing, for instance those rated at 50-125. The grain structure is fine enough to begin with; a slight increase in graininess is therefore still acceptable.
Based on my experience, the pushing/ pulling doesn’t quite make a difference within the 1-stop interval. If shooting on films of ISO of or below 125, the grain structure doesn’t concern us as much.
For faster films, the grain structure is usually rougher to start with and so more testing is required to figure out if the enhanced grain is acceptable for your taste.
Controlling contrast
The objective of the pre-scan/ print analogue process is to produce the most printable negative. As to what printable means, this obviously depends on the individual photographer.
But one of the chief considerations that is common to all is the contrast level of the negative. Some prefer a flatter negative as it retains more details in the mid-tones, allowing a greater room for manipulation in scanning/ printing; others prefer a considerable level of contrast as there are limits as to how much you can bump up the contrast in the printing/ scanning stage.
Pushing and pulling is helpful in getting the contrast level where you need it to be, as the lighting conditions during the exposure may not be ideal.
As mentioned in above sections, you push when the lighting situation was flatter than preferred, and pull when the lighting situation was more contrasty than preferred.
As to how much pushing is ideal, it is important to consider how much latitude the particular film has relative to the subject. If the subject concerned itself spans across a limited range of brightness, most modern films will have sufficient latitude to accommodate for pushing.
Where the subject itself is high in contrast, the film’s latitude for pushing decreases. The longer the exposure scale of a film, the more room it has to accommodate for pushing. You can learn about the exposure scale of your film, aka its built-in contrast level, by studying the characteristic curve on the manufacturer’s data sheet.
Developer - graininess
Certain developers are made for pushing and pulling specifically, and are usually the better options because different developers have varying capacities in this regard.
To find out if the choice of developer you use is good for pushing the specific film stock you are shooting, again you will find relevant information on the film manufacturer’s data sheet.

Ilford FP4+ Data Sheet, available on Ilford’s official site.
For instance, here is a recommendation of development times from Ilford regarding pushing and pulling Fp4+ using a variety of developers. You can see that they have left blanks in the table, implying that certain developers are not recommended for pushing or pulling.
Taking Ilford developers as example, Perceptol is a developer specifically made for pulling, Microphen for pushing.
Certain film-developer combinations can result in a disastrous level of grain, especially with Rodinal.
Personal preference
By now it should be apparent that film development is really a balancing exercise. You can’t have it all, this is for sure.
It is a compromise between contrast level, graininess and potential colour shifts.
Some of these factors may matter to you more than others, so you can work out whether you should push/ pull your film by prioritising the factors that are the most critical and if so, by how much.
Examples of pushed film photos
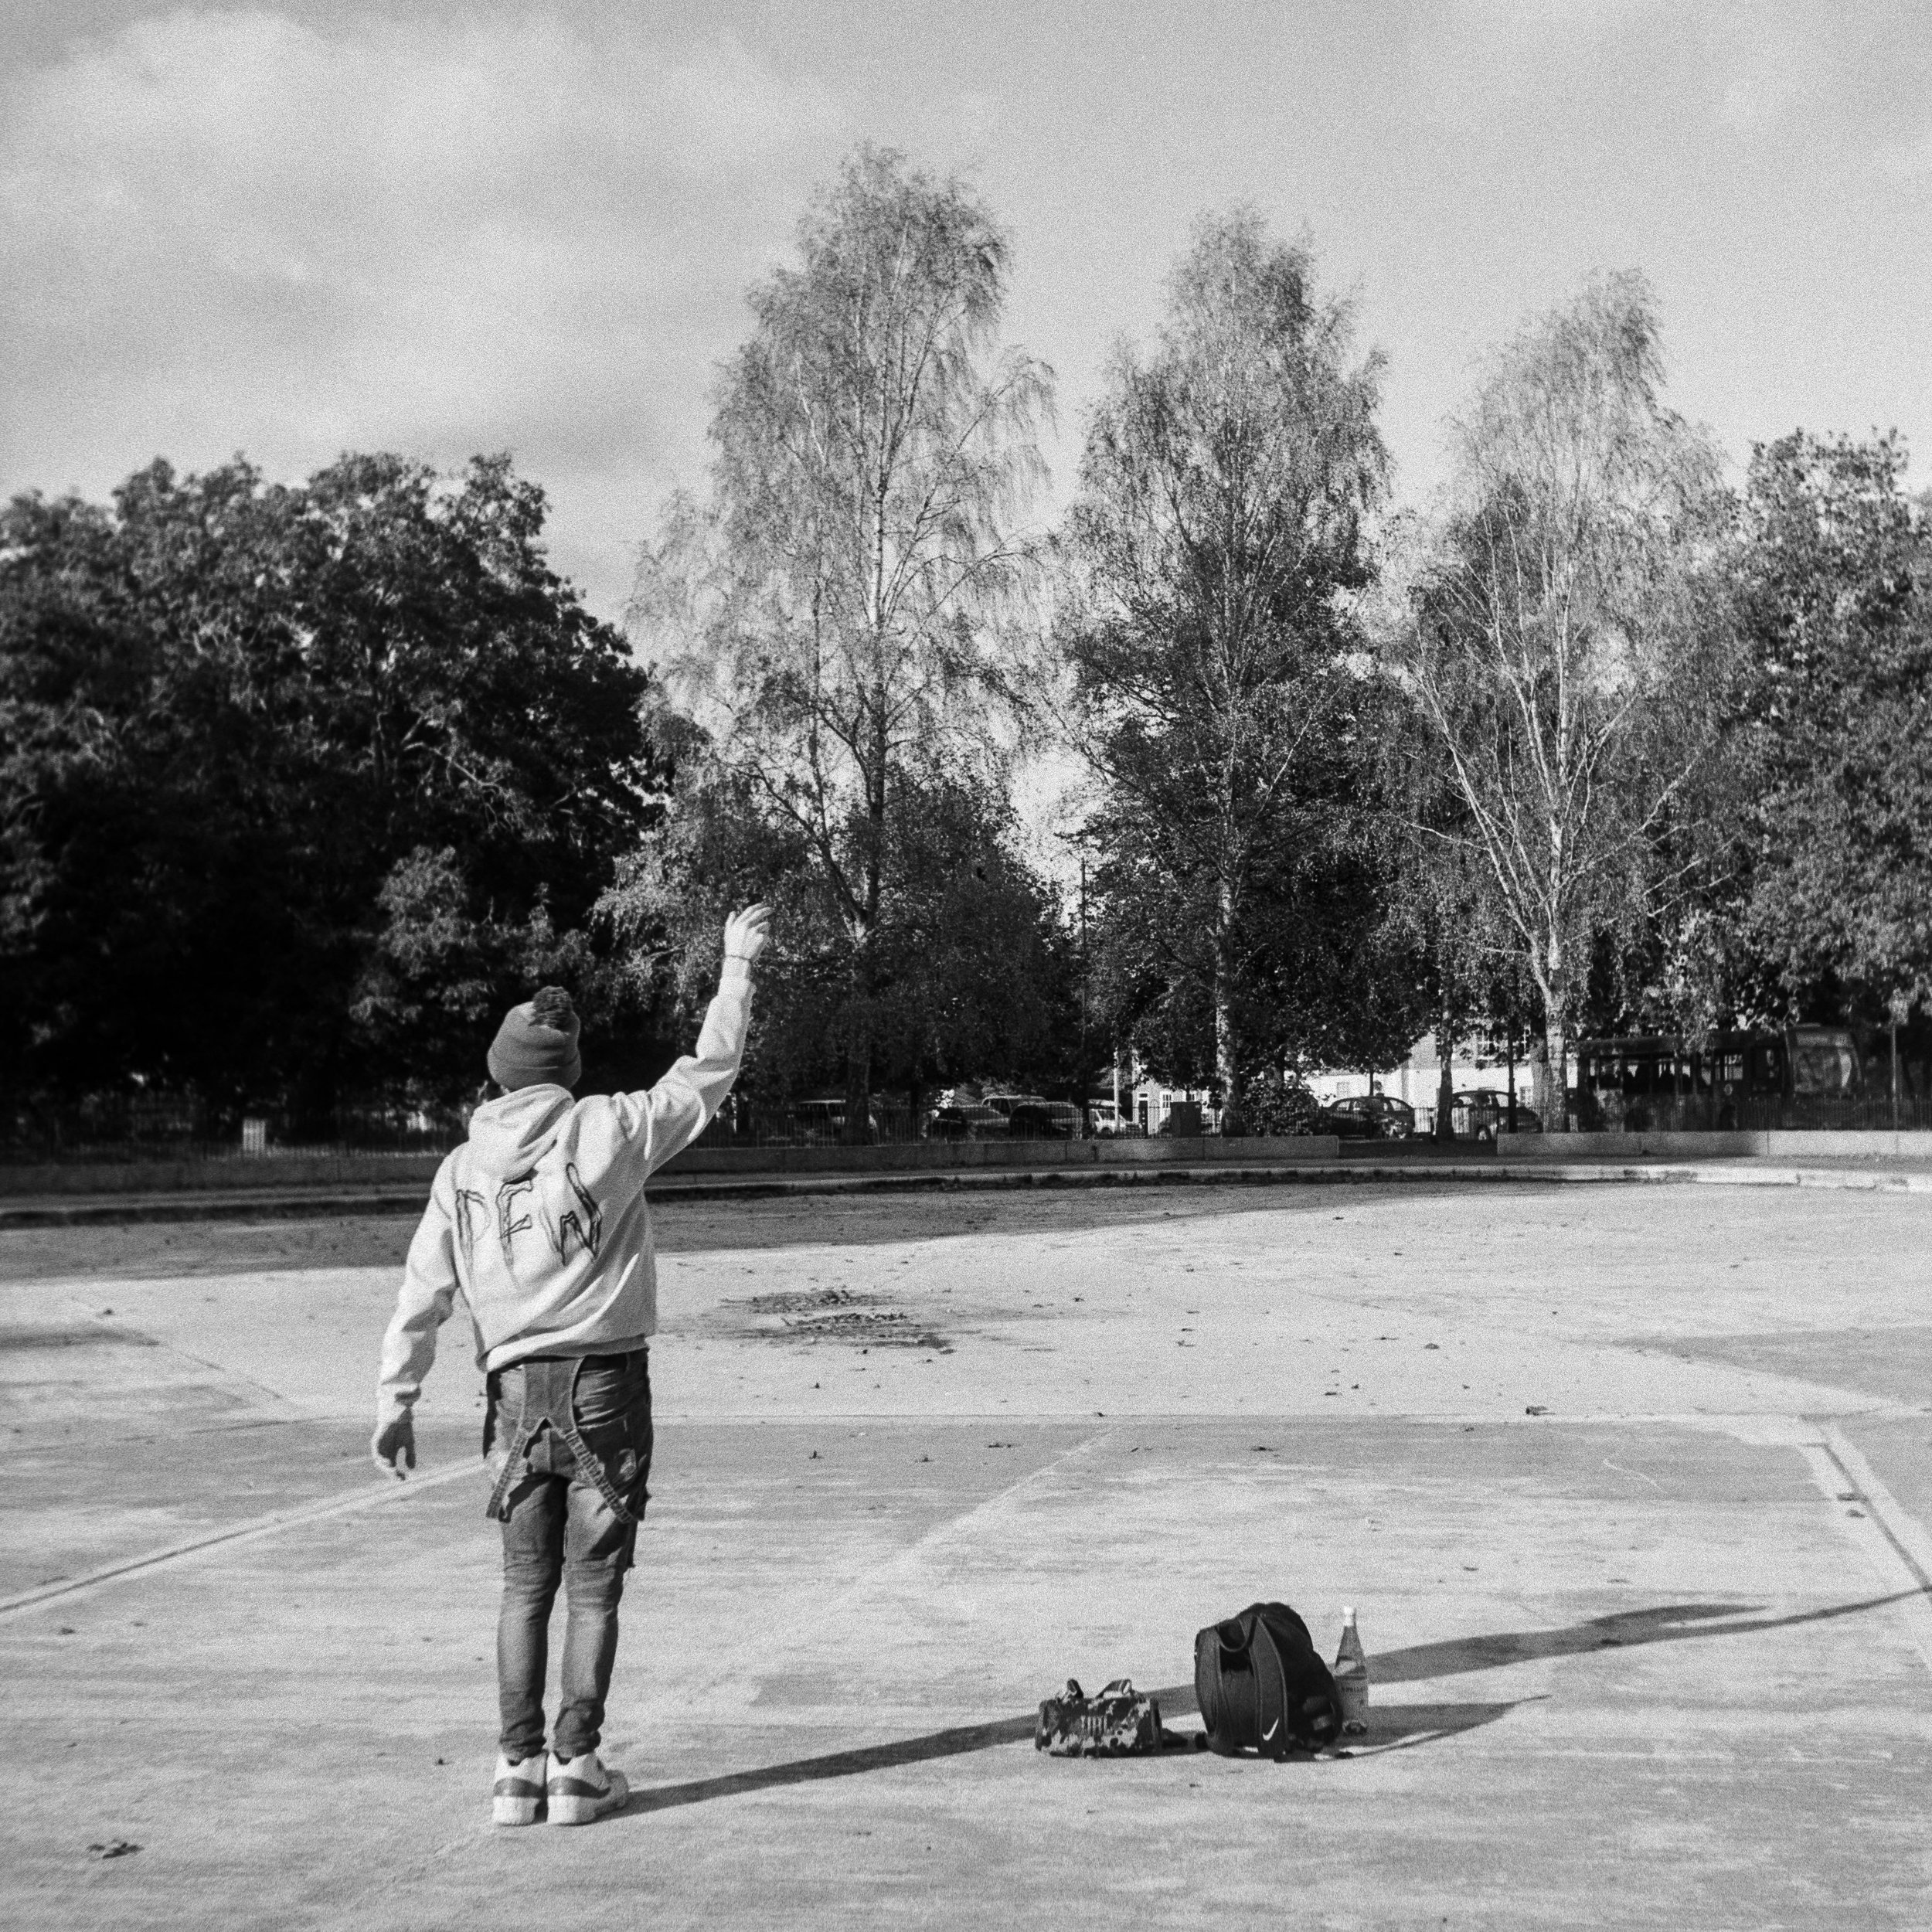
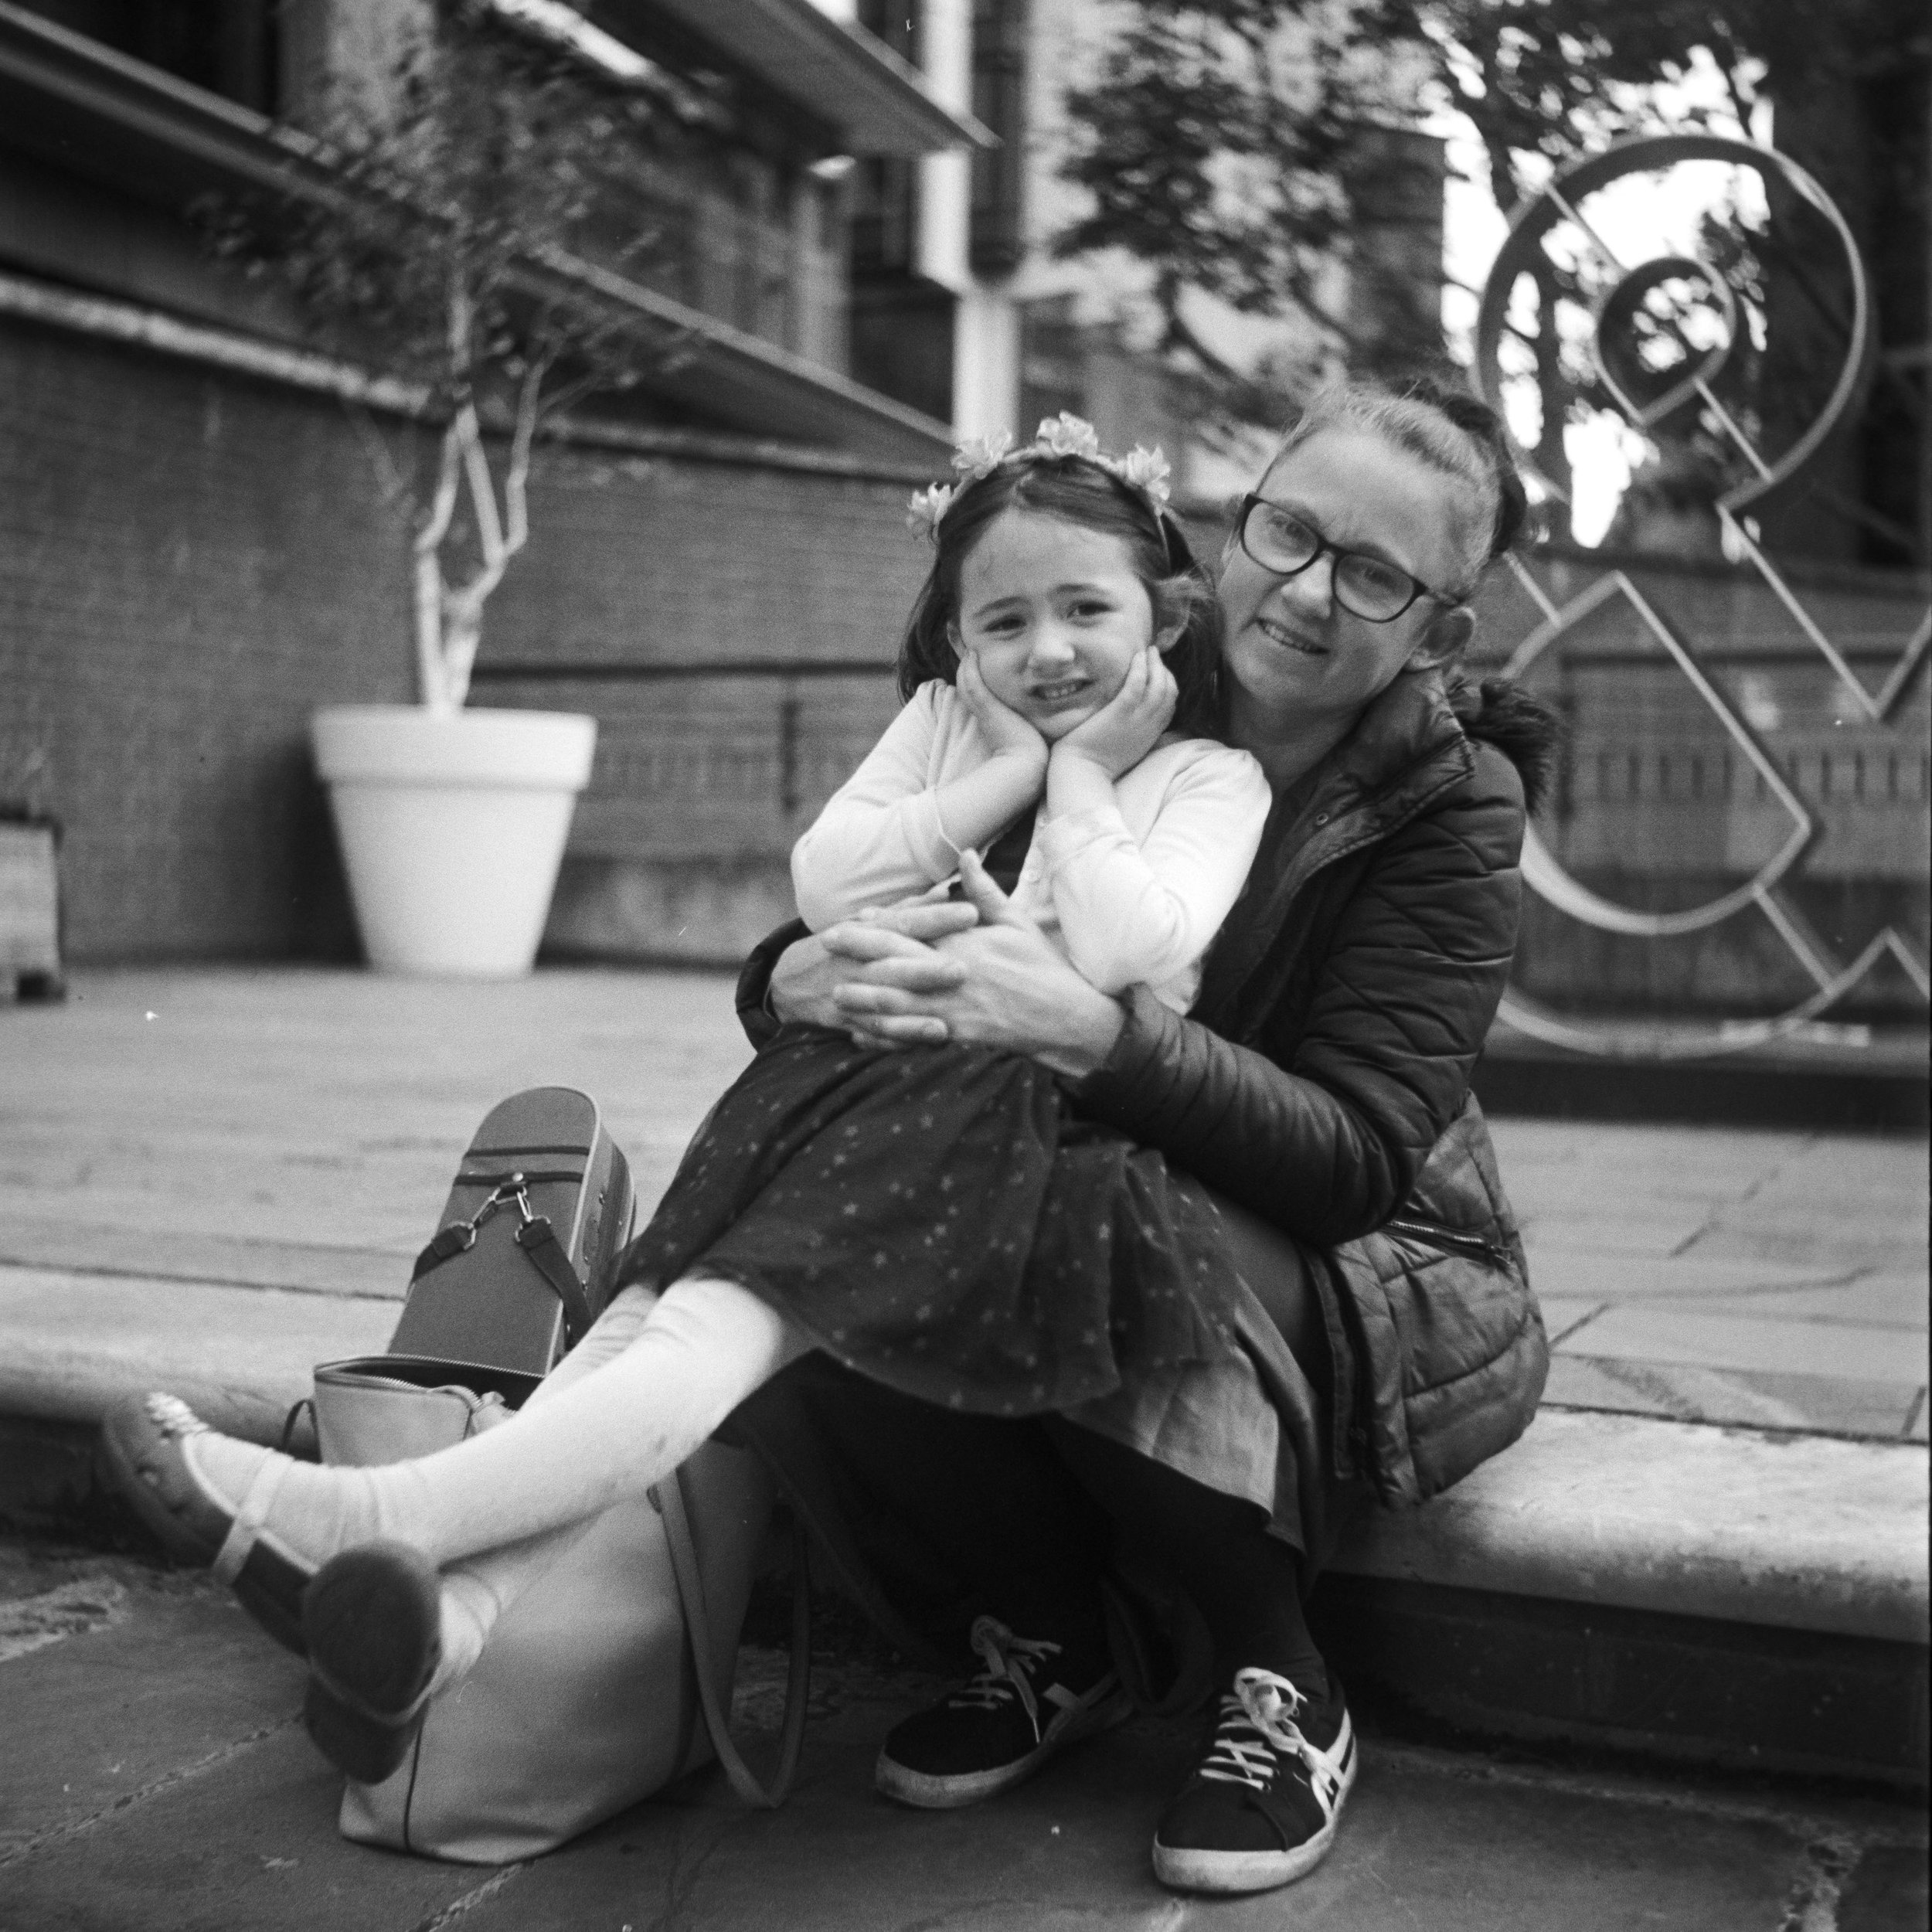
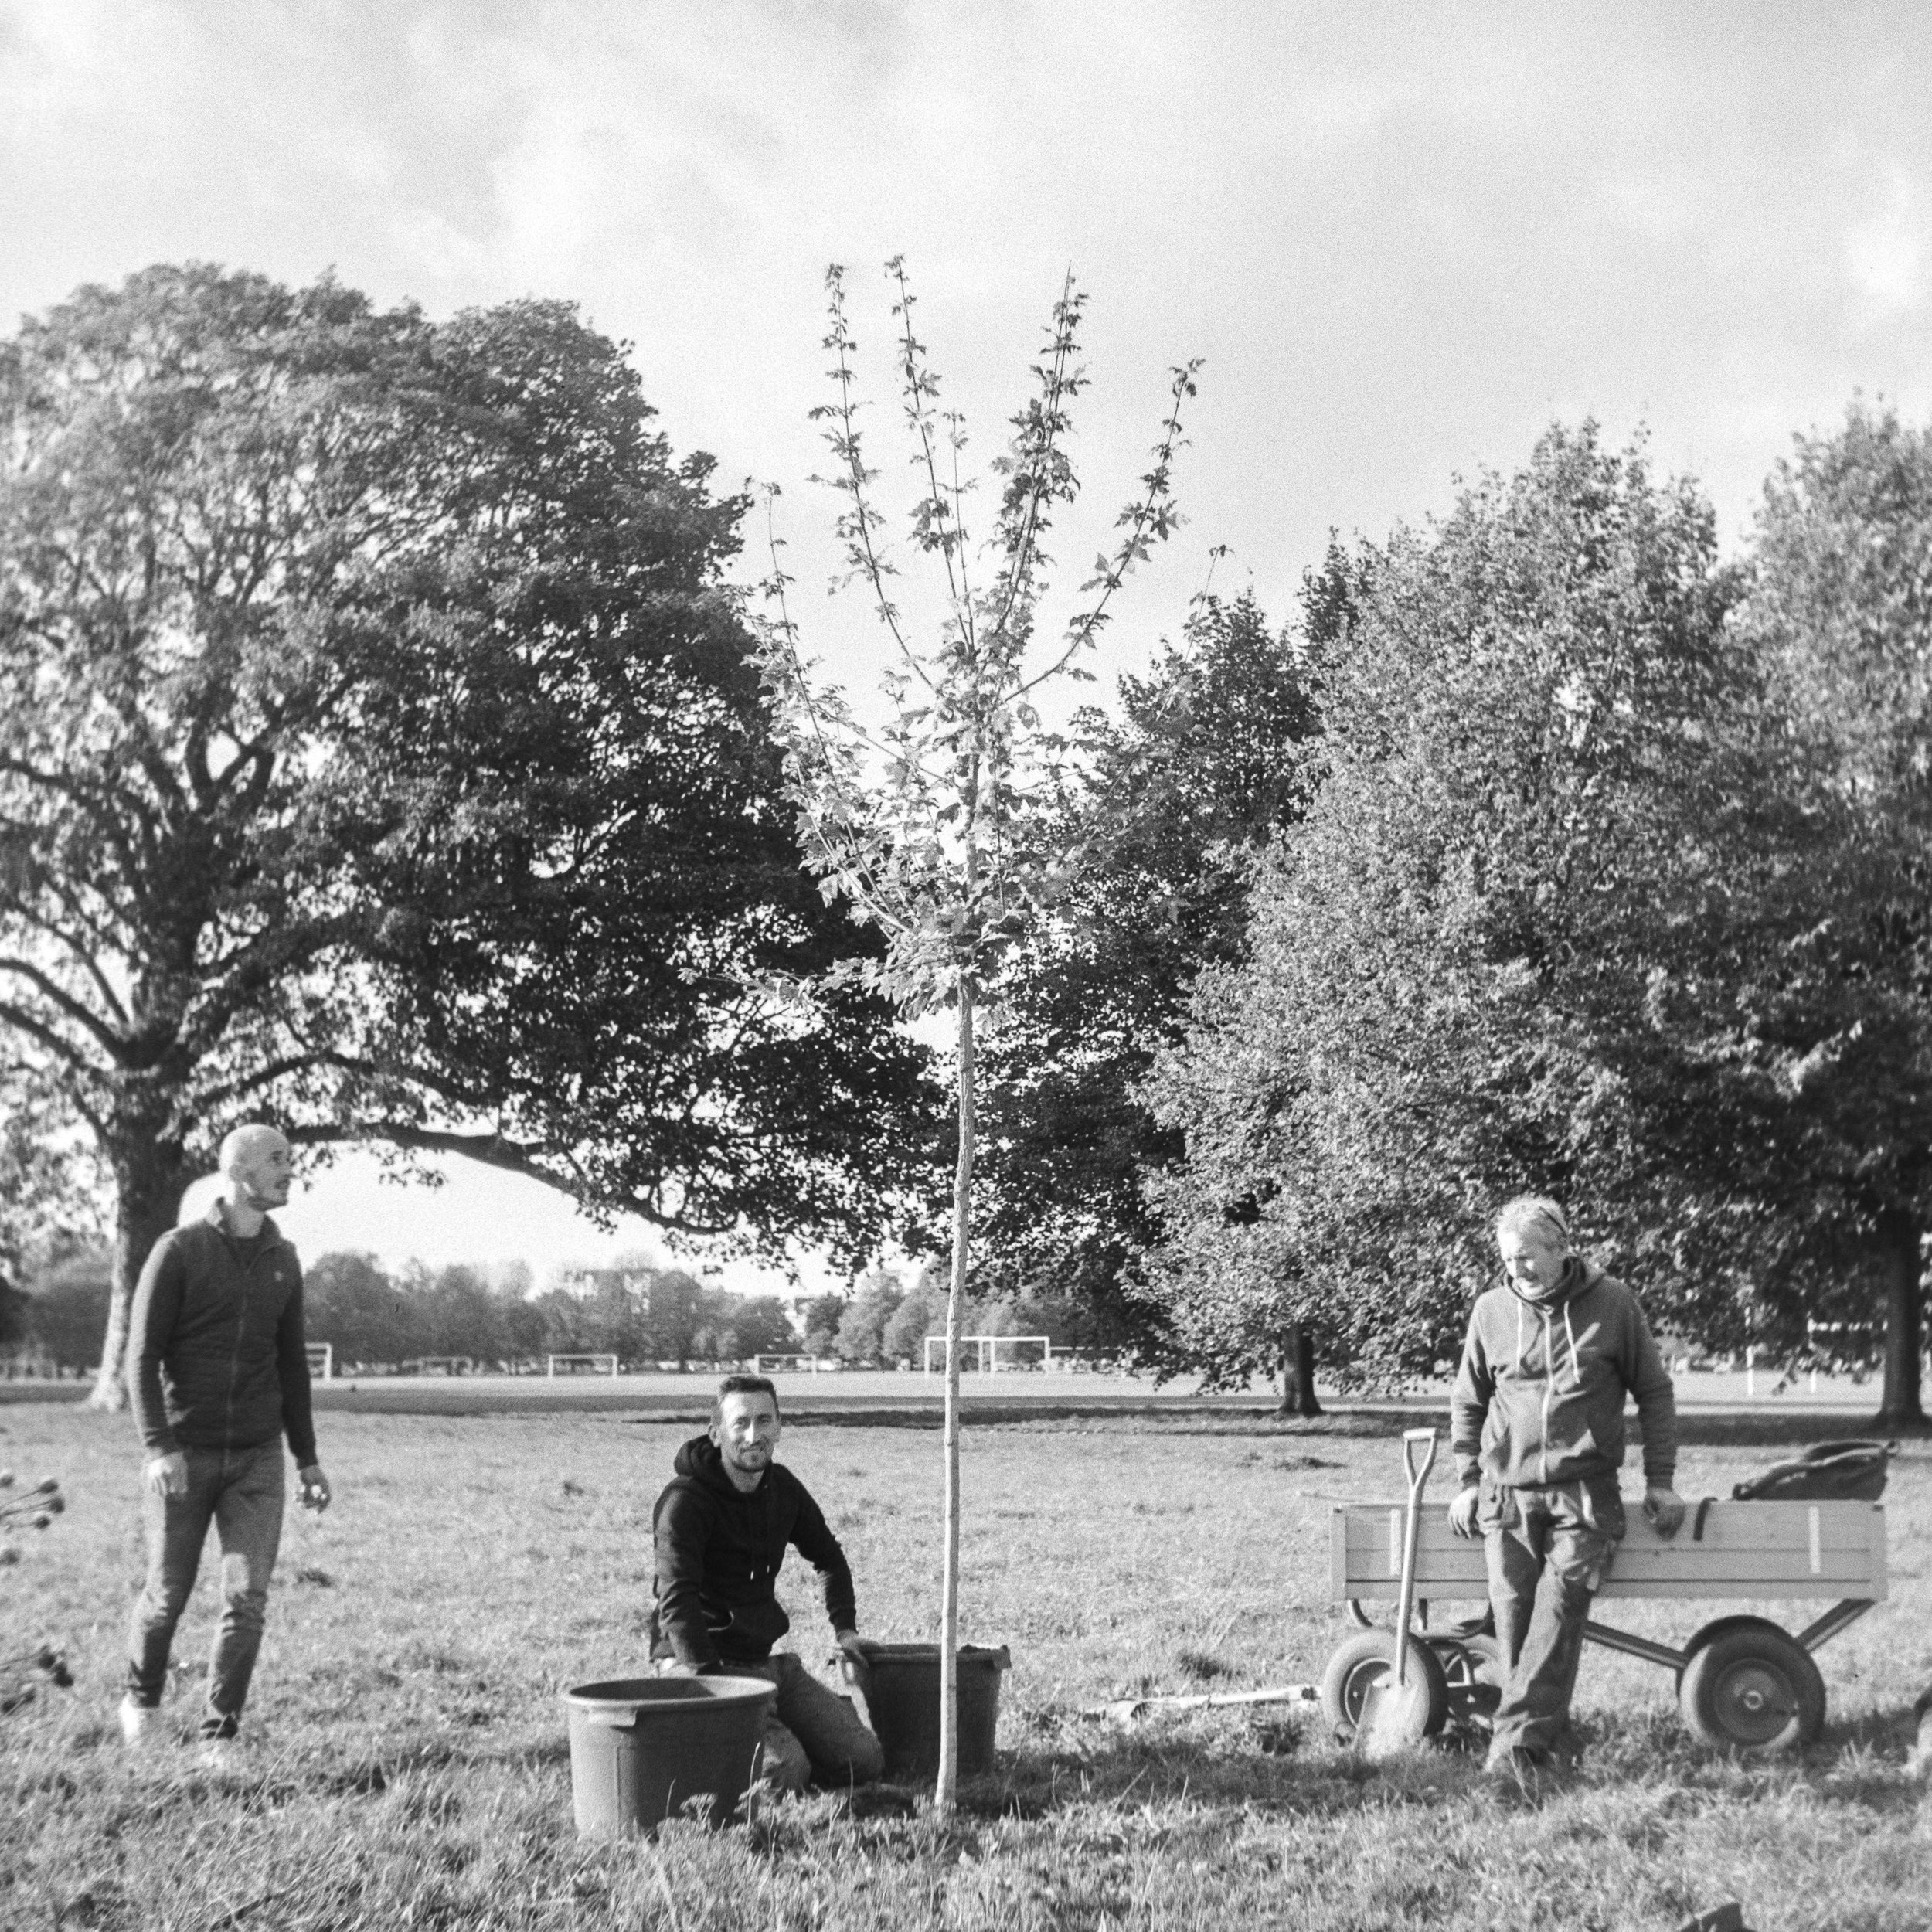
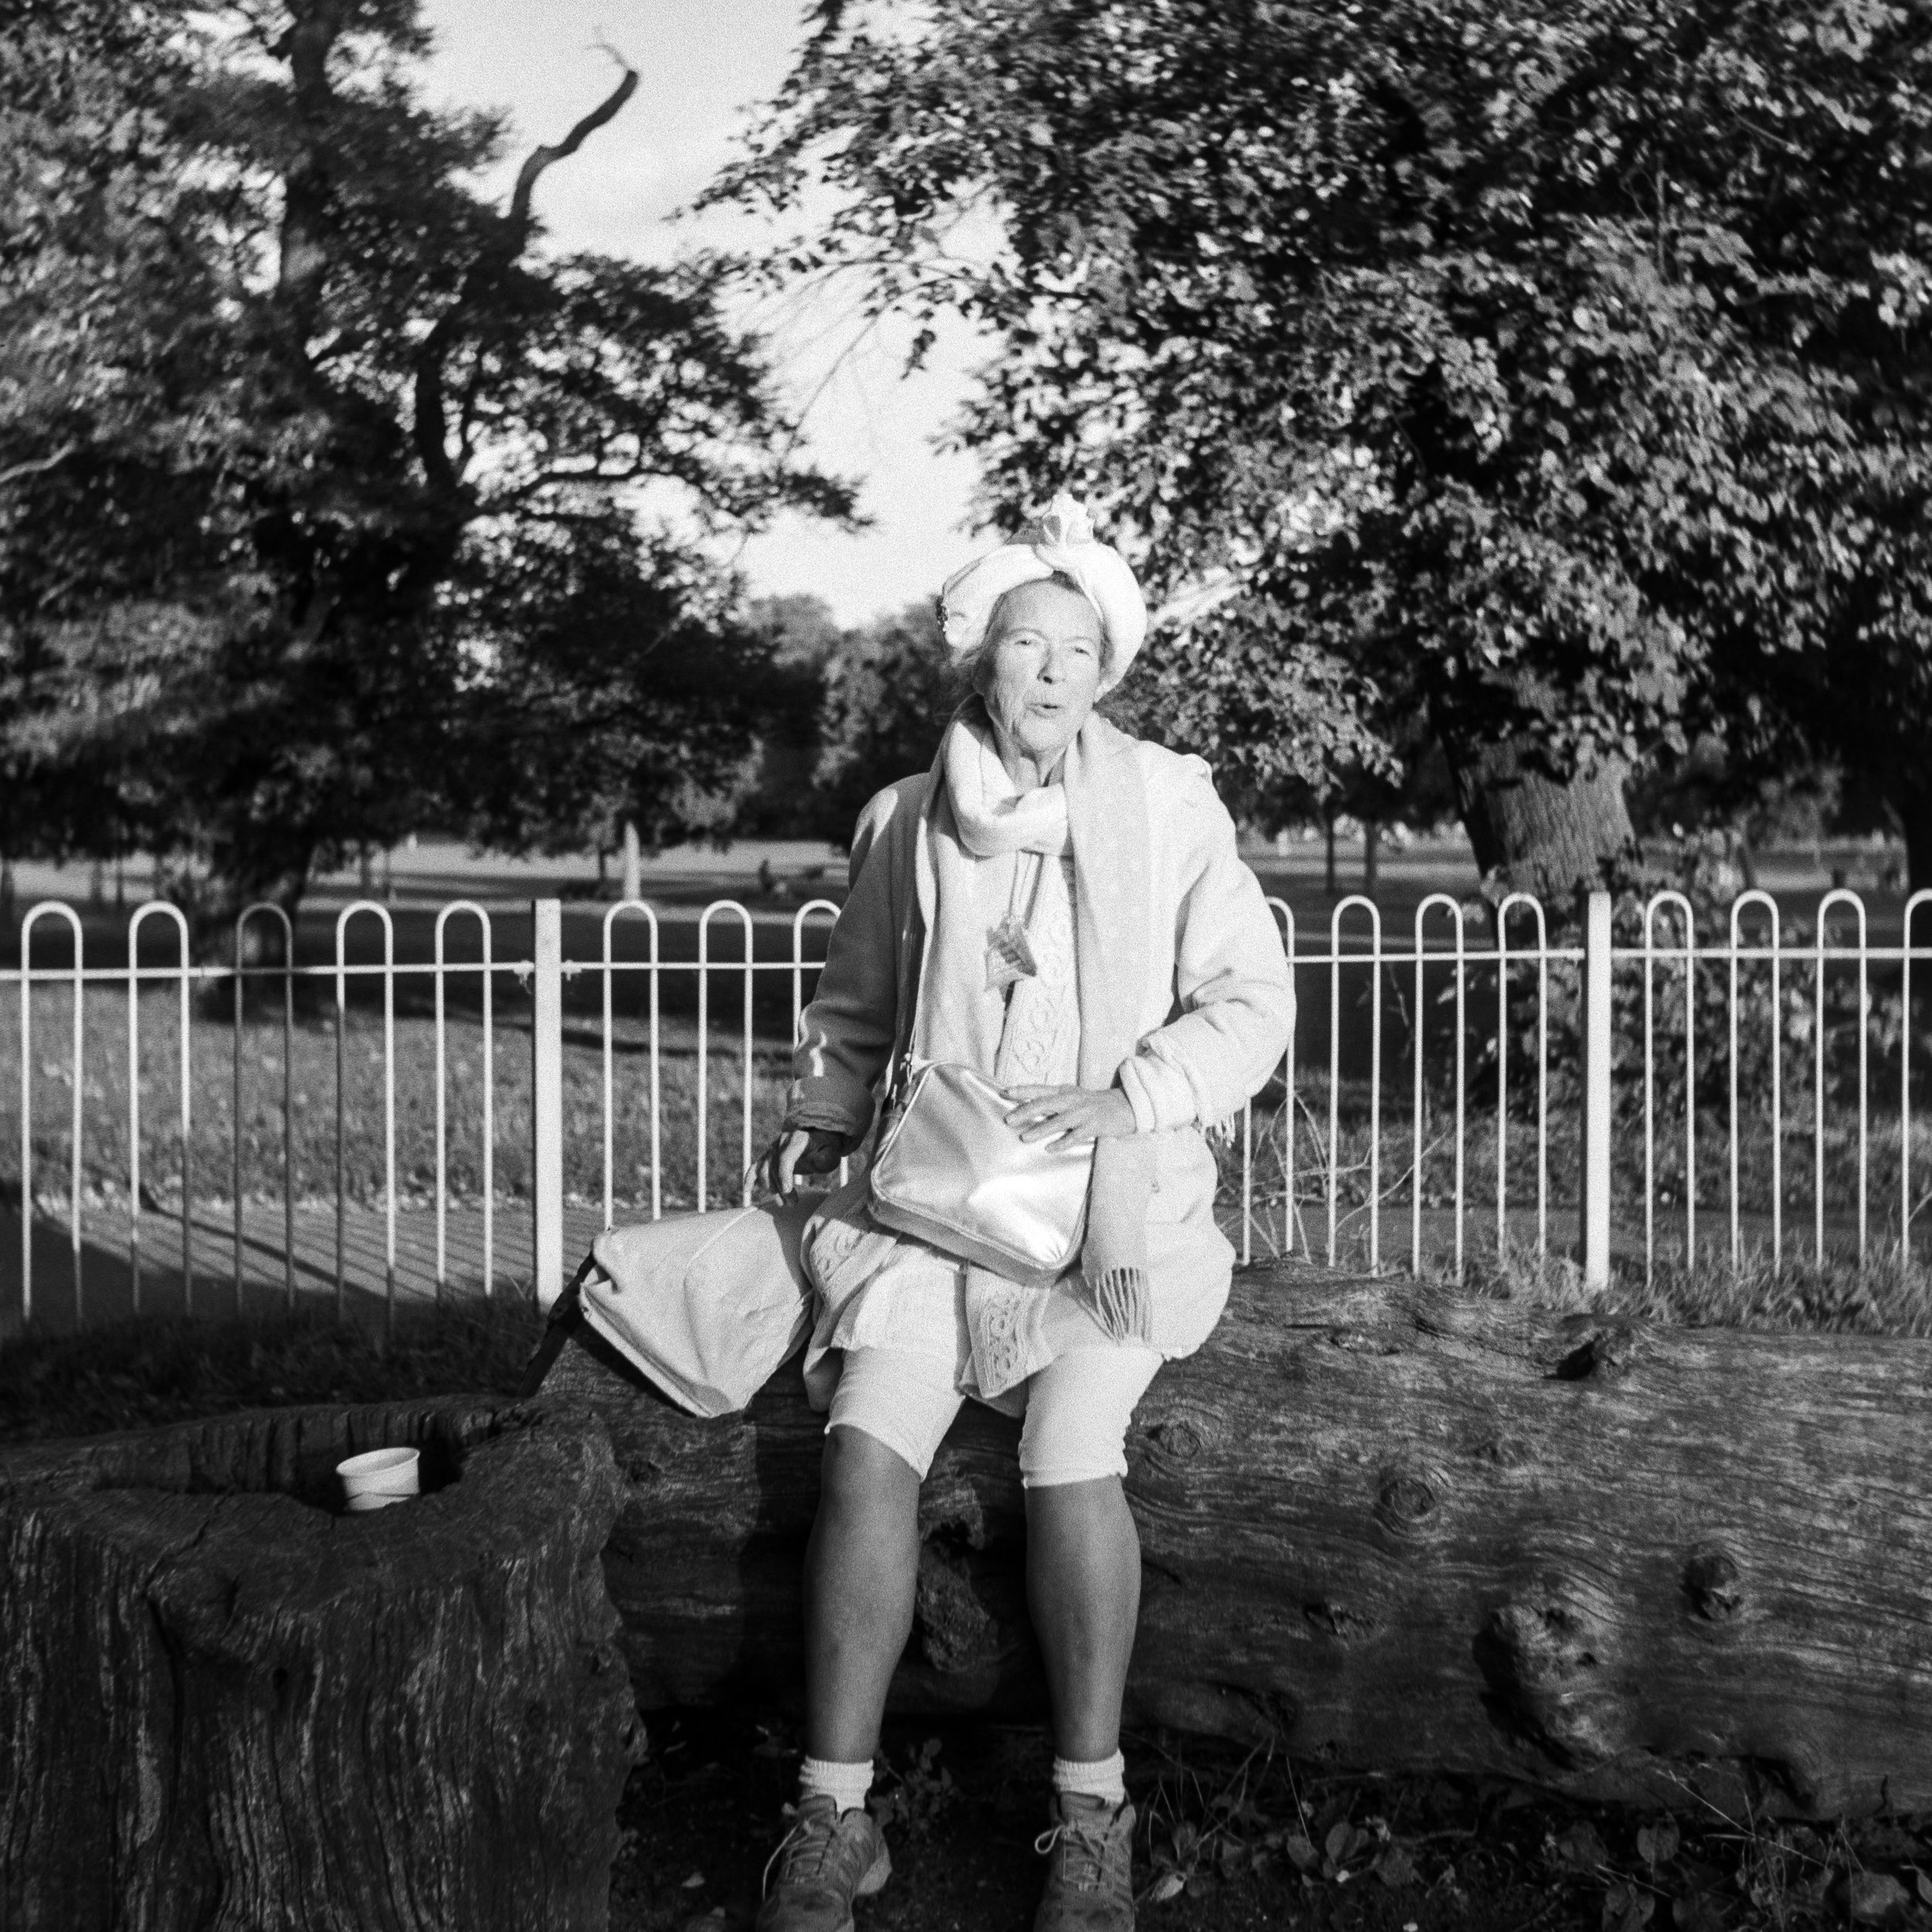
Here is a video that walks you through how I pushed these frames throughout my development process - how I took values from the data sheets, how I adjusted the processing times apart from standard, and how I think of these afterwards.
Pushing film vs Overexposing film
Overexposure brings a uniform increase in values across the frame, while push processing increases the values of highlights to a greater extent than that of the shadows. Overexposure results in a brighter image overall, while pushing in a more contrasty image. Pushing film accentuates the appearance of grain while overexposure does not. But pushing film is a viable solution to shooting under low light.
That said, there is no reason why you can’t overexposure AND push film - why not both?
The two are not related in any way, certainly not either-or. I personally overexpose my film in-camera where possible and give a slight overdevelopment.
But assuming that we are only going with one of the two, the main differences can be understood in terms of contrast and grain structure.
Overexposure is a blanket increase in brightness across all zones in a frame; highlights, mid-tones, shadows, everything. It simply involves opening up the aperture and dropping the shutter speed. You increase shadow detail as more light is allowed in even in the darker parts. Overexposing generally yields more detail for this reason.
Pushing on the other hand does not increase the amount of detail but rather, the contrast. It will certainly increase global contrast, but depending on what’s in the image, local contrast can be raised as well.
As explained above, pushing film boosts highlight brightness at a higher rate than it does to the shadows. This disproportionate enhancement in density effectively increases the contrast throughout the frame.
The details in the shadows does not increase significantly; push development does not invent details that were not recorded during exposure.
A by-product of pushing, or the main product for some, is an increased graininess in the photos, which does not happen with overexposure itself.
Pushing film vs High ISO film
The decision between pushing film and using a higher ISO film depends on your subject, your preferred grain and contrast level, and economic considerations. Generally, start with a film that is fast enough for the lighting conditions you shoot in and has the grain structure you enjoy. Then, push to control contrast.
Let’s break down these factors one by one below.
Subject/ lighting conditions
The subject and lighting dictates the choice of film and whether to push - it is the consideration that should come before anything else.
Choose the film speed that is able to record the darkest detail that you envision in your subject, under the type of light you shoot in.
For a specific breakdown of what light conditions each film speed could cover, as a starter, refer to my other article How to Choose your 35mm Film (ISO + Brand), where I discussed the matter in greater detail.
Another consideration, in relation to the subject, is how much shadow detail you need. For certain subjects like environmental portraits, you might want to retail more detail as certain parts of the body may be in shadows but contain important detail.
For other genres like photojournalism/ reportage, maybe you don’t need as much detail in the shadows. Street photography as well, depending on your personal style, shadow detail may not be as critical.
In short, choose the minimum film speed that can give you the details that you need, assuming that you don’t feel strongly about grain.
Stylistic consideration - grain structure
If you are a hardcore grain lover, go for a film base that has a rougher grain structure.
It is true that you can also increase the appearance of graininess by pushing. But usually users are not advised to push beyond 2 stops. If the more pronounced grain after a 2-stop push still does not satisfy you, you will surely have to go for a faster film to begin with.
But even comparing two films with a speed difference within 2 stops, it is often the case that the graininess of the slower film pushed is still less than that of the equivalent faster film developed straight.
For example, see the comparison below of a 125 film pushed to 200, and a 200 film developed straight.
Ilford Fp4+ 125 pushed to EI 200.
Rollei SuperPan 200 developed at EI 200.
This comparison can obviously come across a rather arbitrary, because the grain structure is highly dependent on the film stock itself, not just the film speed.
But generally, for professional slow films like Fp4+ 125, pushing it one stop does not create a huge difference in the appearance of grain.
So if you would like to minimise grain, pushing is the more attractive option. If you are die-hard fan of grains, go for a faster film.
Stylistic consideration - contrast
As explained above, pushing film gives you more contrast by raising highlights relatively more than shadows.
Switching to a faster film does not necessarily have such an effect; it increase the amount of detail capable of being recorded throughout the entire frame.
High speed films can still give a lot of contrast but it has to do with the film stock itself, not as a direct result of using a faster film.
Economic considerations
If you are looking to shoot a major project on a film, or simply see film as your primary medium of producing work, the economy of your film process is not something you can neglect.
Generally, slower films cost less than faster films. So if you buy in bulk, say, north of 50 rolls, this difference does add up.
The other consideration is whether you are developing your own film.
If you are hoping to produce serious work on film, I would highly recommend that you take the development in-house. Not only to save costs, but to retail the creative control over your negatives.
But that said, it may not be possible for working photographers to take up the workload of developing as well.
Anyway, if you develop your own film, pushing a slower film is a great way of securing more density on your negatives at negligible extra cost. One, buying the slower film over the faster film is already massive savings; two, pushing merely involves extending the development time but not the amount of developer used.
But if you develop with a lab, they usually charge an extra quid or two for push processing. In that case, you will have to see if the cost-saving of buying the slower film offsets the increase in development cost.
How to calculate the development time for push processing?
To push colour negative film, the times are the same regardless of the film stock as the C-41 process is standard. The general rule is to increase development time by 30% per stop, keeping all other stages constant. For black and white film, follow recommendations by film manufacturer available on data sheets. Otherwise, multiply 1.33 for every stop pushed, divide for every stop pulled.
Color negative (C-41)
Some film manufacturers have published elaborate instructions on push development times, such as Cinestill.
You can access the online pdf here. Refer to the below for a section on development times.

Colour Negative Film (C-41) Push/Pull Processing Development Chart
As the C-41 chemistry works the same for all films, you may want to take the values in the table above as reference for colour negative films in general.
Black and white
Black and white film manufacturers usually publish more elaborate instructions regarding push and pull processing of their films, because there are more variables when it comes to black and white films as compared to colour negative.
The black and white darkroom procedure is designed to leave much room for creative discretion and experimentation. Times will differ drastically depending on film-developer combination, developer dilution and the extent of pushing/ pulling.
The key is to refer to the official published times as a starting point. These times are ascertained by manufacturers under lab conditions, which although differs significantly from actual everyday situations, which is a good enough proxy to begin with.
With films on the market today, their technical data is publicly available assets. Just type into Google ‘(Manufacturer) (Film Stock) (ISO) data sheet’ and you will find it.
I personally do not recommend venturing too far away from the published guidance.
If you really have to, it is generally the rule of thumb to multiply 1.33 per stop pushed with the standard development time, and divide by 1.33 per stop pulled. So if you wish to push 3 stops, you would multiply 1.33^3= 2.35 to the standard processing time.
In such case, do experiment with slight increments every time to arrive at the optimal workflow for your purposes.
Push and Pull film time chart
Below is a downloadable master file covering the recommended development times of 24 common black and white films widely available on the market today.
Here are a few things I would like to draw your attention to:
This file only contains information on black and white emulsions because that of colour negative is standard, as mentioned in the section above
All development times correspond to 20℃, unless otherwise specified in brackets
All development times are expressed in decimals, except for a select few expressed in minute:second

Enjoy! Otherwise, simply refer to the screen captured charts below for the specific film stock you are looking for.
Ilford Hp5+ 400
Ilford Hp5+ 400 push and pull time chart
Ilford Fp4+ 125
Ilford Fp4+ 125 push and pull time chart
Ilford PanF Plus
Ilford PanF+ push and pull time chart
Ilford Delta 100
Ilford Delta 100 push and pull time chart
Ilford Delta 400
Ilford Delta 400 push and pull time chart
Ilford Delta 3200
Ilford Delta 3200 push and pull time chart
Ilford SFX 200
Ilford SFX 200 push and pull time chart
Ilford Kentmere Pan 100
Ilford Kentmere Pan 100 push and pull time chart
Ilford Kentmere Pan 400
Ilford Kentmere Pan 400 push and pull time chart
Kodak T-Max 100

Kodak T-Max 100 push and pull time chart
Kodak T-Max 400

Kodak T-Max 400 push and pull time chart
Kodak T-Max 3200
Kodak T-Max 3200 push and pull time chart
Kodak Tri-X 400

Kodak Tri-X 400 push and pull time chart
Fujifilm Neopan Acros II 100
Fujifilm Neopan Acros II 100 push and pull time chart
Rollei RPX 100

Rollei RPX 100 push and pull time chart
Rollei RPX 400

Rollei RPX 400 push and pull time chart
Rollei Retros 80S

Rollei Retro 80S push and pull time chart
Rollei Retro 400S

Rollei Retro 400S push and pull time chart
Rollei SuperPan 200

Rollei SuperPan 200 push and pull time chart
Bergger Pancro 400

Bergger Pancro 400 push and pull time chart
CineStill BwXX 250
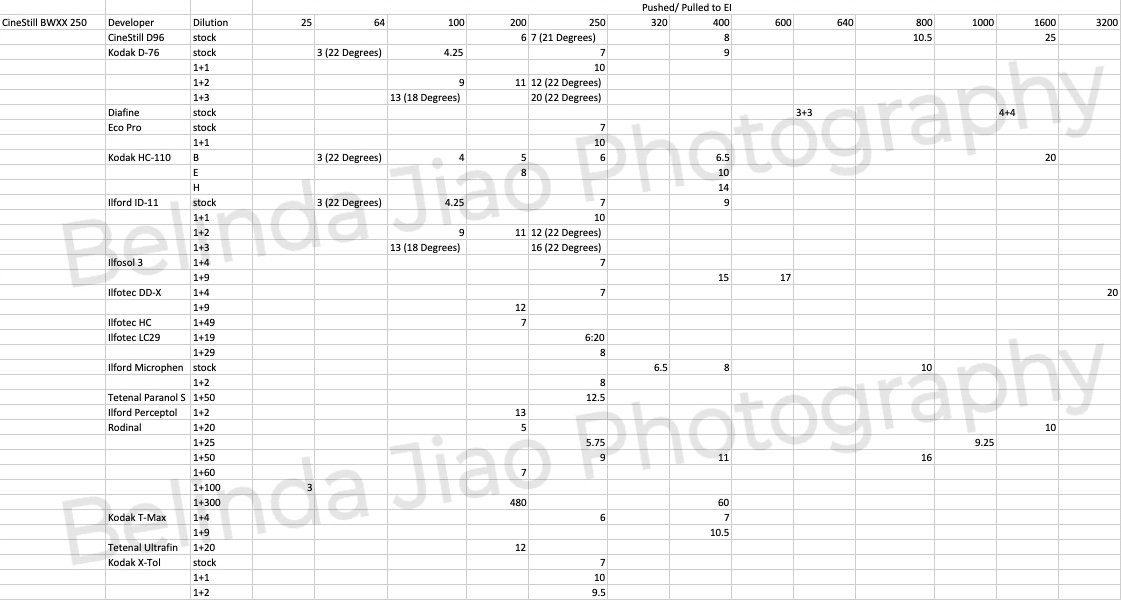
CineStill BwXX 250 push and pull time chart
Fomapan Classic 100

Fomapan Classic 100 push and pull time chart
Fomapan Classic 200

Fomapan Classic 200 push and pull time chart
Fomapan Classic 400

Fomapan Classic 400 push and pull time chart
Does pushing film increase exposure?
No. Exposure refers to the amount of light captured by the film in-camera, and has nothing to do with the development. Exposure is determined the moment the shutter is fired. It will only be altered afterwards if the frame is exposed to light again, giving a double exposure or more. Pushing refers to leaving the film in the developer longer and is a common way of compensating for underexposure.
The precise meaning of pushing has been a subject of debate among photographers. Some understand it to be purely extending the development time beyond the recommended standard. Others maintain that it is a combination of underexposure in-camera and prolonged development in the darkroom.
Personally I find this to be merely a debate on terminology and does not have an incredible impact on your process as long as you understand the concept of ‘Exposure Index’ (EI).
Pushing is therefore quite a separate concept from exposure. Depending on how you choose to understand the concept of pushing, it decreases exposure. Not of itself, but because of the photographer’s deliberate decision to shoot underexposed.
What pushing does increase though, is the density of silver buildup on the negative, which in turns give a brighter image finally.
Another way of understanding it is that the brightness of the final print depends on a variety of factors, one of which is the exposure in-camera, and the other the amount of development provided.
Summary
In this article, we talked about:
The purposes of pushing/ pulling film;
ISO vs Exposure Index (EI);
Whether you should push or pull your film;
Pushing vs overexposing film;
Pushing vs high ISO film;
How to calculate the time for pushing or pulling film;
Time charts for pushing and pulling film; and
Whether pushing film increases exposure.
SUBSCRIBE via the box on the left for more PRO tips, and follow me on Instagram (@_bjiao__) and let me know what you think in the comments!
Share this article on Pinterest too!
Keep shooting, keep creating!
The mission of this blog is to provide the best insider information in the photography industry, as openly as possible. You have direct access to my
first-person experience as an aspiring photographer who talks, but also works.
Honest opinion are rarely available as public resources because this is a competitive industry. Huge sums are made when such information is delivered in the form of mentorship and workshops.
This blog is a great way in which I cover my daily expenses, but also provide real value.
If you have learnt something that would be worth at least $10, please consider donating to the page. This enables me to keep creating content and helping more people sustainably.
Your continued support for the blog is appreciated!