As much as we are told to avoid harsh shadows in photography, learning how to use them to our advantage and to create them where appropriate will give your photos a completely new flavour.
In this article, you will learn firstly what are harsh, strong shadows, see examples of how they are used, and ways to create them.
Harsh shadows can be created in many ways. The factors that determine the harshness of the light are mainly the size and distance of light source. Naturally, daylight can cast excellent harsh shadows during mid afternoon time. You can also create harsh shadows using bare studio lights, with adding modifiers as an option.
To illustrate the formation of strong shadows, I will use a recent portrait shot I did on my friend Ricky Chan in Kwun Tong, Hong Kong.
If you find this helpful, SUBSCRIBE to my channel via the box on the left to make the most out of my blog! Also, do share it with people who might be interested. Shoot me an email/ DM to share your thoughts too.
Also, Pin this article to your Photography Techniques/ Camera & Gear boards in Pinterest if you find it helpful!


What are Harsh Shadows?
There are two main characteristics that goes into what we generally call ‘harsh’ shadows.
The first is the darkness of the shadow. This has to do with how light is prevented to hit the shadow areas.
The other is the abruptness of the shadow. This means that the shadow area is separated from the brighter areas by a clearly defined line, as opposed to fading into the brighter areas across a gradation.
These two things, while usually happens concurrently, are not entirely the same concepts.
And you need both of them to make these harsh shadows happen.
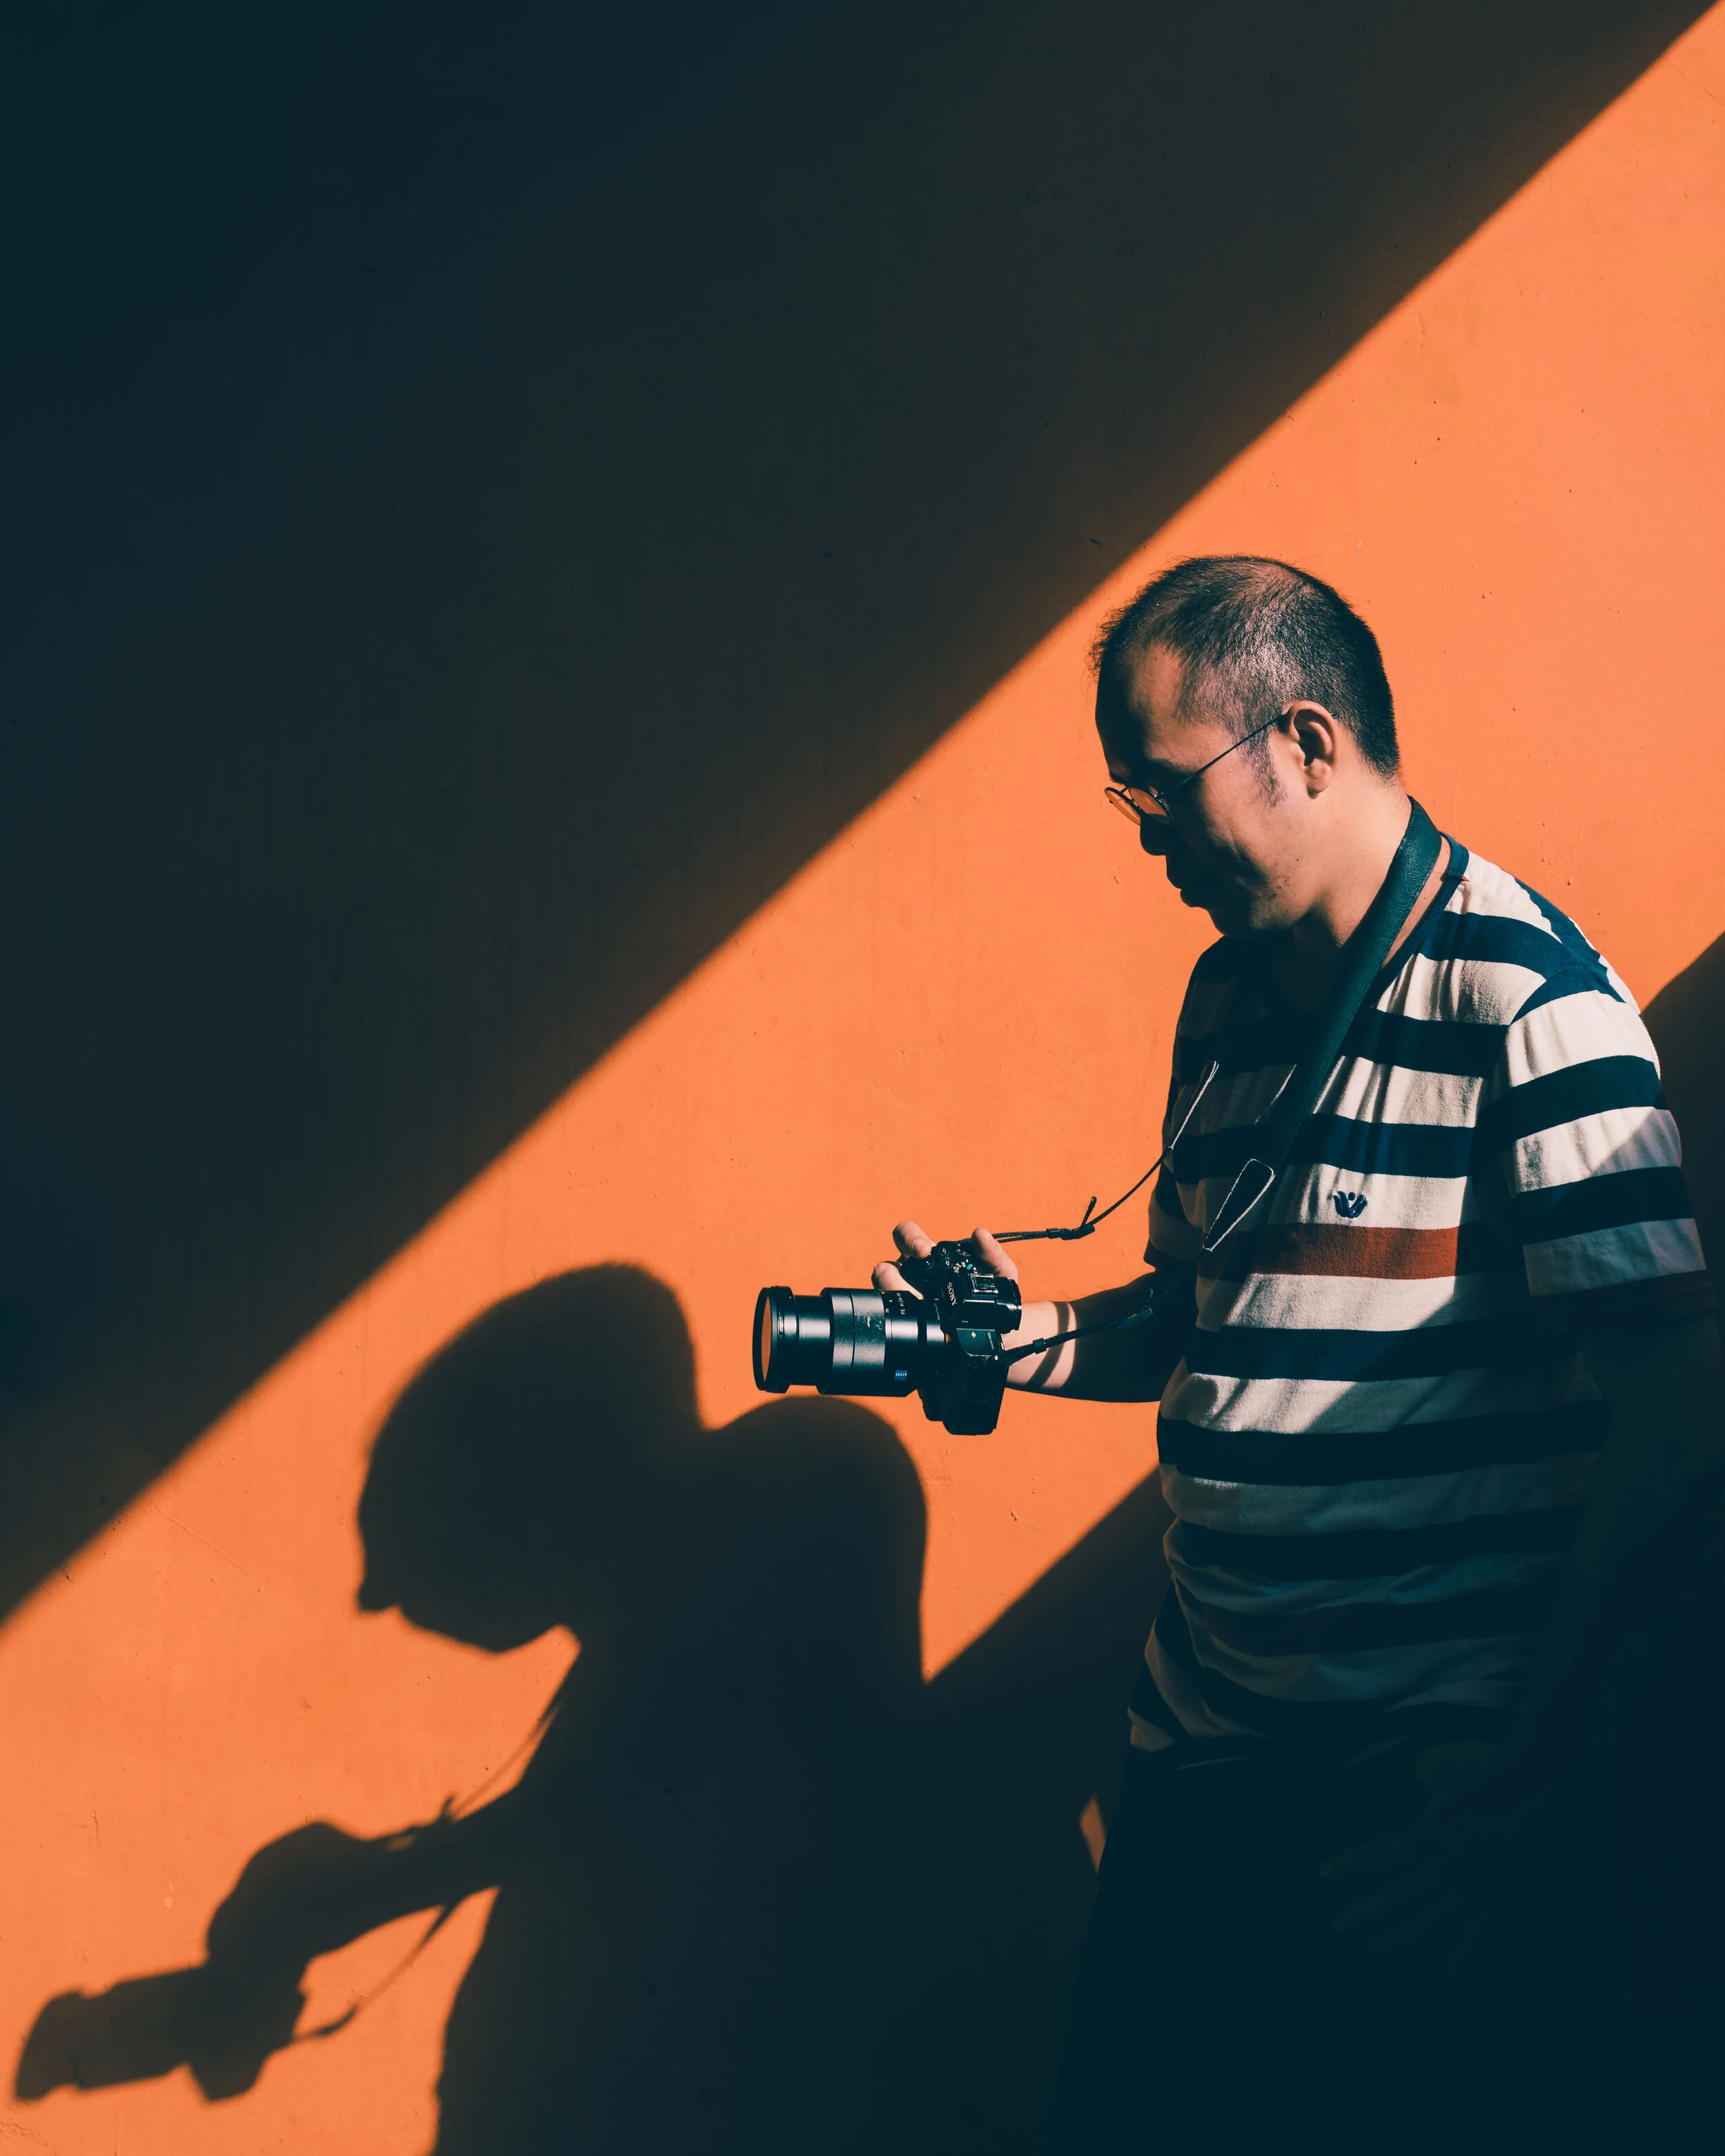
Here is an example of what harsh shadows typically look like.
I edited the shadows in post slightly but observe for the two points I have just made.
How do Harsh Shadows Naturally Occur?
Before we talk about creating harsh shadows, it would be beneficial to talk about recognising how they can occur potentially in our everyday lives.
In fact, you don’t need to create harsh shadows just to photograph them, because these spots are hidden in many corners and yet go unnoticed.
See this series of images in which I incorporated strong shadows based on what I found in my surroundings. You can take inspiration from these because the odds are, you will find these pretty shadows in your situation too, once you know what to look for.

Silhouettes
Silhouettes is an extreme form of backlighting. But most back-lit situations are good enough to create harsh shadows in your photos.
Cameras, when compared to the human eye, are less capable of perceiving various shades of darkness. Therefore, if one part of the frame is brightly lit relative to the rest (aka a high-contrast situation), the camera will drop almost everything in the darker areas into total blackness if you wish to preserve the detail in the brighter areas.
Look for situations in life where the light is coming from behind your subject. A good starting point is to try shoot pictures of people or objects against a sunset.
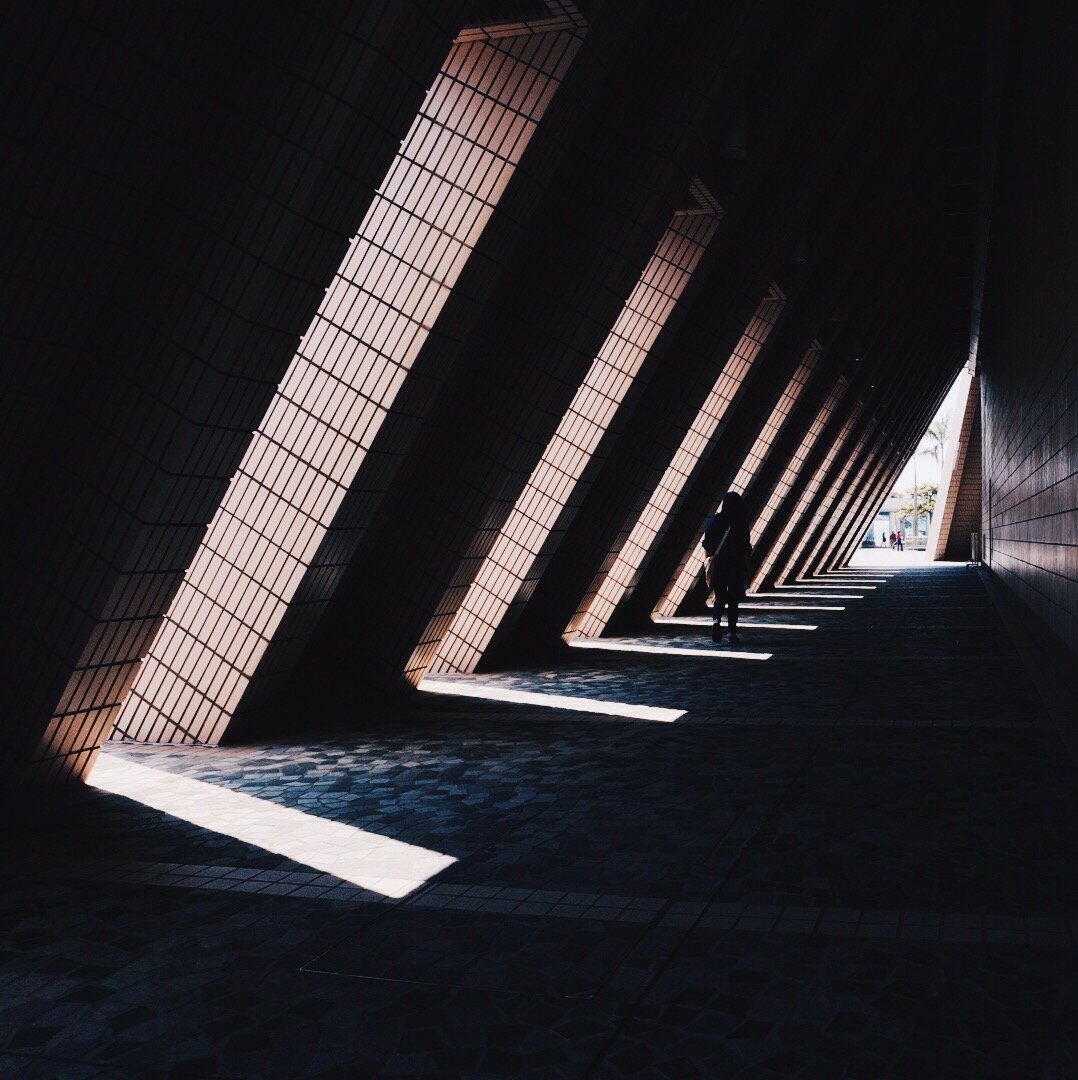
Gaps in Building Structures/ Plants
Daylight is usually the most intense during early to mid afternoon time. Therefore, when it hits directly onto a gap in the building structure, it will cast a shadow at an angle depending on the time of the day.
With this type of shadows, you can get a wide variety of harshness. As you can see from the examples above, the shadows cast have a sharp line but the colour isn’t necessarily very dark.
This is because light can bounce off other structures in that location to fill up the shadows formed.
The harshest shadows are therefore usually obtained in a narrow space, where other sources of light can’t spill over to light up the shadows.
To find these spots, start by noticing patterns in the area you usually hang out during the afternoon. The chances are, if you have a routine of some sorts, it doesn’t take you long before you start seeing regularities in how light and shadows fall in your circle of activity.
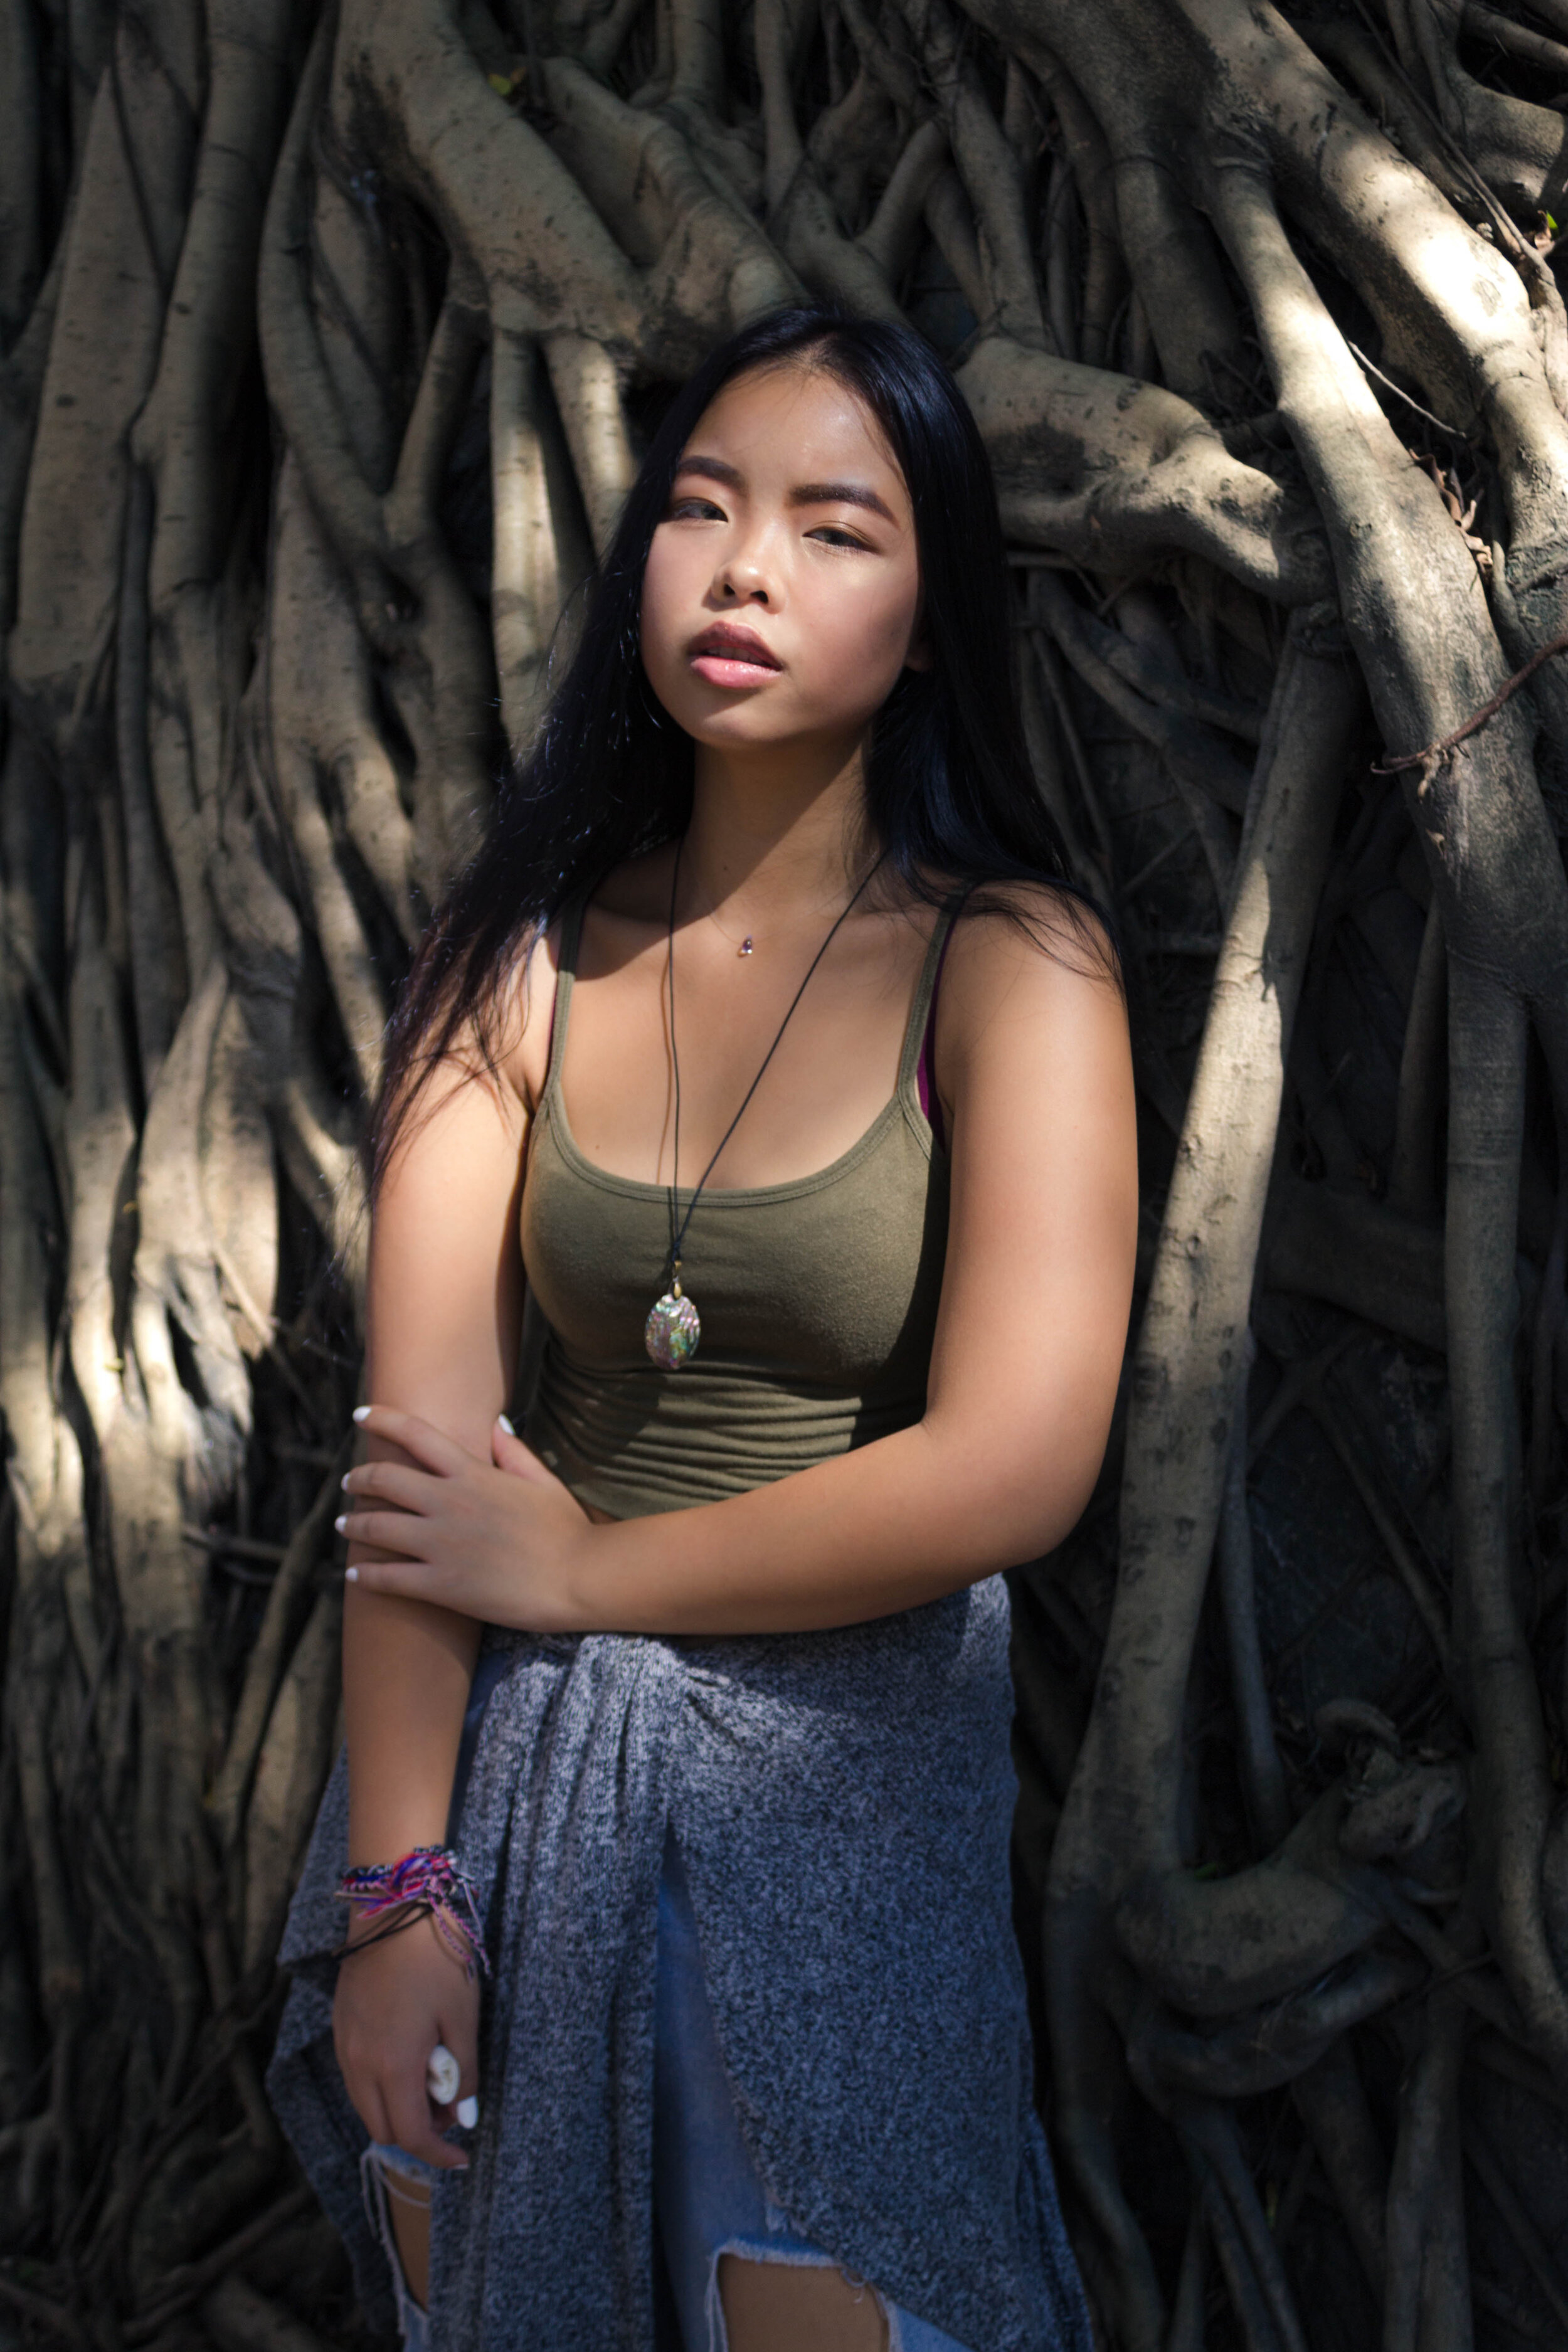
Shadows cast by leaves and branches is also a popular method to cast shadows, often in portraits because the size of the shadow is just right. It spread across the face nicely.
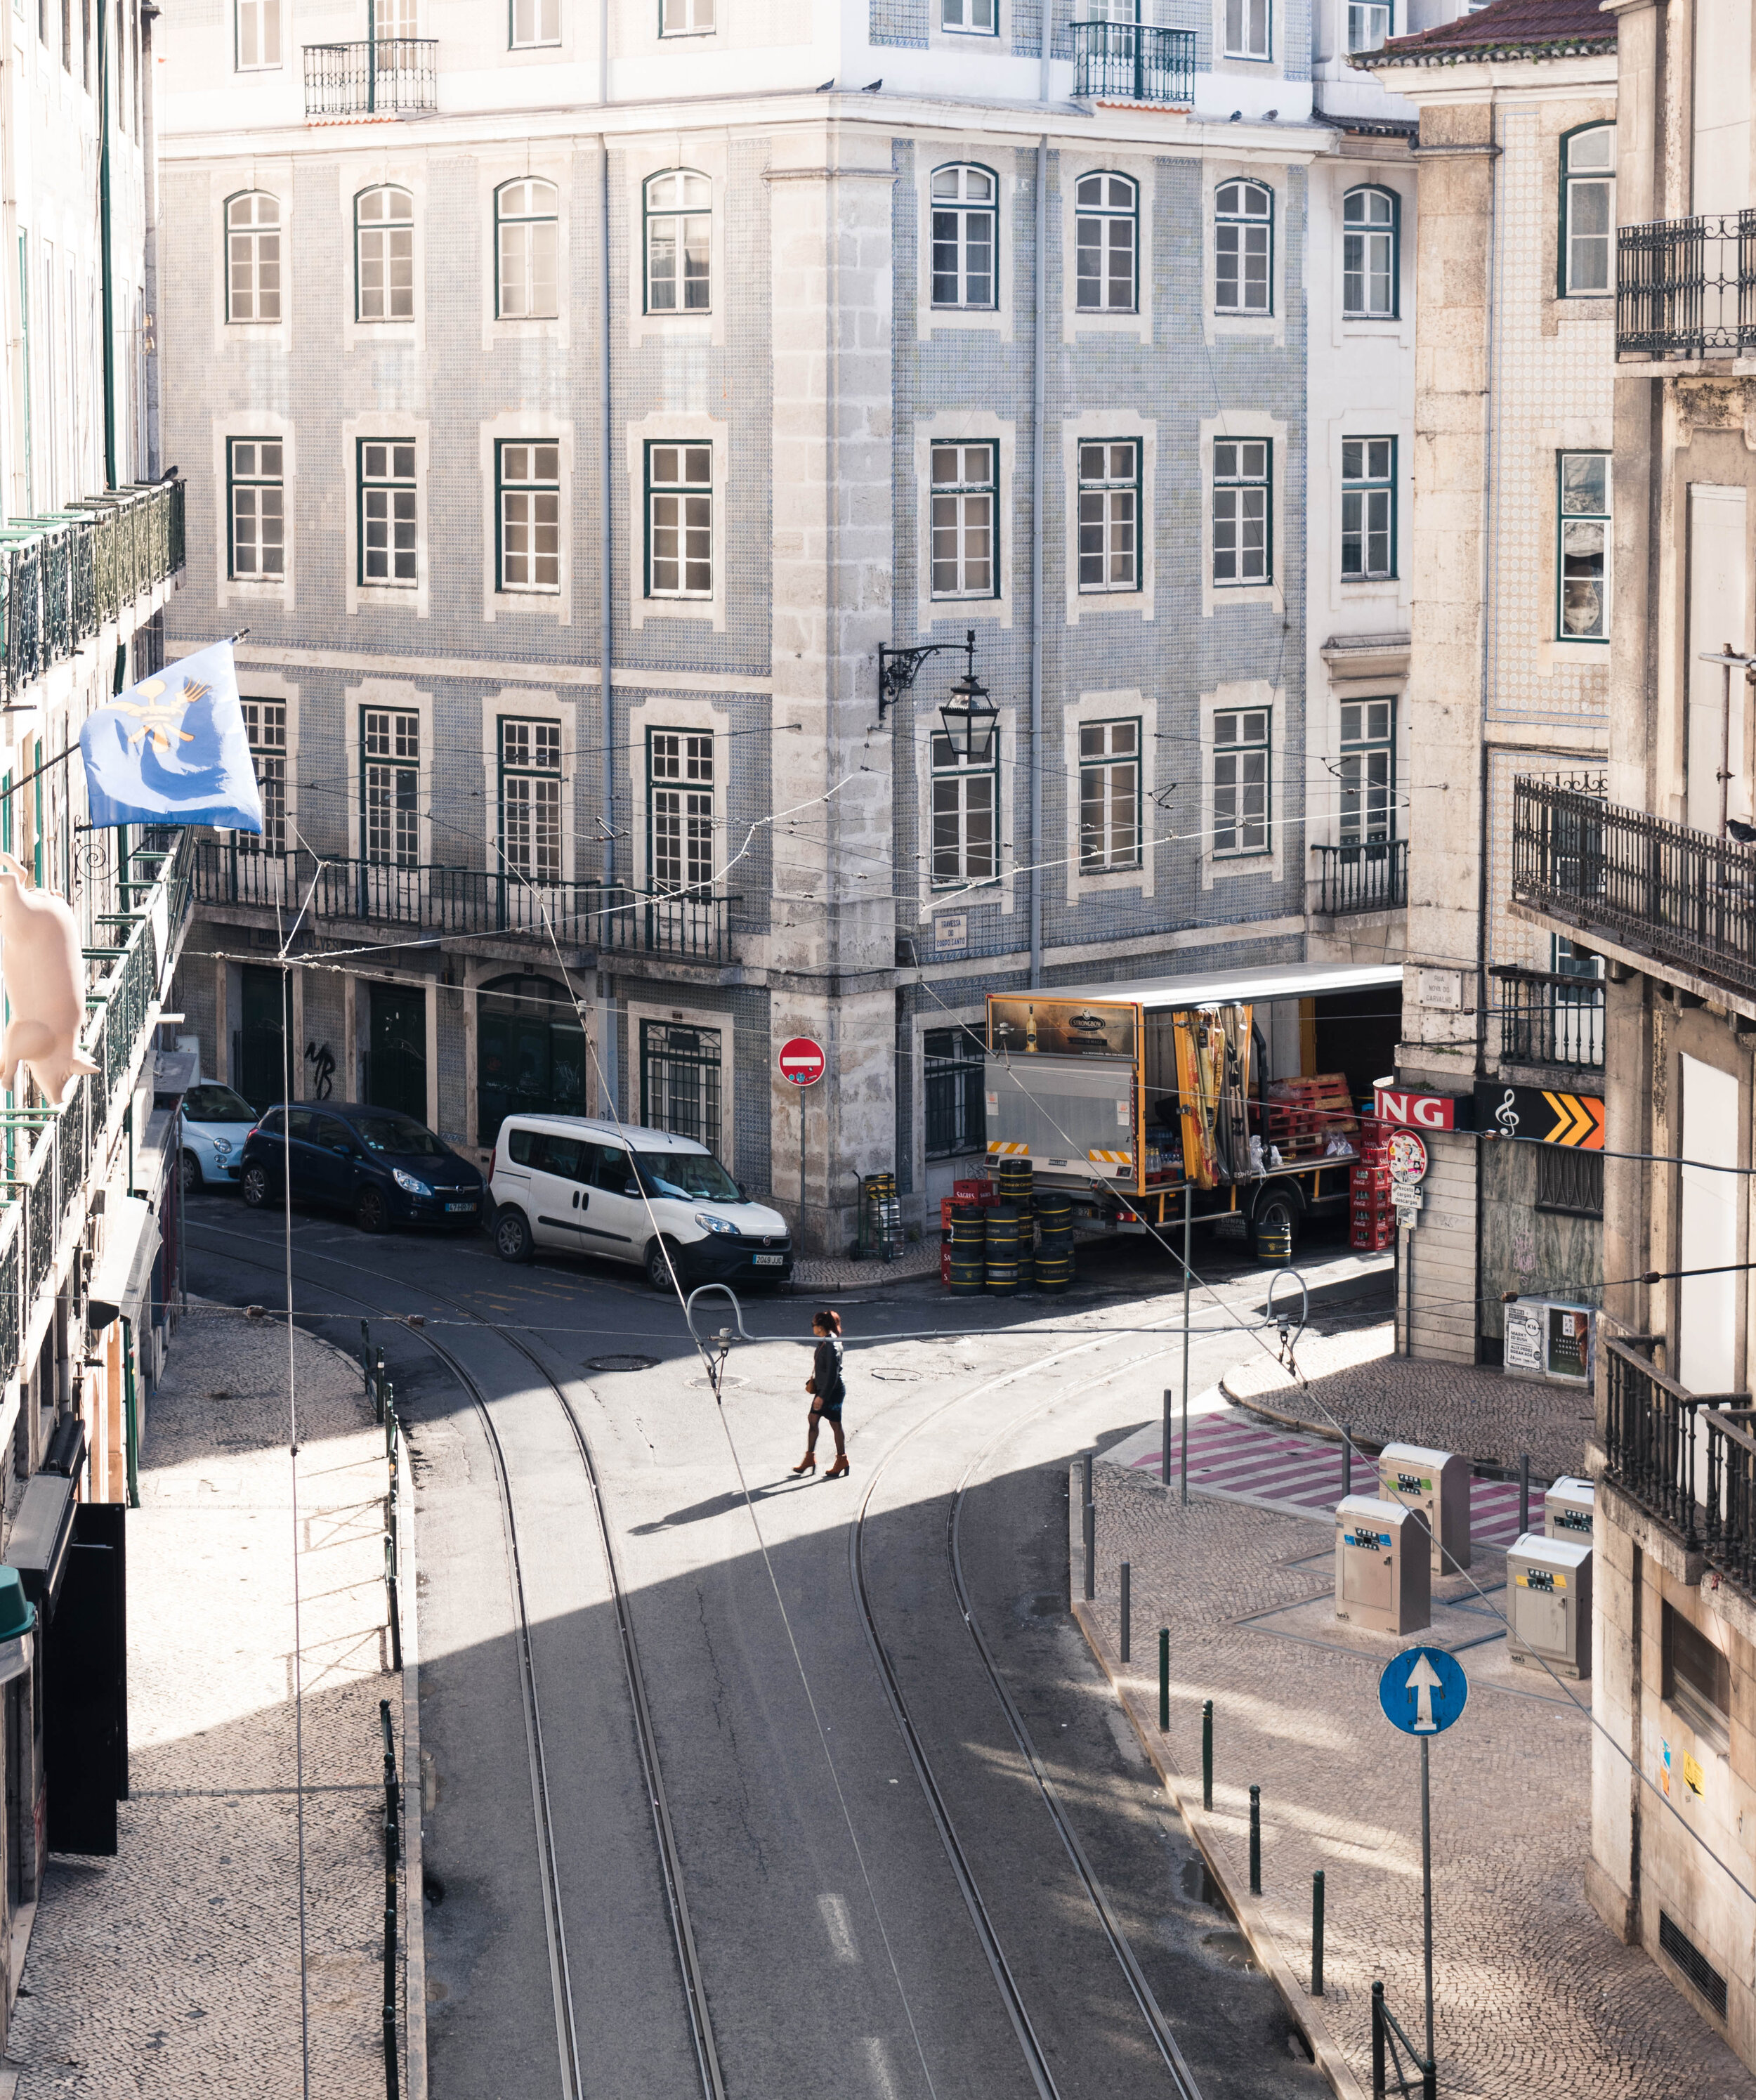
Bonus: Real-life Demonstrations with Commentary
If you are wondering how photographers can play with naturally occurring lights and shadows, it is wise to take street photography as a case study.
Here is a video with live point of view footage of how you can catch light and shadows literally on any street, and turn them into amazing results with thoughtful editing.
How to Create Harsh Shadows?
As I alluded to earlier in the intro, the size and distance of the light source dictates how harsh the shadow is.
In relation to size, smaller light sources create harsher shadows. In relation to distance, further away light sources create harsher shadows.
The premise though, is that we keep the brightness level of the photo constant. To keep things simple for now, we are going for shadows that are both very dark and has defined outlines.
We will go over both natural and artificial sources of lights in the list below.
Sunlight
The sun is arguably the most commonly used as a source of harsh light in outdoor shoots. The sun is a very intense source of light in certain parts of the day, and is also a tiny light source from where we are - Earth.
To incorporate the shadows cast by the sun into your shot, shoot during early to mid afternoon, when the sunlight is the most intense.
In the case of portraits, frame your subject using the geometry of the dark shadows. You can get creative with this so by no means feel obliged to do exactly what is commonly done.
Usually, the shadows are used to guide the eye to see the brighter areas of the frame. Therefore typically, the photographer places the subject’s face and parts of the body into the bright section.
Another way to use the harsh shadows created by the sun on an outdoor session is to shoot near plants. You can either use the shadows cast by the branches and trunks by moving your subject, or pick up leaves with a special shape and move it over the subject’s face.
Bonus #1: Don’t Shoot at Noon
If you think about it, the sunlight is also very harsh during noon time too. But even if you have in mind the intention to create harsh shadows, it is not recommended to go shoot during noon.
This is because you can’t do much with the shadows. You will get harsh shadows, but positioned in a weird direction that you can’t make use of.
Since the sunlight hits from the above, the shadow cast will likely be vertically below the subject casting the shadow.
This means that in general it is harder to compose shots because from the vantage point of your camera, that shadow will be buried and compressed onto a black patch on the ground.
And specifically in the case of portraiture, the shadows appear at such weird places that sometimes you can’t even recognise the person in frame.
Therefore, a sweet spot between sunlight intensity and shadow perspective is early to mid afternoon.
Street Lights
You can still get harsh shadows outdoors after the sun has gone down. Because street lights are perfect for this purpose too!
First of all they are small in size. The head of a street light contains a small bulb, similar to a point light source.
Another reason why it casts such harsh shadows is because, they are usually lifted up high, at least 2.5m above ground level. This makes them a decently far away light source from your subject.
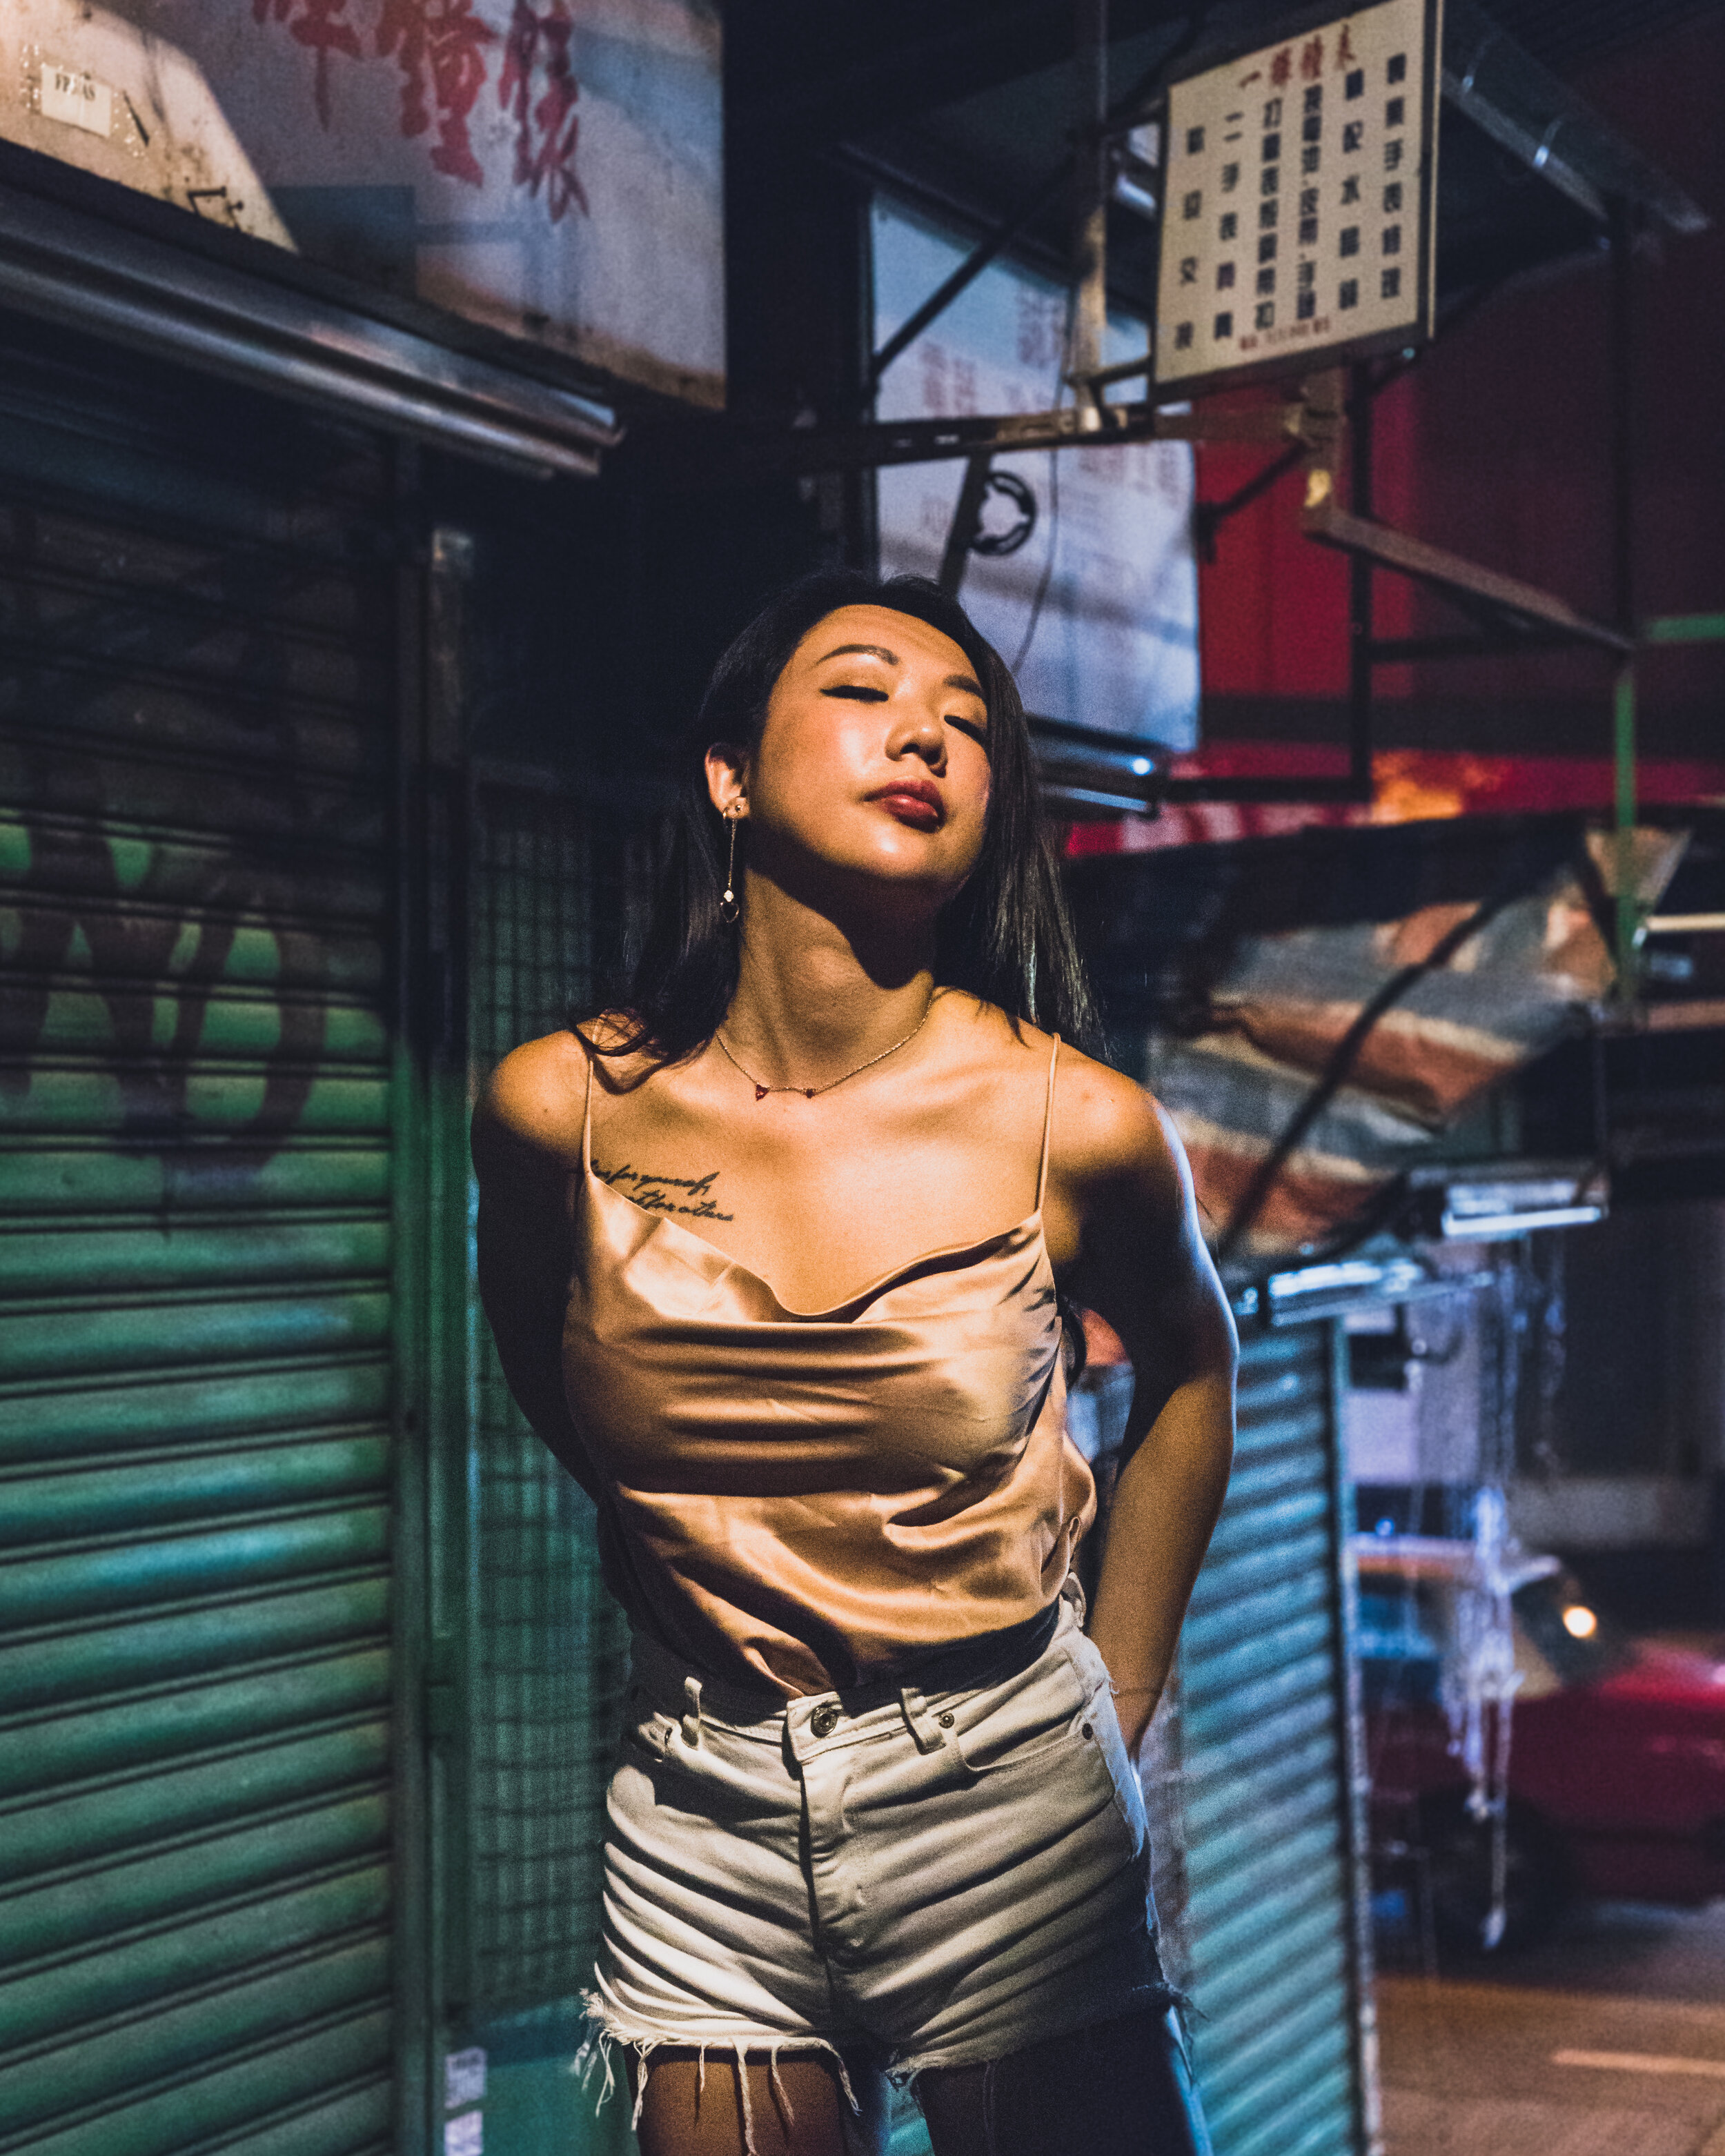
Here is an example how I used street lights to create harsh, dark shadows in the background to frame my subject.
Observe both the shadows on my model and the background. For instance, her chin casted a very harsh and sharp shadow on her neck.
Artificial Lights (Studio Lights, Flash Lights)
The two common types of artificial lights designed for photography are flashes and studio lights.
In fact, your choices are not limited to these. Any lights you find in your environment, be it phone flashes, desk lamps, light bulbs etc, can cast harsh enough shadows when used without any modifiers.
This is because the light source is tiny relative to the subject in frame.
Another way of seeing this is that bare bulbs are seldom preferred in commercial photography because of the unflattering blown up highlights and harsh shadows. This is why photographers add modifiers to transform the quality of light into softer ones, making it more suitable in a commercial setting.
However, here we are going for harsh lighting for artistic reasons. Therefore, simply going back to the basics would miraculously serve our purpose!
Modifiers (Snoot, Flaps)
We mentioned how the bare bulb alone can cast shadows harsh enough for our present purposes. However, if you want to exaggerate that effect even further, there are some modifiers that can help you crank those shadows even more.
Some lights come with snoots, aka an extra piece of rubber that is fitted onto the bulb, and narrows down as it protrudes.
What is does is that it concentrates the light further into a narrower beam that hits squarely onto your subject.
Another way to concentrate the light into a smaller light source is to close up the flaps - some studio lights come with them, not all.
The general principle here is to decrease the size of the light source.
Bonus #2: Place Object the Shadow-casting Object Closer to the Subject
In both cases, you might want to create harsh shadows on, or as a frame around your subject.
The key to getting sharp, nicely defined shadows in frame is to use objects closer to your subject to cast these shadows.
The longer the distance between the obstructor and the subject, the more gradual the transitions will be.
If you want to form any pattern on the model’s face, get them to hold that object closer to themselves. If you are using a structure to create a shadow frame, position your model closest to that object.
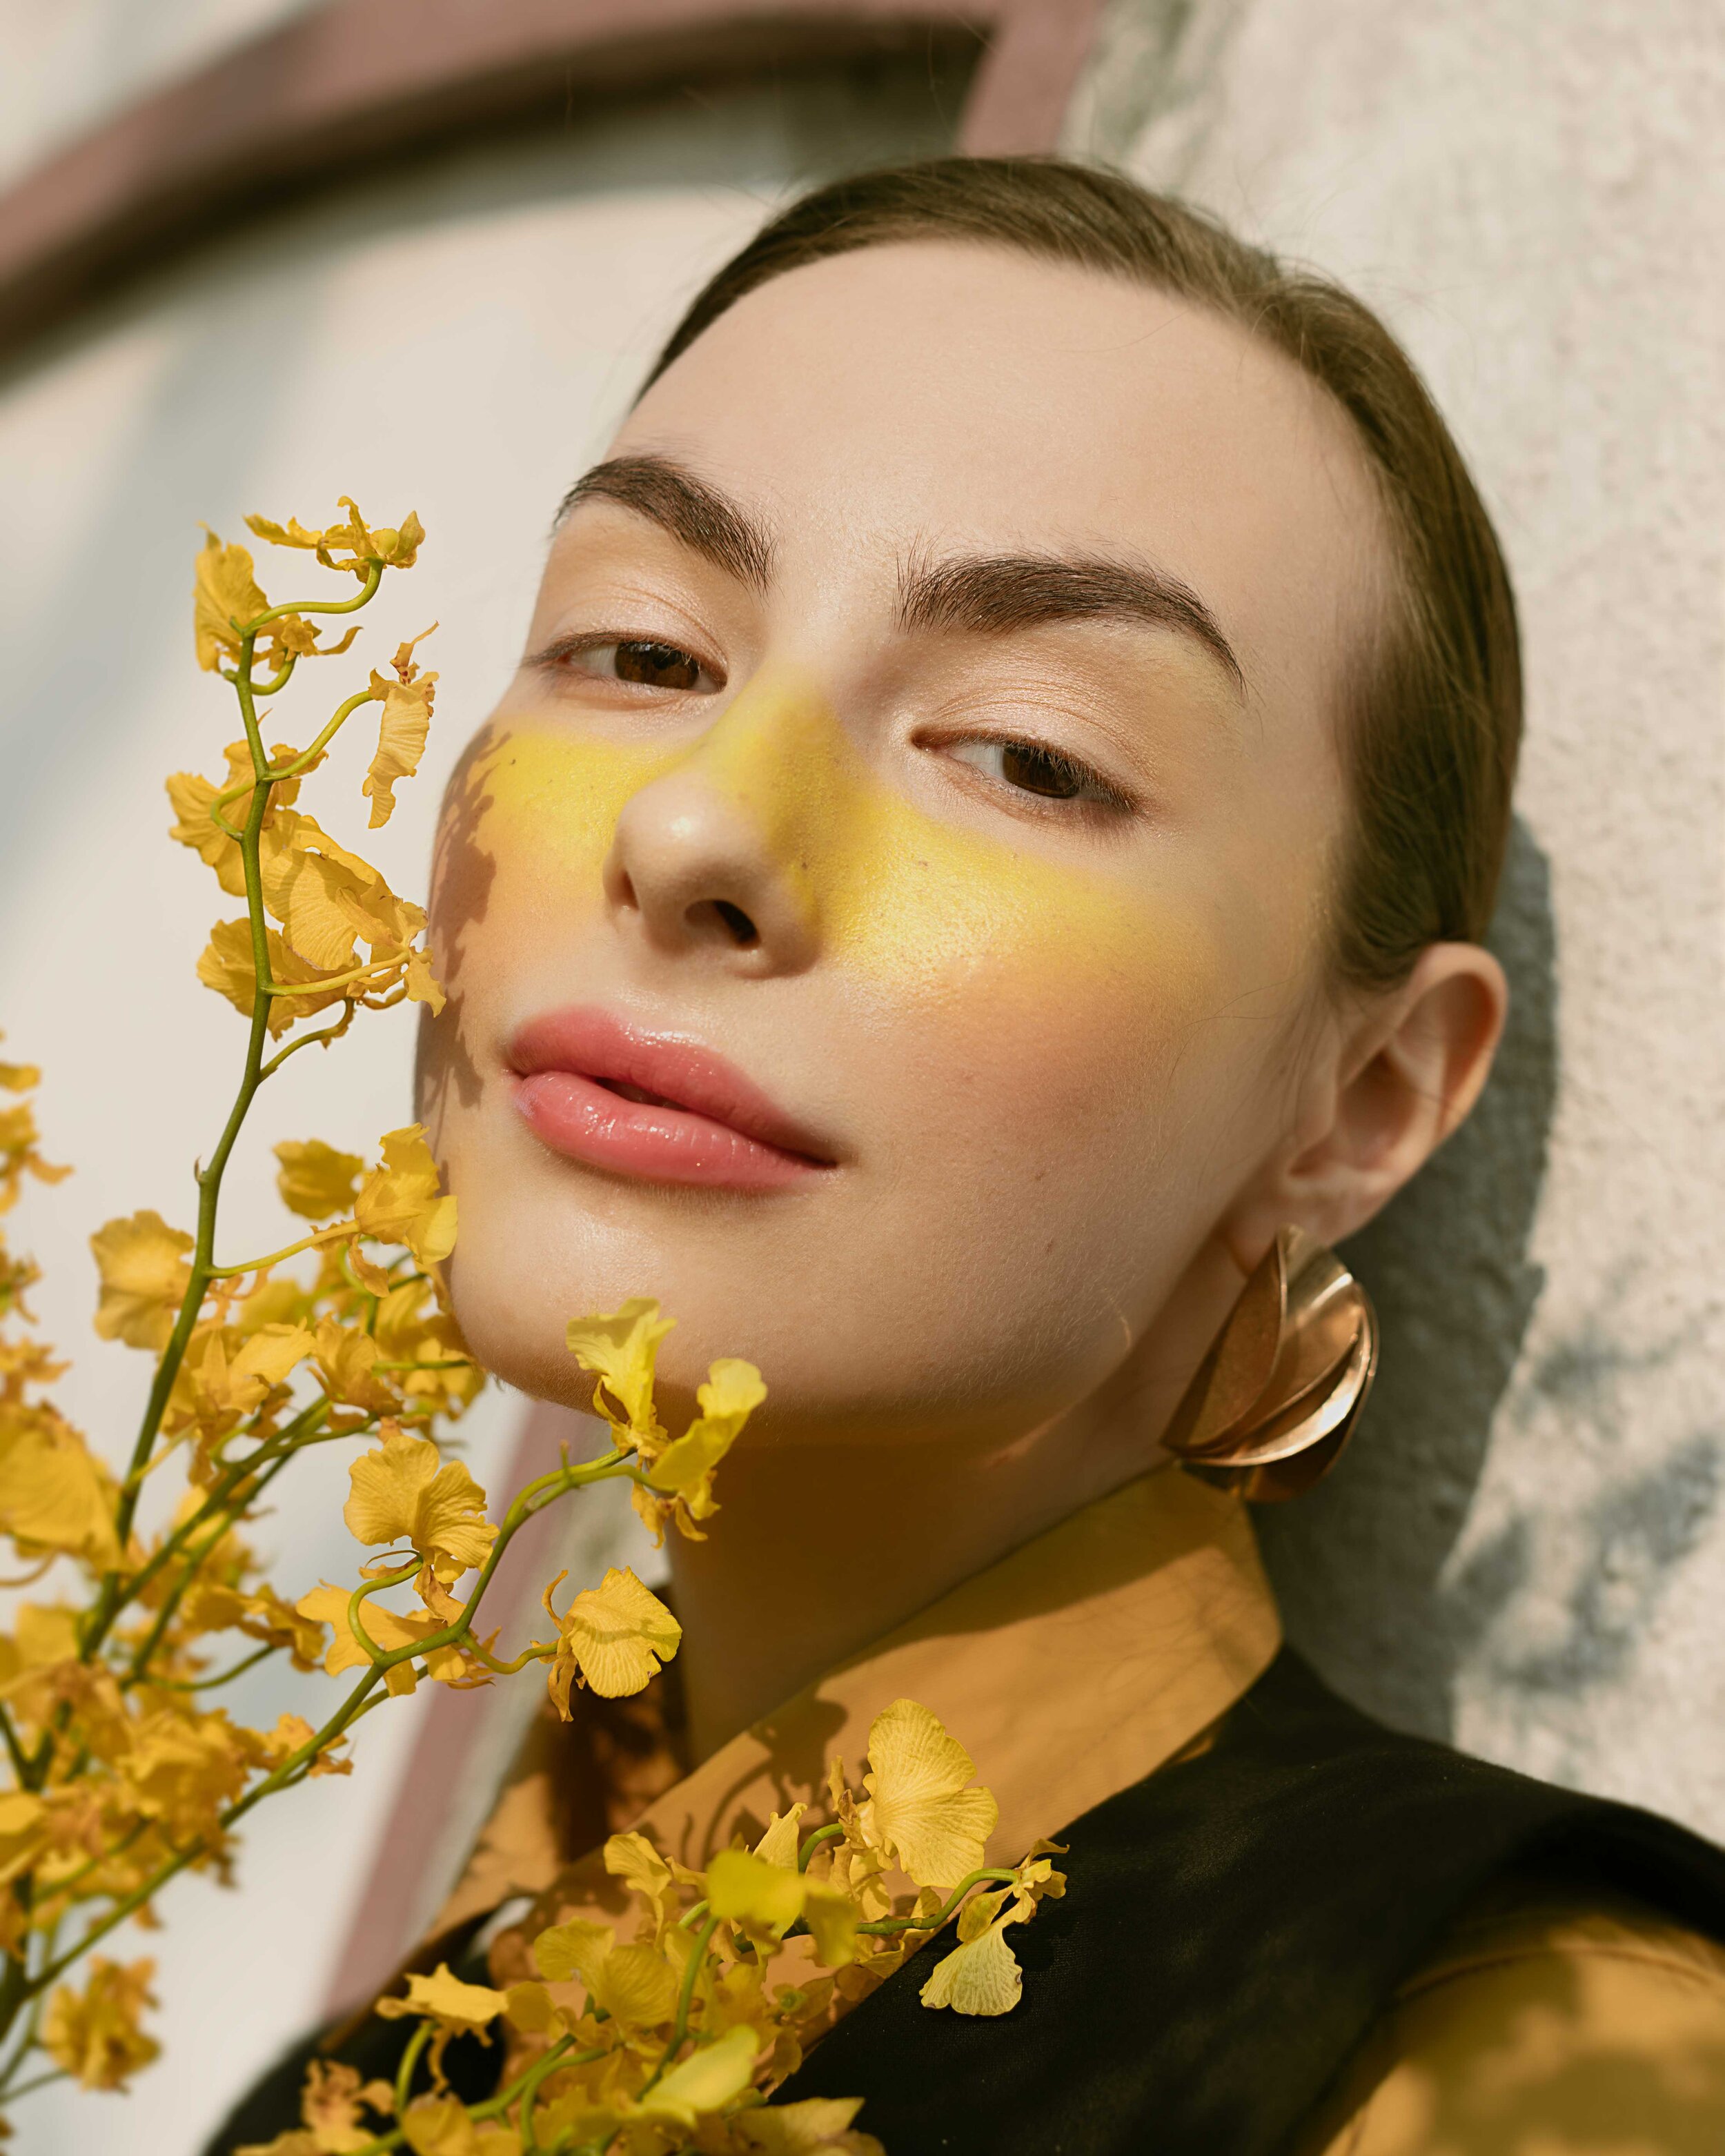
You can see that from the first two photos from the series, the object casting the shadows are held relatively close to the subject’s face.
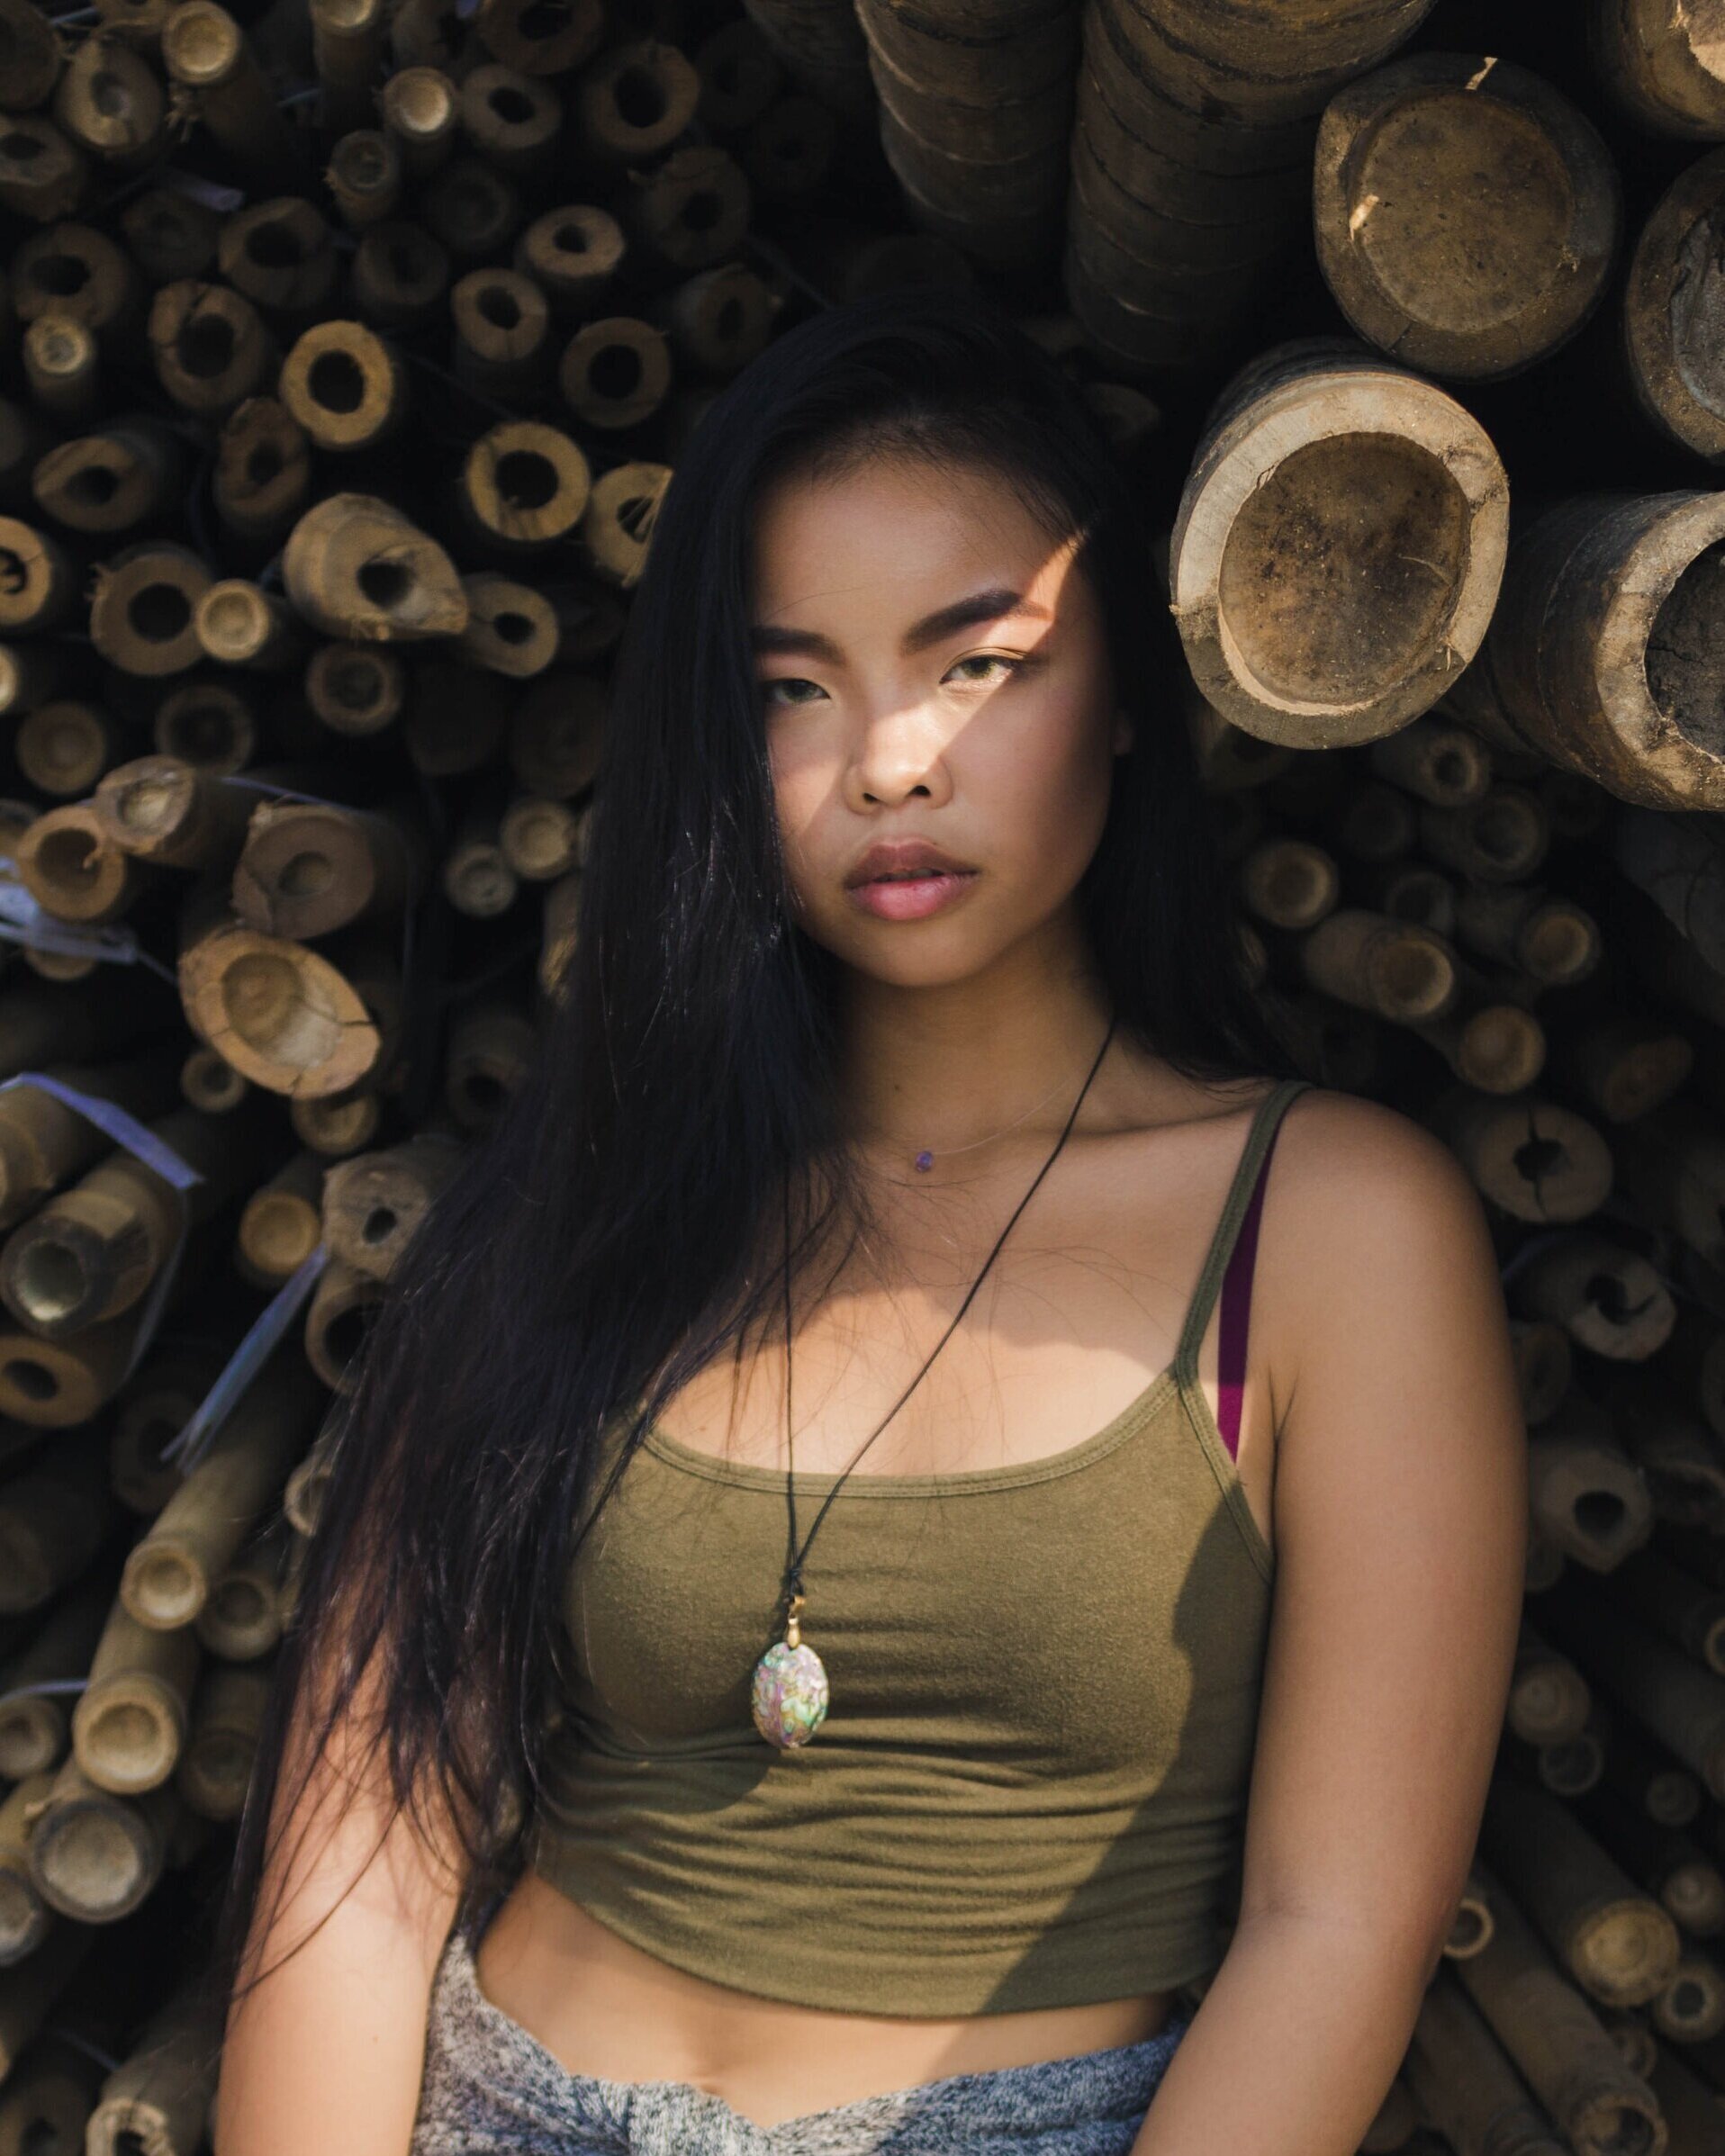
In the first one, I got my model to literally touch her face with the bunch of flowers. In the middle one, I placed my model right next to the fracture in the bamboo to get that pattern on her face.
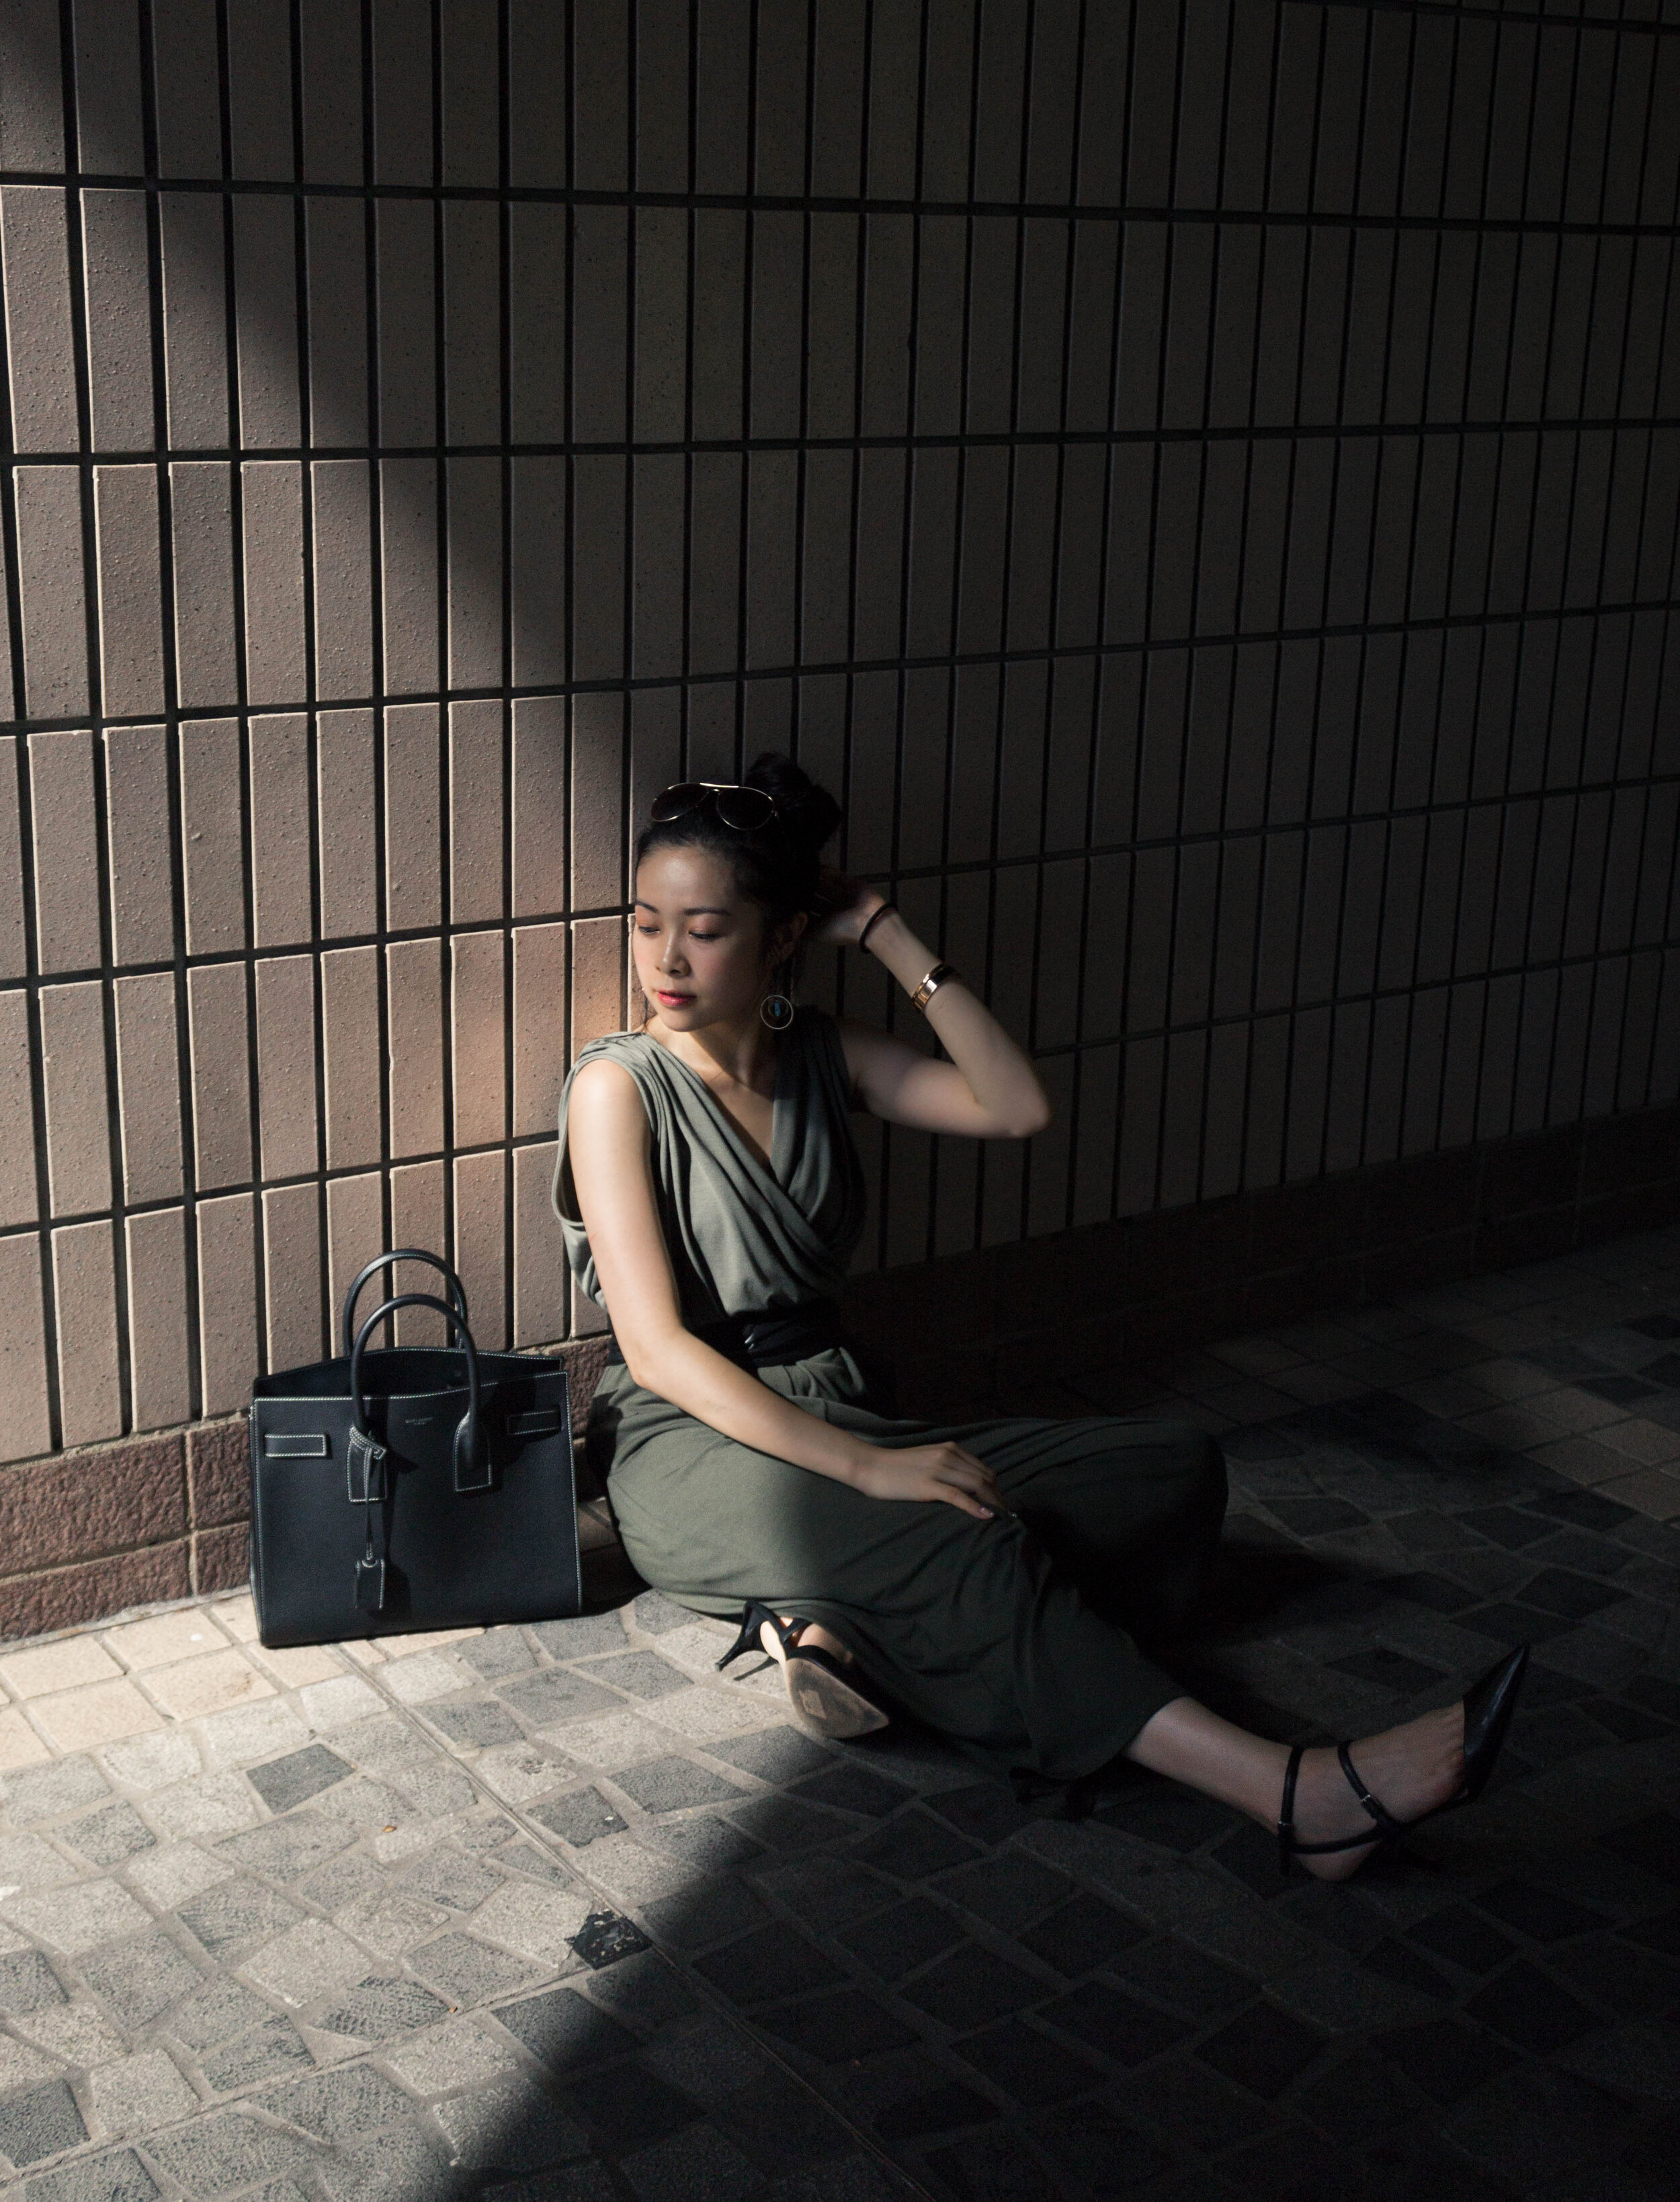
Whereas in the last example, the building structure casting the shadow was relatively further away from my model. Therefore, although the shadow part still showed total darkness, the edges had a slight gradation because of this difference in distance.
Summary
In this article, we talked about:
What are harsh shadows,
Where to look for harsh shadows, and
How to create your own harsh shadows
More sharing coming soon!
SUBSCRIBE via the box on the left for more PRO tips, and follow me on Instagram (@_bjiao__) and let me know what you think in the comments!
Share this article on Pinterest too!
Keep shooting, keep creating!
The mission of this blog is to provide the best insider information in the photography industry, as openly as possible. You have direct access to my
first-person experience as an aspiring photographer who talks, but also works.
Honest opinion are rarely available as public resources because this is a competitive industry. Huge sums are made when such information is delivered in the form of mentorship and workshops.
This blog is a great way in which I cover my daily expenses, but also provide real value.
If you have learnt something that would be worth at least $10, please consider donating to the page. This enables me to keep creating content and helping more people sustainably.
Your continued support for the blog is appreciated!