This is the complete start pack for anyone looking to start shooting on a TLR film camera.
For those looking for a visual guide in action, here is a video that takes you through the entire process step by step.
If you find this helpful, SUBSCRIBE to my channel via the box on the left to make the most out of my blog! Also, do share it with people who might be interested. Shoot me an email/ DM to share your thoughts too.
Also, Pin this article to your Film Photography/ Camera & Gear boards in Pinterest if you find it helpful!
What you will need

TLR Camera - an unloaded one, apparently;
Unexposed roll of 120 film - typically white in colour on the outside;
Empty Spool - there should be one already in your camera. Completing the previous roll of film will leave an empty spool behind in the camera. If unfortunately your camera doesn’t come with one, check with your local film camera stores and ask if they could give you one.
Flat surface - ideally find a sturdy surface on which you can comfortably work, as it takes some getting used-to to operate a TLR film camera.
Load 120 Film into a TLR Camera
Step 1: Unlock and open the back cover
If you turn the metal knob (towards the left for my camera, this depends on the model you have), this loosens the lock that clicks the back cover in place.

Once it is unlocked, you can open the back cover like this.

This is a closer look into how the inside would look like.

Step 2: Open the unexposed roll of film
Remove the packaging that comes with the new roll of 120 film - it is usually enclosed inside of a paper box and a plastic wrap.
After taking these things off, take out the fresh roll of film, which typically prints ‘unexposed’ on the outside on white backing paper.
Step 3: Insert the roll of film
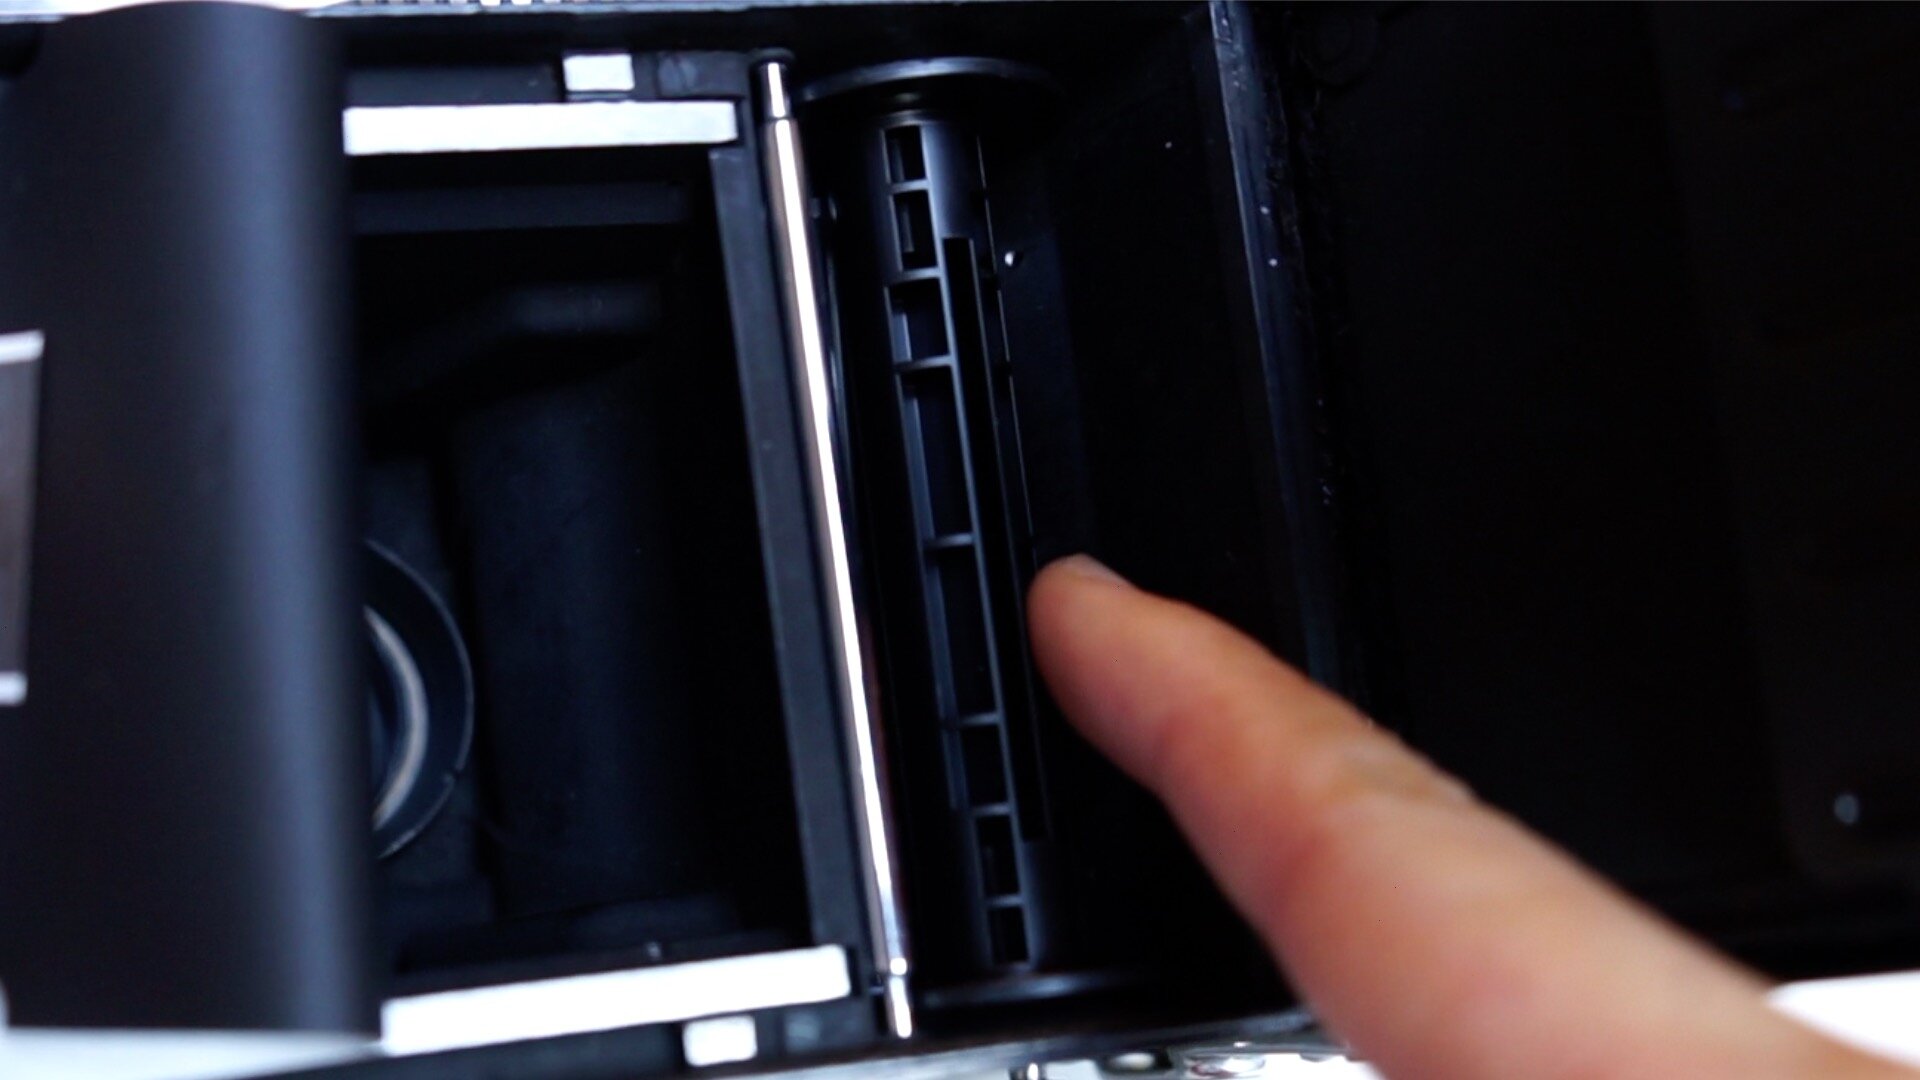
Take out the empty spool from inside the camera, and insert it into the takeup side of the camera.
Tear off the slip of paper that takes the film together, and extend the film. At the beginning of the film, there is a protruding part, known as the film leader, which looks like this.

Insert the film leader into the slit on the empty spool, which is open vertically through the middle of the stem.
Once inserted, start rotating the film advancing knob, until the film starts advancing smoothly and becomes tout against the back of the camera.
Keep on rotating until the arrow appears on the backing paper. Align it to the border of the frame, which is typically indexed with a dot, and close the back cover.
Turn the knob at the bottom of the camera to securely lock the back cover, to prevent any light leaks.
Advance 120 Film on a TLR Camera
In order to start shooting, the film needs to be advanced further.
Right after closing up the camera cage, the peep window should read figure ‘0’. That means the camera is on the 0th exposure, which means nothing.
Turn the film advancing knob further until you reach the figure ‘1’ in the window. When you have rotated enough, you should feel a resistance that prevents you from further turning the knob.
When this happens, you are ready to shoot.
Shoot 120 film on a TLR Camera
As mentioned in the video, there are a few essential parts in operating a TLR camera.
Part 1: Camera Settings + Focus
On TLR Cameras, you will have to work out the exposure settings and focus adjustments manually. The controls are all mechanical.
For the shutter speed and aperture, they are each controlled by a handle respectively, usually on opposite sides. In my case, my shutter is on the left, the aperture on the right of the photo.

As for the focus knob, it is found on the side of the camera. Whichever side it is for your model, it is on the opposite side from the film advancing knob.
Part 2: Lever
The lever is a longer handle that is typically on the side of the shutter.
Before every shot, pull it all the way down once.
Part 3: Shutter Button
The shutter button is usually located directly below the shutter lever, in form of a circle button.
After the lever has been pulled, you will be able to fire the shutter to take the shot.
The shutter curtains open as you fire the shutter, though it might make less of a noice than you would expect.
Part 4: Advance Film
After every shot, remember to turn the film advancing knob until the next number appears. This enables you to shoot the next shot.
Or else, two exposures will be made on the same part of the film, creating potentially unwanted effects.
Unload 120 Film on a TLR Camera
Step 1: Unlock and open the back cover - similarly as above
Step 2: Take out the completed roll of film from the take-up position of the camera
Step 3: Tape the completed roll of film to prevent light leaks
What is the ISO? Can you change the ISO in film cameras?
No, the ISO cannot be changed. The ISO is also known as film speed, which is a property of the film you purchased. In other words, the ISO is determined by the film itself. Therefore, nothing can be changed about the ISO value when shooting film. You will have to adjust the shutter speed and aperture based on the fixed ISO of the film you are shooting on.
Summary
In this article, we talked about:
How to operate a TLR film camera (load, advance, shoot, and unload 120 film), and
Why the ISO on film cameras cannot be changed.
More sharing coming soon!
SUBSCRIBE via the box on the left for more PRO tips, and follow me on Instagram (@_bjiao__) and let me know what you think in the comments!
Share this article on Pinterest too!
Keep shooting, keep creating!
The mission of this blog is to provide the best insider information in the photography industry, as openly as possible. You have direct access to my
first-person experience as an aspiring photographer who talks, but also works.
Honest opinion are rarely available as public resources because this is a competitive industry. Huge sums are made when such information is delivered in the form of mentorship and workshops.
This blog is a great way in which I cover my daily expenses, but also provide real value.
If you have learnt something that would be worth at least $10, please consider donating to the page. This enables me to keep creating content and helping more people sustainably.
Your continued support for the blog is appreciated!